25+ August Nail Ideas That Are Actually Worth Trying This Summer
Sun-Kissed, Bold, and Beautiful: August Nail Designs to Try Right Now
August is that sweet spot in summer where you still want color and warmth, but you’re slowly starting to crave something a little more refined — less neon, more depth. I’ve been doing nails for years, and August is honestly one of my favorite months to work with clients because the inspiration just flows. The season is winding down but everyone still wants to feel that vacation energy. Think sun-kissed tones, metallic finishes, earthy shades, and just enough boldness to carry you through.
1. Terracotta Almond Nails with Gold Foil
Nail Styling Advice
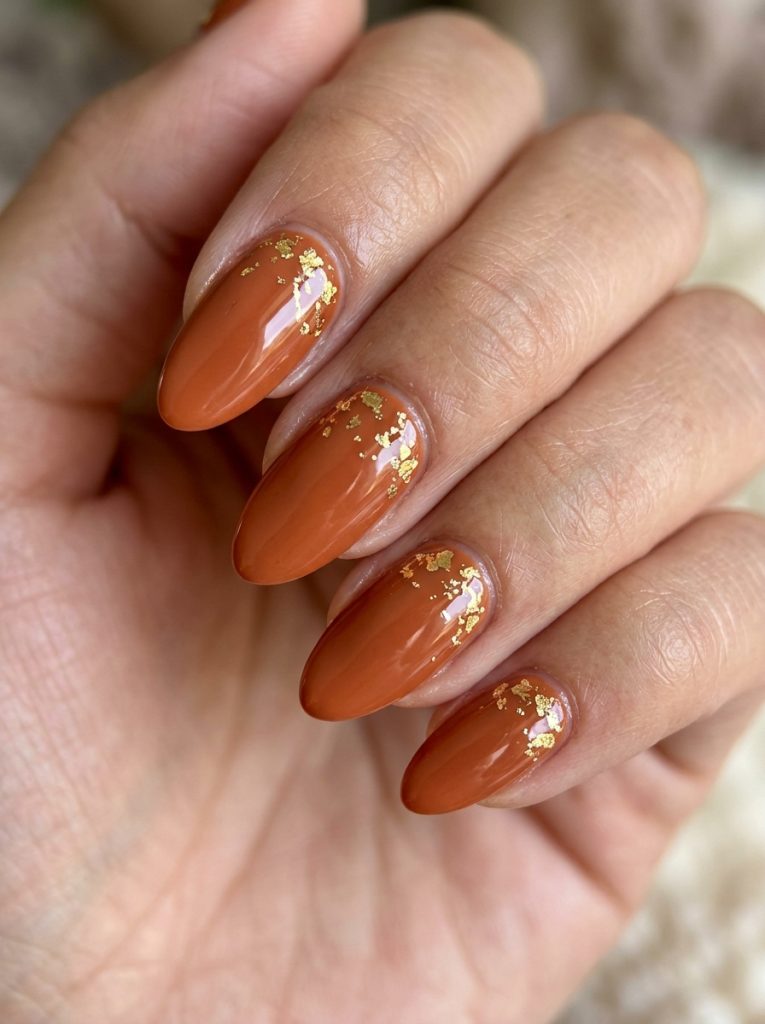
This one has genuinely been my most requested design this August season. Terracotta is such a flattering shade — it warms up the hand, it works on light and deep skin tones, and it photographs beautifully. I’ve done this set on clients ranging from very fair to deeper brown skin tones, and honestly it’s stunning across the board.
How to Create This Nail Look
Step-by-step:
Start with clean, lightly buffed nails. Apply base coat and cure. Apply two thin coats of your terracotta gel shade, curing between each. Before applying the second top coat, lay your gold foil flakes using a silicone brush — place them randomly near the base or side of the nail. Apply a non-wipe top coat to lock in the foil, and cure. Finish with glossy top coat.
Tools used: Liner brush, silicone foil brush, UV lamp, dotting tool (optional)
Skill level: Beginner-friendly. Honestly takes about 45–60 minutes for a full set.
Occasions to Wear
This is a great everyday work set — polished but not too flashy. I’ve had clients wear it to weddings as a guest and get loads of compliments. It also works beautifully for late summer outdoor events, dinner dates, or even back-to-school if you want something earthy and grounded.
2. Glazed Donut Chrome Nails
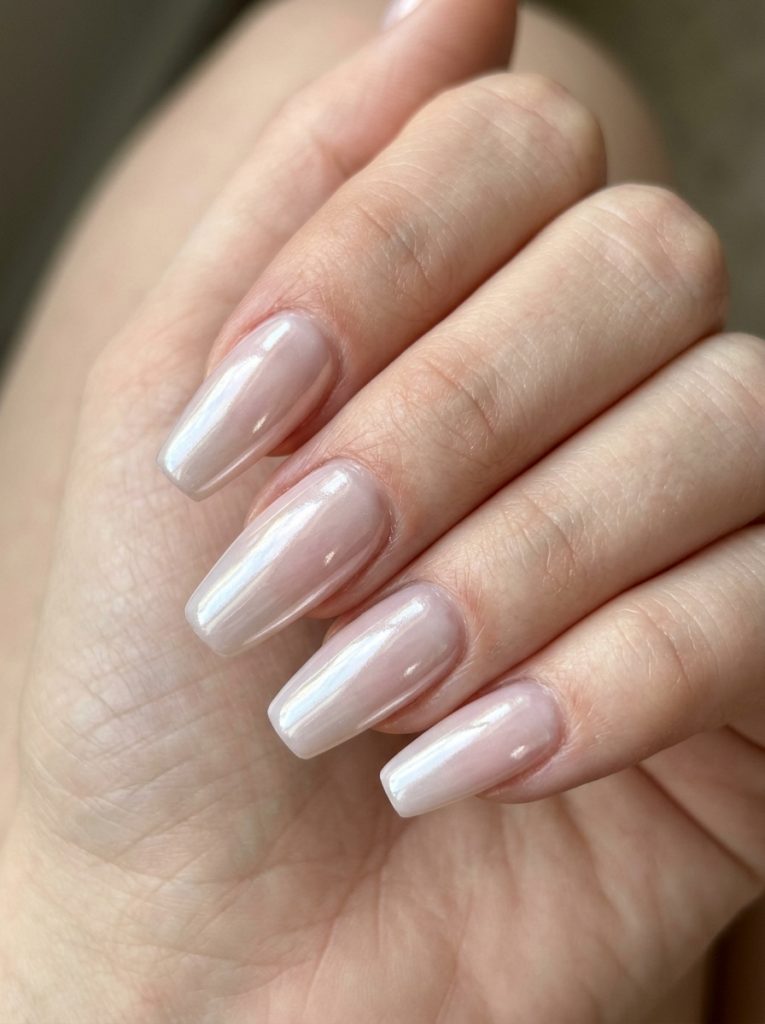
Nail Styling Advice
If you haven’t done a glazed chrome set yet, August is genuinely your moment. This finish became massive and it’s not slowing down. The sheer, milky base with that soft chrome shimmer catches light in a way that’s almost hypnotic. I tried this nail set with a coffin shape on a client and she literally couldn’t stop looking at her own hands — which is exactly the reaction you want.
How to Create This Nail Look
Step-by-step:
Prep nails and apply a very thin sheer milky-pink gel base. Cure fully. Apply a no-wipe gel top coat and cure. While the surface is slightly tacky, use a silicone finger or eyeshadow applicator to buff chrome powder across the nail in circular motions. Apply a final gel top coat and cure to seal.
Tools used: Chrome powder, silicone applicator or eyeshadow brush, UV/LED lamp, no-wipe top coat
Skill level: Intermediate. The chrome application takes a little practice to get smooth.
Occasions to Wear
Honestly, this is a nail set you wear everywhere and it still feels appropriate. I’ve recommended it for summer weddings, baby showers, first dates, and casual Saturday brunches. It’s elevated without screaming “I tried too hard.”
3. Dusty Mauve Square Nails
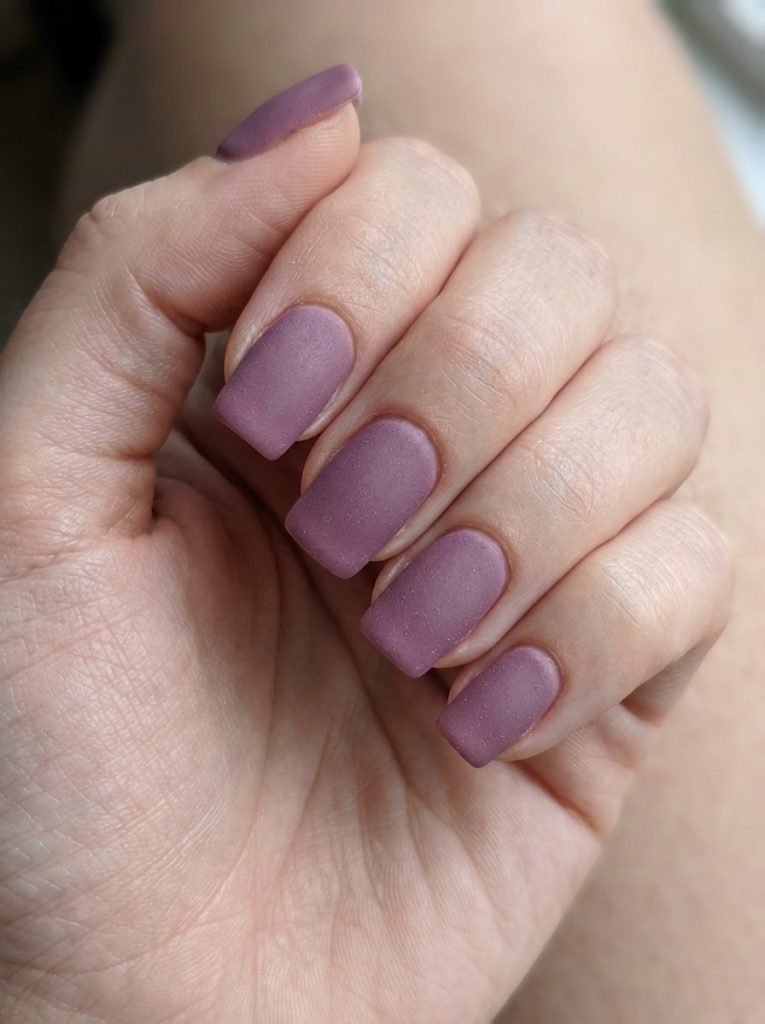
Nail Styling Advice
I personally love dusty mauve in August because it bridges summer and fall without committing to either. It’s got this smoky, muted quality that looks expensive without being precious. Square nails give it an edge — it’s not soft and romantic, it’s more modern and deliberate.
How to Create This Nail Look
Step-by-step:
Shape nails into a crisp square with a file. Apply base coat and two coats of dusty mauve gel, curing between layers. Apply a matte top coat and cure. Optional: use a fine brush to add a thin metallic cuticle line in silver or rose gold for detail.
Tools used: Square nail file, matte top coat, UV lamp, optional fine liner brush
Skill level: Beginner. Very straightforward — the shape and color do all the work.
Occasions to Wear
Great for transitional August-to-September energy. Works perfectly for office settings, evening events, or just your everyday rotation when you want something that looks intentional without much effort.
4. Sunset Ombre Coffin Nails
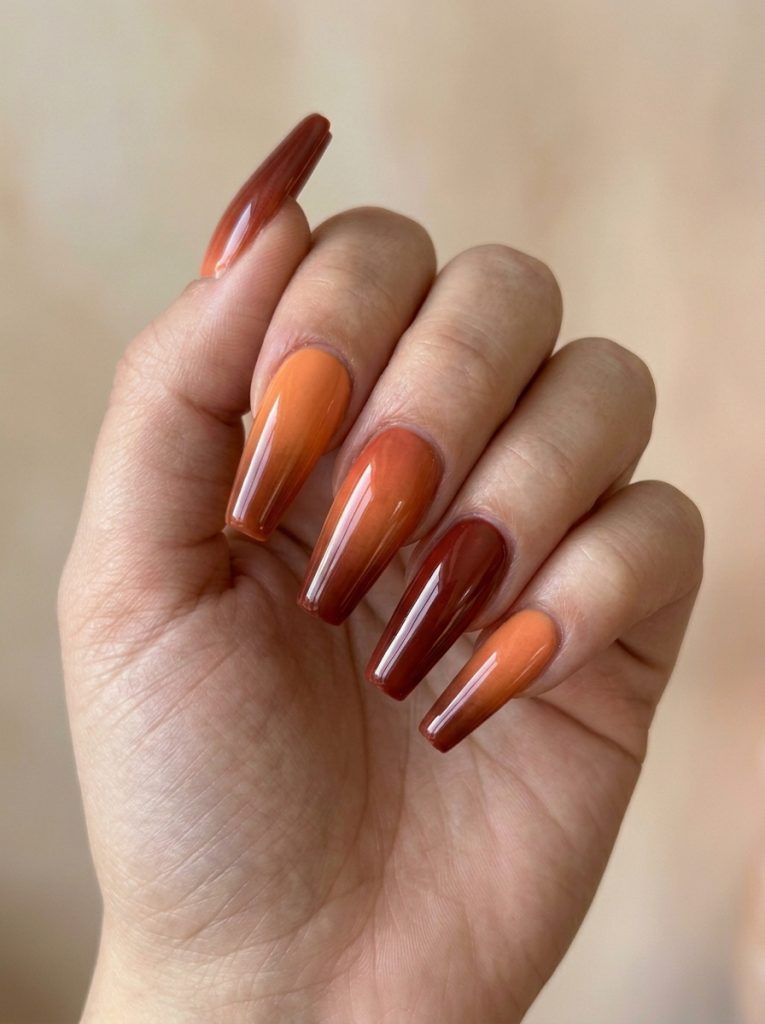
Nail Styling Advice
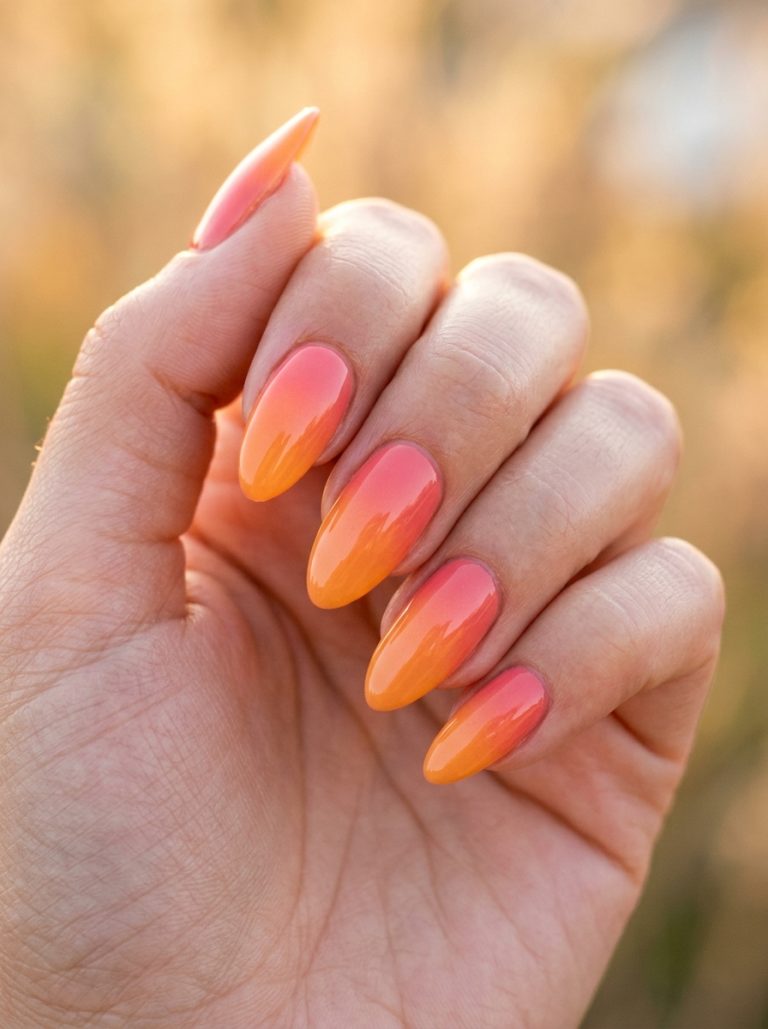
August screams sunset to me. Orange bleeding into coral bleeding into deep red — this ombre combination is genuinely stunning on coffin nails. The long coffin shape gives the gradient enough canvas to fully bloom. I’ve done this set on clients before beach vacations and it photographs so well against tan skin or sandy backgrounds.
How to Create This Nail Look
Step-by-step:
Apply a white or light coral gel base. Using a small sponge, dab your orange and coral shades together at the mid-nail, blending upward toward deep red at the tip. Cure each layer. Blend in thin passes — don’t try to get it perfect in one go. Finish with glossy top coat.
Tools used: Small makeup sponge cut into a wedge, UV lamp, three gel shades (coral, orange, deep red-brown), glossy top coat
Skill level: Intermediate. Ombre blending has a learning curve.
Occasions to Wear
End-of-summer trips, beach holidays, music festivals, or literally any occasion where you want your hands to look like a sunset. Also a genuinely great bridesmaid nail option for outdoor summer ceremonies.
5. Minimalist White Linen Nails
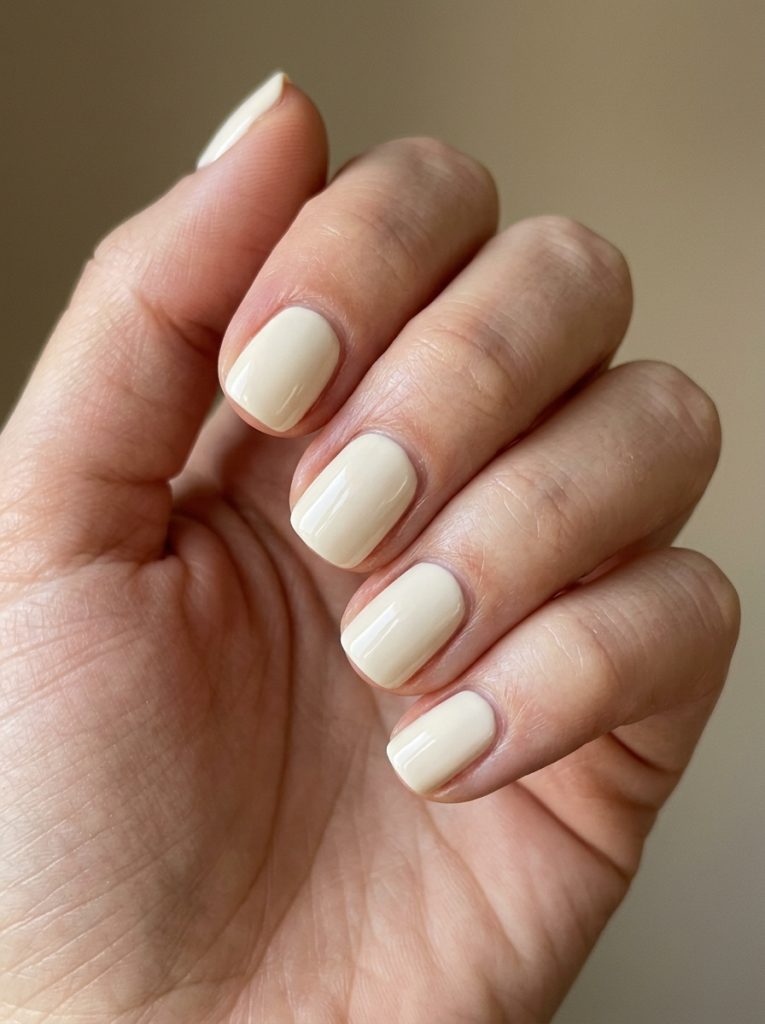
Nail Styling Advice
Not everyone wants something bold, and that’s completely valid. White linen nails — that warm, slightly off-white shade — are quietly one of the most versatile August sets you can do. It’s not stark white. It has just the tiniest hint of cream or beige warmth that keeps it from looking clinical.
How to Create This Nail Look
Step-by-step:
Prep nails and shape into a soft oval or square. Apply base coat. Apply two coats of warm off-white gel (look for shades labeled linen, cream, or bone). Cure. Apply a glossy top coat for a clean finish, or matte if you prefer a softer look.
Tools used: UV lamp, off-white gel polish, your choice of top coat
Skill level: Complete beginner. No special skills required.
Occasions to Wear
Literally everything. Work, gym, weddings, errands. This is the nail equivalent of a white t-shirt — always appropriate.
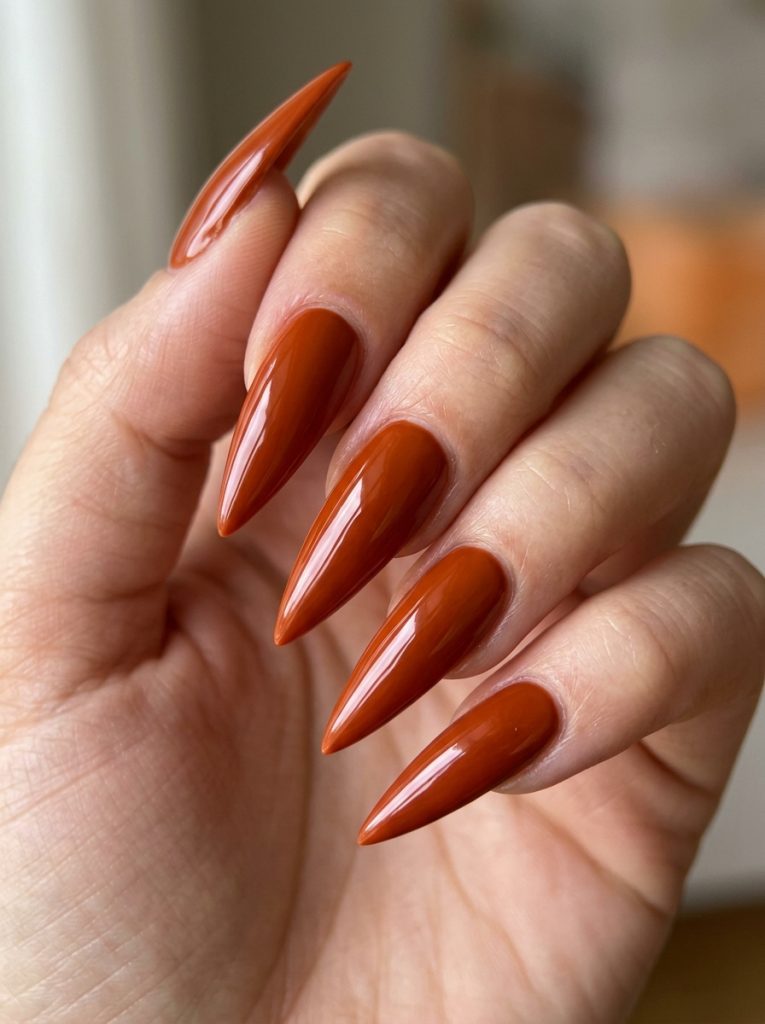
6. Burnt Orange Stiletto Nails
Nail Styling Advice
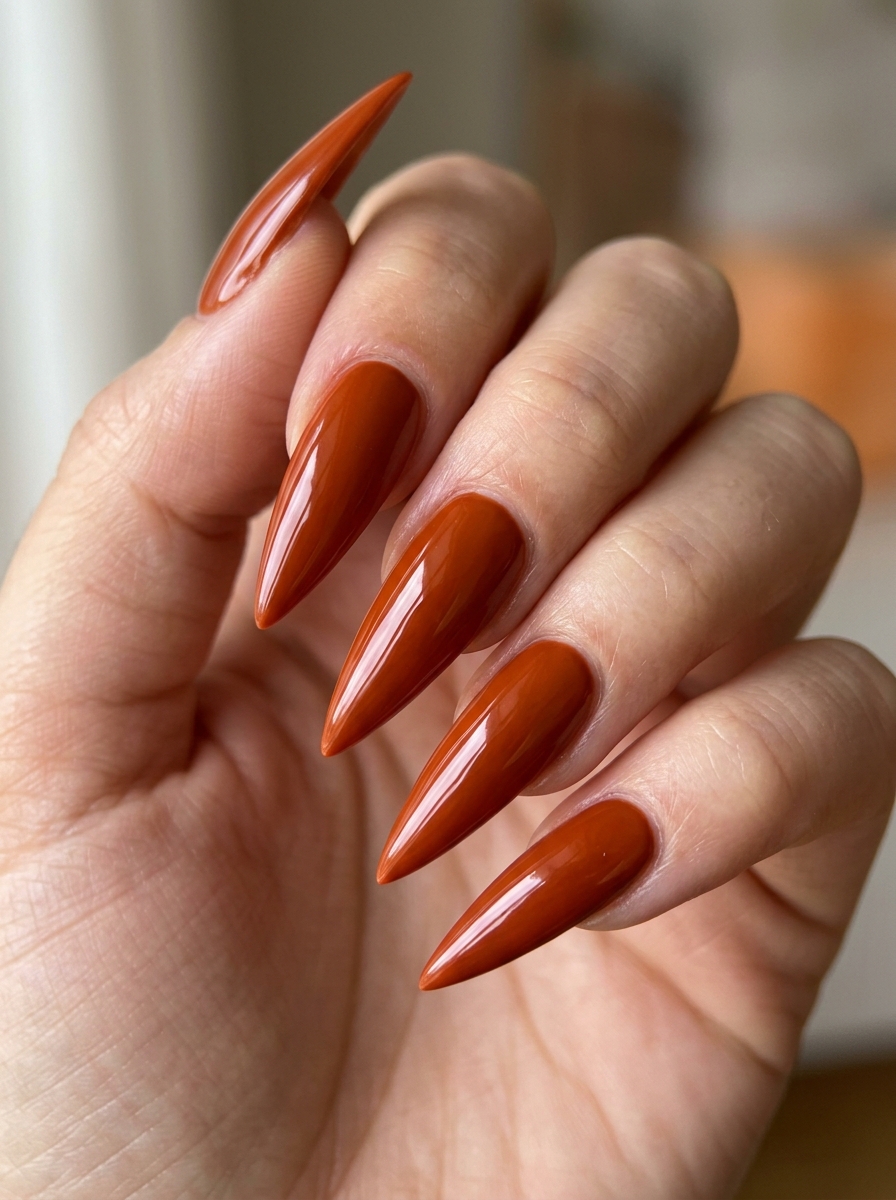
Stiletto nails in burnt orange are a commitment, and I love that for August. This is not a wallflower choice. It’s dramatic, season-appropriate, and the stiletto shape takes the color somewhere fashion-forward. I’ve done this set on clients who want that end-of-summer statement moment — and every single time it gets attention.
How to Create This Nail Look
Step-by-step:
Using acrylic or gel extensions, create stiletto-shaped nails or file natural nails carefully into a soft point. Apply two coats of burnt orange gel. Cure. Optionally add a tiny gold shimmer top coat for extra depth. Finish with glossy top coat.
Tools used: Acrylic or gel extension forms (if extending), UV lamp, burnt orange gel polish, optional gold shimmer coat
Skill level: Intermediate to advanced — stiletto shaping takes practice.
Occasions to Wear
Fashion events, parties, concerts, date nights. Honestly this is more of a weekend or special occasion nail than an everyday set. But if your everyday involves looking this good, go for it.
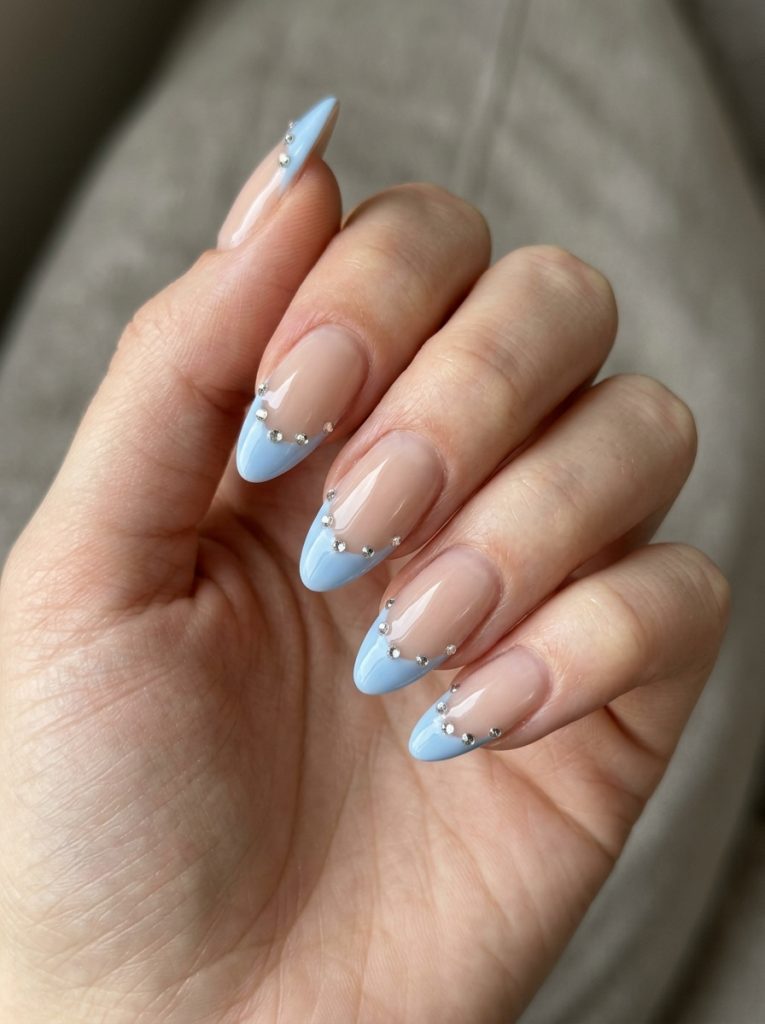
7. Baby Blue French Tip with Rhinestones
Nail Styling Advice
French tips aren’t going anywhere, but baby blue tips feel distinctly August to me — that pool water, clear sky energy. The rhinestone addition along the smile line makes it feel elevated rather than basic. I’ve been doing variations of this on clients all summer and the rhinestone detailing is what takes it from sweet to actually interesting.
How to Create This Nail Look
Step-by-step:
Apply a sheer nude or light pink base. Cure. Using French tip guides, paint the tip in baby blue gel. Cure. Before the final top coat, carefully place micro rhinestones along the smile line using a dotting tool with a bit of gel as adhesive. Seal with top coat and cure fully.
Tools used: French tip guides/tape, baby blue gel, micro rhinestones, dotting tool, UV lamp
Skill level: Intermediate. The rhinestone placement requires steady hands.
Occasions to Wear
Absolutely perfect for garden parties, summer weddings, baby showers, and daytime events. Also lovely for resort or pool settings.
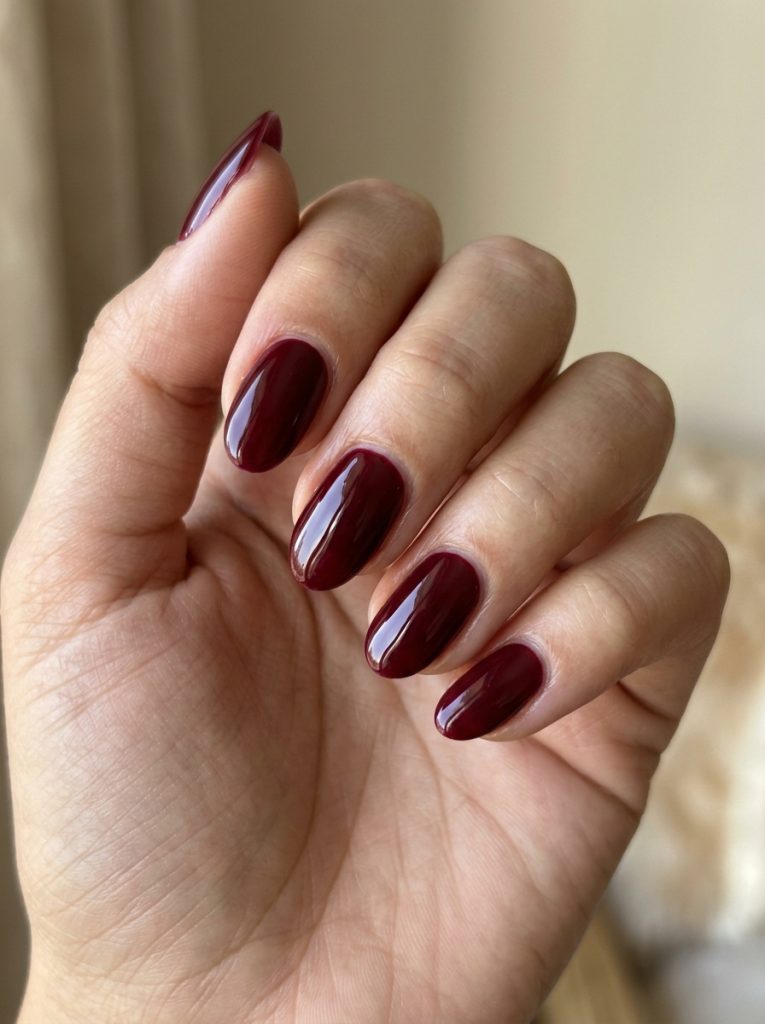
8. Dark Cherry Oval Nails
Nail Styling Advice
Dark cherry is hands down my favorite August-to-September transition color. It’s deep, it’s rich, it’s grown — and it doesn’t feel out of place in the heat the way some dark shades do. The oval shape softens it beautifully. I tried this nail set with a client who had been wearing bright neons all summer, and she was genuinely surprised at how much she loved the shift.
How to Create This Nail Look
Step-by-step:
Shape nails into an oval. Apply base coat. Apply two coats of dark cherry gel (look for a blue-red or cool-toned burgundy base rather than an orange-red for this look). Cure between coats. Apply glossy top coat.
Tools used: Oval nail file, dark cherry gel polish, UV lamp, glossy top coat
Skill level: Beginner. Clean application and proper curing is all it takes.
Occasions to Wear
Work, evening events, dinner out, gallery openings. This is genuinely one of those nail sets that looks right for almost any situation except the most casual beach days.
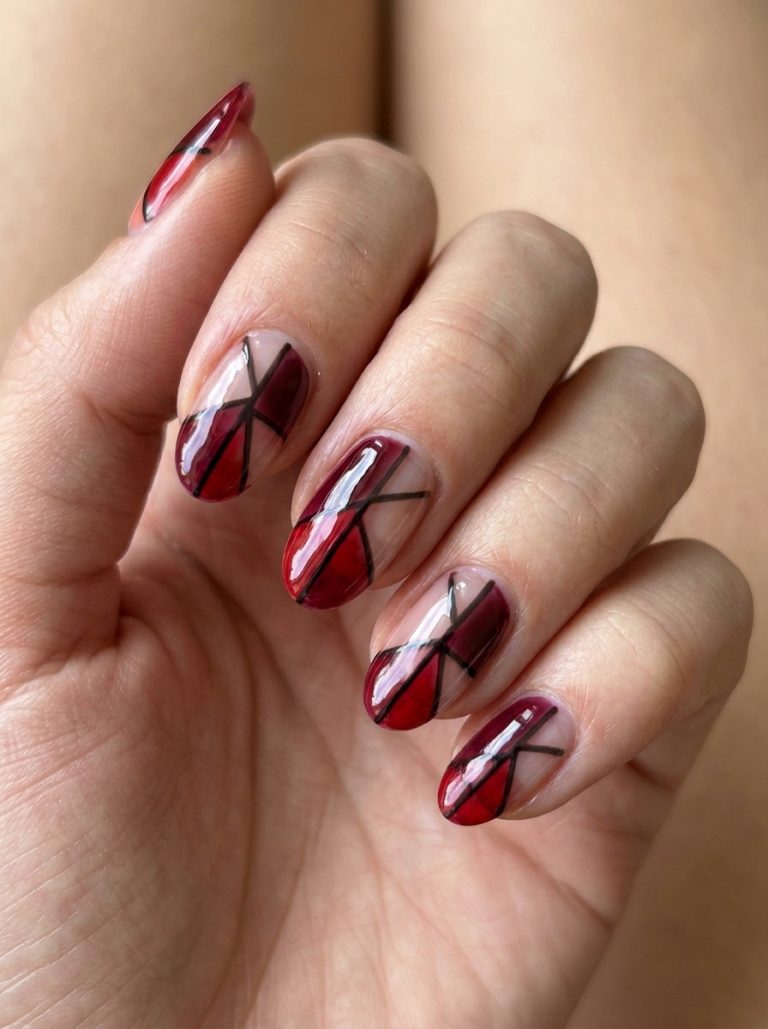
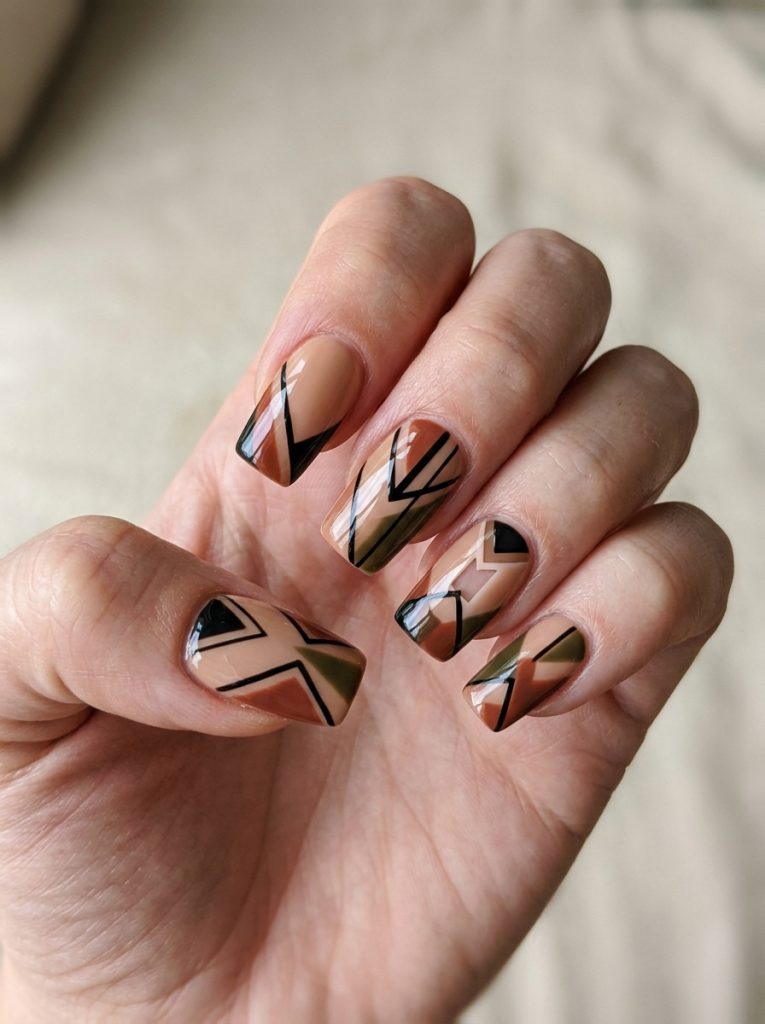
9. Negative Space Geometric Nail Art
Nail Styling Advice
Negative space designs feel genuinely artistic and they photograph incredibly well. The idea is simple: you leave portions of the nail bare (or in a sheer base) and use color or line work to create shapes around it. Triangles, arches, half-moons — all of these work beautifully.
How to Create This Nail Look
Step-by-step:
Apply base coat to nails and cure. Using nail tape or striping tape, create your geometric cutout shapes — triangles or diagonal lines are easiest. Paint your chosen color (black, cobalt, terracotta, or even gold) over the tape. Carefully remove the tape before the gel cures, then cure immediately. Apply top coat.
Tools used: Striping tape, liner brush, UV lamp, your chosen gel color
Skill level: Intermediate. Tape placement is the fiddly part.
Occasions to Wear
Art events, creative workplaces, fashion-forward occasions, or literally just when you want your nails to start conversations.
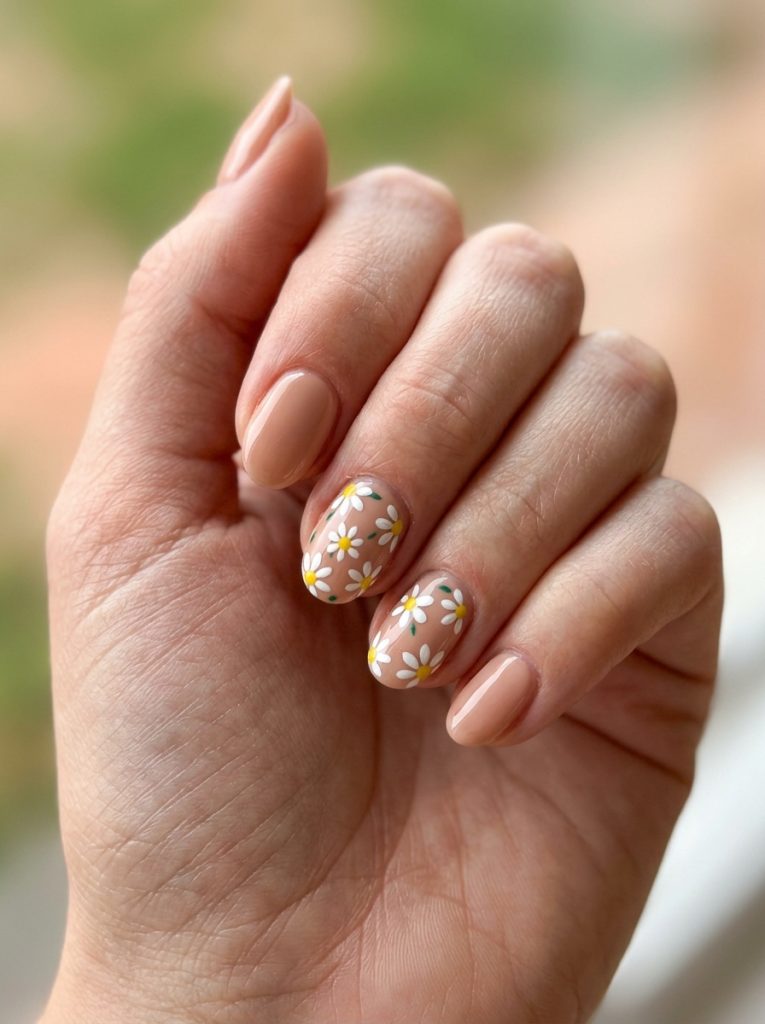
10. Warm Nude with Daisy Nail Art
Nail Styling Advice
Daisy nail art became iconic for a reason — it’s cheerful, it’s Summer-coded, and it’s actually approachable to create. In August, I like pairing it with a warm nude base rather than a stark white one because it gives the whole look a more sun-soaked, effortless feel.
How to Create This Nail Look
Step-by-step:
Apply two coats of your warm nude base and cure. Using a dotting tool or thin brush, create small daisies — white petals first using small elongated dots around a center point, then a tiny yellow dot at the center. Let dry or cure gently. Seal with top coat.
Tools used: Dotting tool, thin detail brush, white and yellow gel or nail art paint, UV lamp
Skill level: Beginner to intermediate. The daisies look harder than they are once you get the rhythm.
Occasions to Wear
Day trips, picnics, music festivals, casual summer events, any outdoor occasion where you want to feel light and happy.
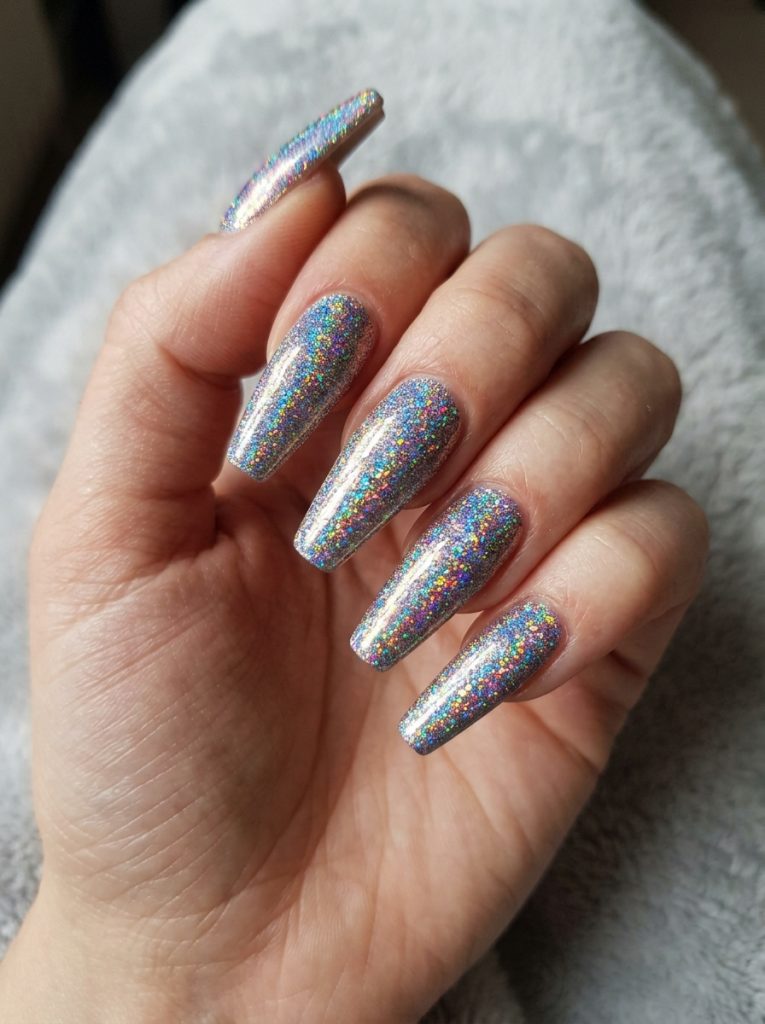
11. Holographic Glitter Coffin Nails
Nail Styling Advice
For the clients who want maximum impact, holographic glitter coffin nails deliver every time. This isn’t your average glitter — holographic particles scatter rainbow light in a way that looks almost sci-fi in the right lighting. August is the perfect time because outdoor light in summer truly makes these pop.
How to Create This Nail Look
Step-by-step:
Apply base coat. Apply one thin coat of a neutral or clear gel base. While slightly tacky, press holographic glitter or a holographic gel shade onto the nail. Cure. Add another thin layer of gel over the top to encapsulate the glitter. Cure. Finish with glossy top coat.
Tools used: Holographic glitter gel or loose glitter, UV lamp, clear encapsulating gel, silicone brush
Skill level: Intermediate. Encapsulation takes a bit of practice to get smooth.
Occasions to Wear
Parties, festivals, New Year’s in August (hey, some people plan early), concerts, bachelorette events, or any time you genuinely want everyone to look at your hands.
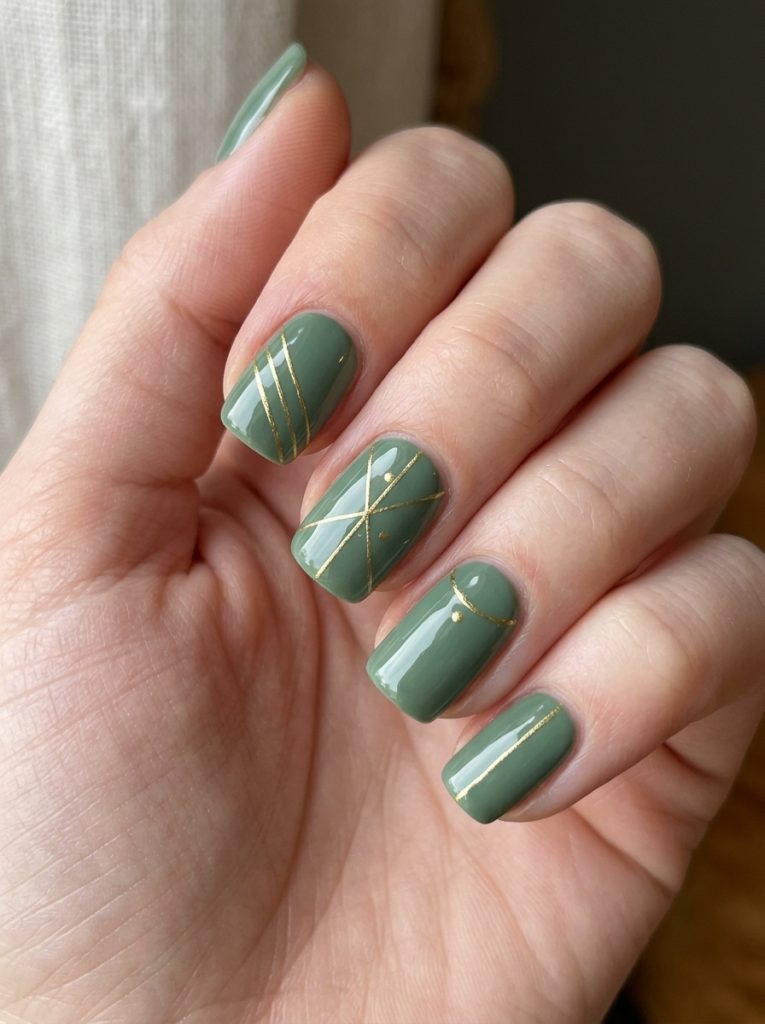
12. Sage Green Short Nails with Gold Lines
Nail Styling Advice
Sage green has genuinely become a staple and I don’t see it going anywhere. It’s earthy, it’s grounding, it’s mature without being boring. Adding fine gold line details — a single diagonal line, or a thin cuticle arc — elevates the simplicity perfectly. This is the design I recommend to clients who want something artistic but understated.
How to Create This Nail Look
Step-by-step:
Apply base coat. Apply two coats of sage green gel and cure. Using a very thin liner brush and gold gel paint, draw one or two delicate lines across each nail — diagonal, horizontal, or a curved arch. Steady your hand against the table. Cure. Seal with top coat.
Tools used: Thin liner brush, sage green gel, gold gel paint, UV lamp
Skill level: Beginner-friendly. The lines don’t need to be perfect — slight wobble adds character.
Occasions to Wear
Everyday wear, work settings, gallery visits, farmers markets, creative environments. It’s quiet luxury in nail form.
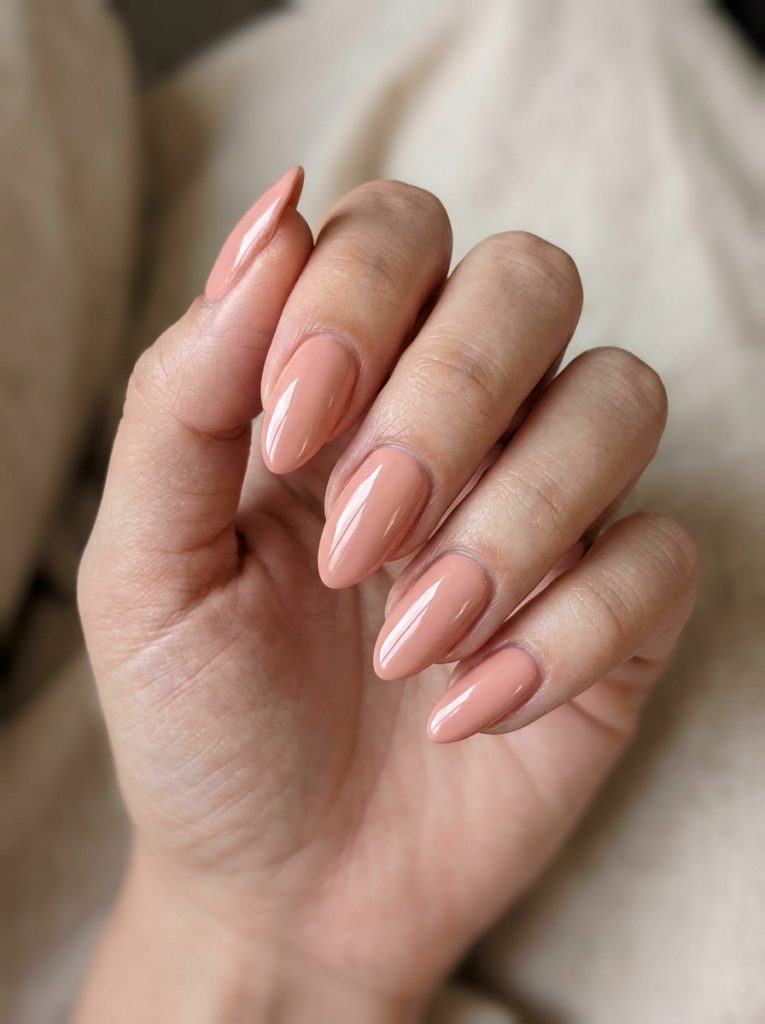
13. Peach Fuzz Almond Nails
Nail Styling Advice
Peach fuzz was the color of the year not long ago and it absolutely belongs in an August lineup. It’s that soft, fuzzy peachy-pink that sits somewhere between blush and apricot — warm without being orange, feminine without being saccharine. I’ve done this on almond nails more times than I can count this season and it never misses.
How to Create This Nail Look
Step-by-step:
Shape nails into a soft almond. Apply base coat. Apply two coats of peach fuzz gel — look for a shade that leans warm and slightly muted rather than bright. Cure between coats. Finish with glossy top coat.
Tools used: Nail file, peach-toned gel polish, UV lamp, glossy top coat
Skill level: Complete beginner. Just clean application and you’re done.
Occasions to Wear
Everyday wear, brunches, weddings as a guest, baby showers, summer work events. It’s the kind of set you get a hundred compliments on without anyone being able to quite pinpoint why they love it so much.
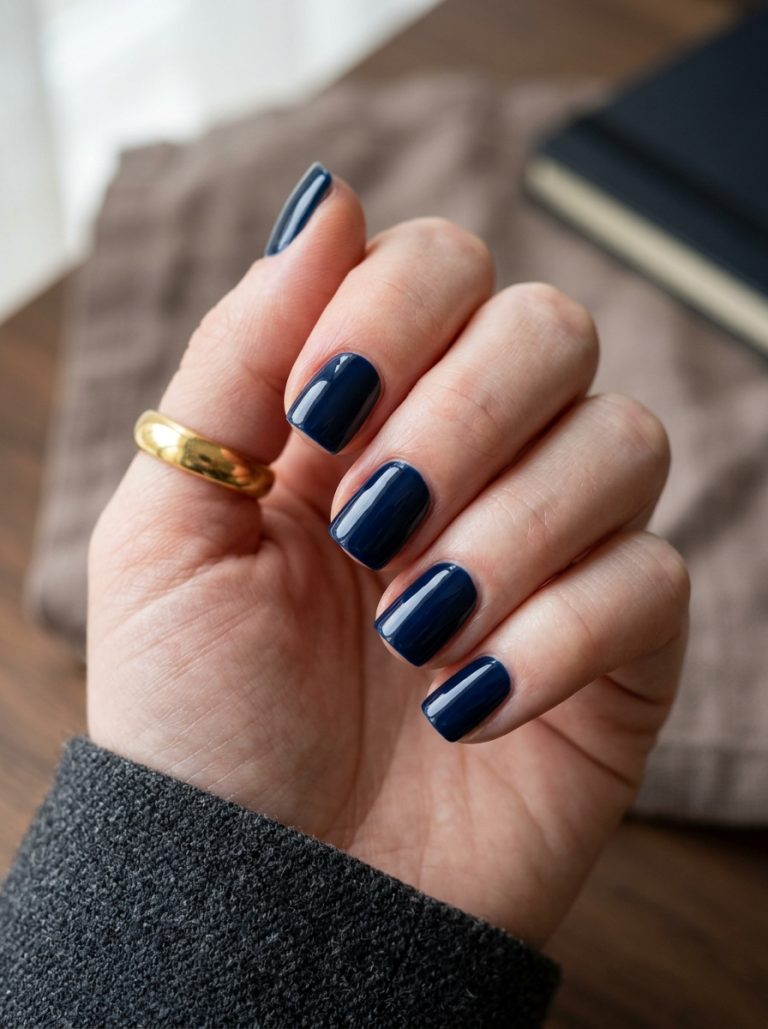
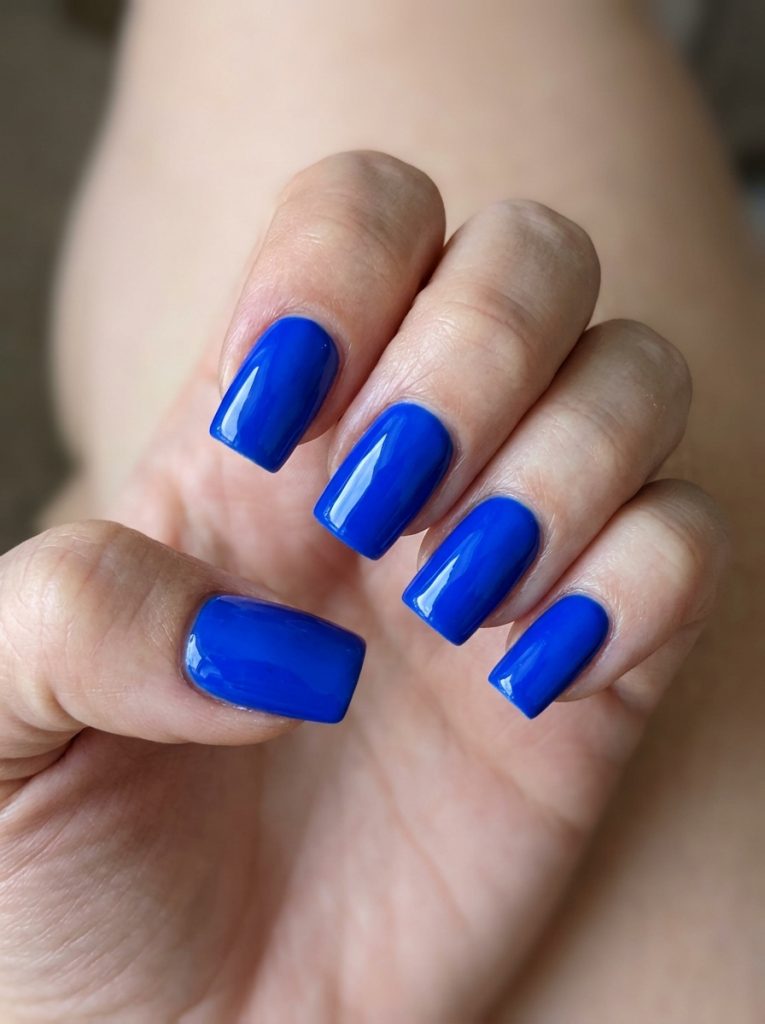
14. Cobalt Blue Square Nails
Nail Styling Advice
If you want to make a statement in August without going dark, cobalt blue is your answer. It’s bold, it’s summer-coded — think ocean, pool tiles, cloudless sky — and it photographs like a dream. I tried this nail set on a client who was hesitant about color, and she texted me three days later saying she’d gotten six compliments in one day.
How to Create This Nail Look
Step-by-step:
File nails into a clean square shape with straight sides and flat tips. Apply base coat. Apply two thin coats of cobalt blue gel — it may need a third coat for full opacity. Cure after each. Finish with a high-gloss top coat for maximum color impact.
Tools used: Square file, cobalt blue gel, UV lamp, high-gloss top coat
Skill level: Beginner. Opacity is the only thing to watch — build in thin layers.
Occasions to Wear
Vacations, pool days, summer parties, beach weddings, casual Friday offices, or any moment you want your nails to look like they belong in a fashion campaign.
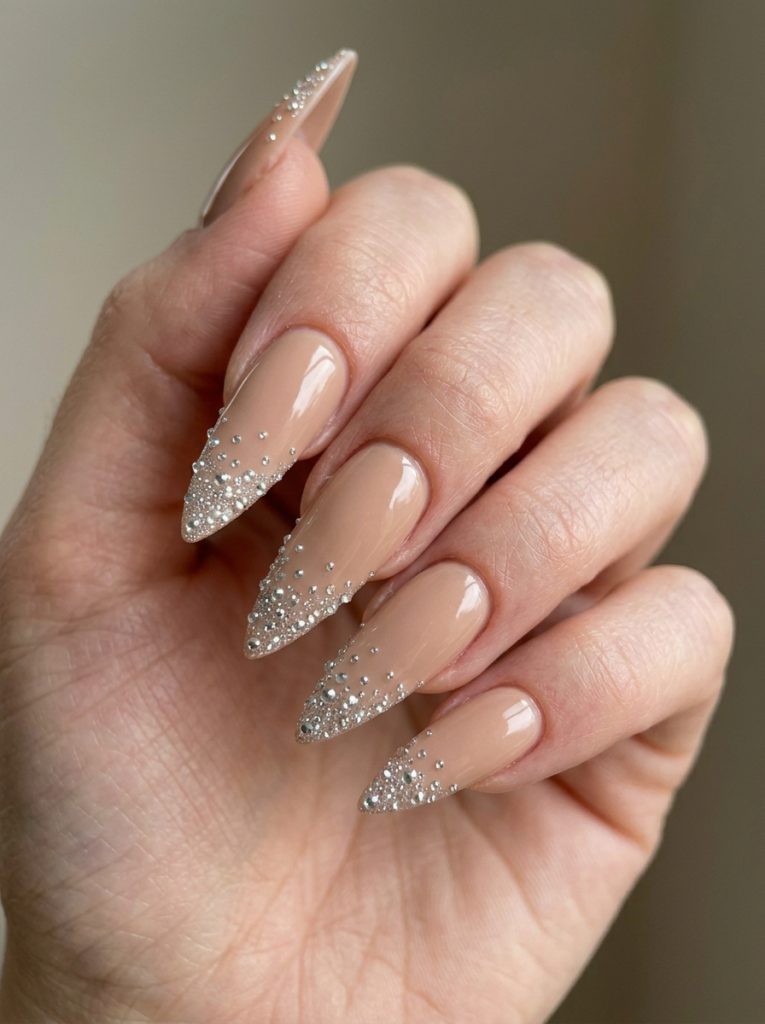
15. Sandy Nude Stiletto with Micro Gems
Nail Styling Advice
Sandy nude is different from regular nude — it has a slightly warmer, more golden undertone that feels genuinely August-appropriate. Like, if summer had a nail color, it would be this. The micro gems placed near the tip or along one side add just enough sparkle to feel special without tipping into overdone.
How to Create This Nail Look
Step-by-step:
Create or shape stiletto nails. Apply sandy nude gel base in two coats, curing between each. Before the final top coat, apply a thin dot of gel near the tip or side of each nail and press micro gems onto it using a dotting tool. Vary the placement slightly per nail. Cure. Seal with top coat.
Tools used: Dotting tool, micro rhinestones or gems, sandy nude gel, UV lamp, stiletto file or forms
Skill level: Intermediate — stiletto shape and gem placement both require a steady hand.
Occasions to Wear
Evening events, date nights, vacations, pool parties, summer engagement parties. Also genuinely one of the best bridal nail options for an August wedding.
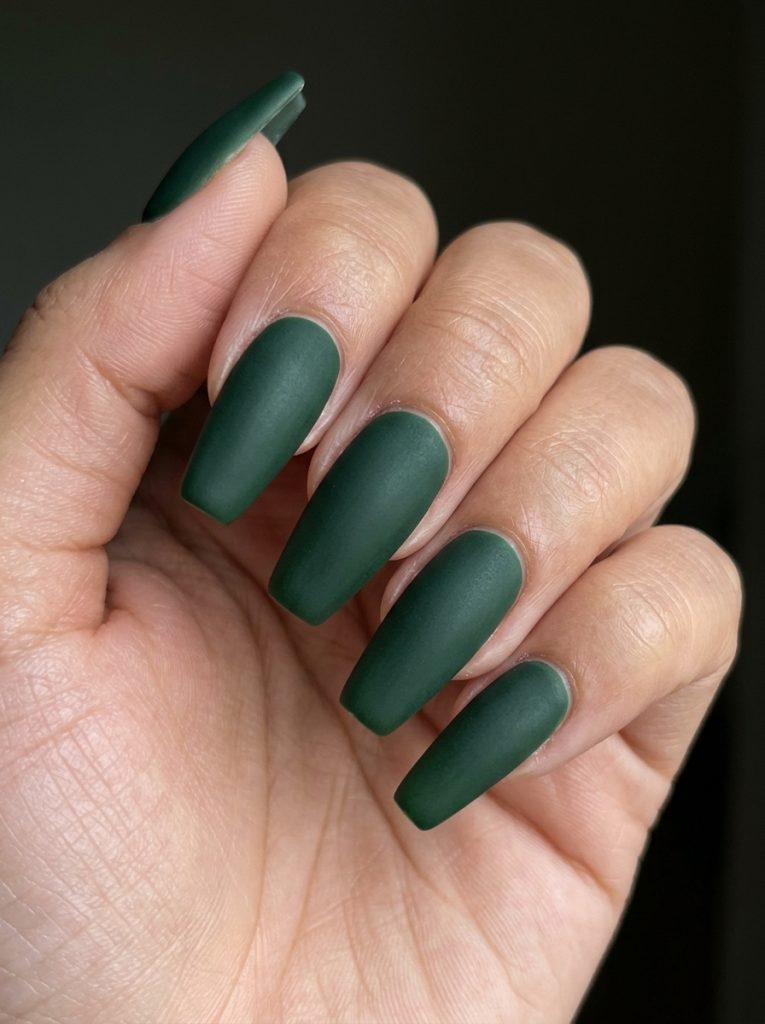
16. Forest Green Coffin Nails with Matte Finish
Nail Styling Advice
Forest green in August is a sleeper hit. Most people associate it with autumn and skip it during summer — but I’ve been pushing this shade to clients for August and the reaction is always the same: surprise, then obsession. It’s rich, it’s grounded, and against tanned summer skin it’s truly striking.
How to Create This Nail Look
Step-by-step:
Shape or extend nails into a coffin. Apply base coat. Apply two coats of forest green gel, curing between. Apply a matte top coat and cure. Optional: use a fine liner brush to add a single thin nude or gold line down the center of each nail for added dimension.
Tools used: Coffin nail file, forest green gel, matte top coat, UV lamp, optional liner brush
Skill level: Beginner. Matte top coat does all the heavy lifting aesthetically.
Occasions to Wear
Late August transitional looks, creative work environments, evening events, fashion-forward occasions. It pairs beautifully with earth-tone outfits.
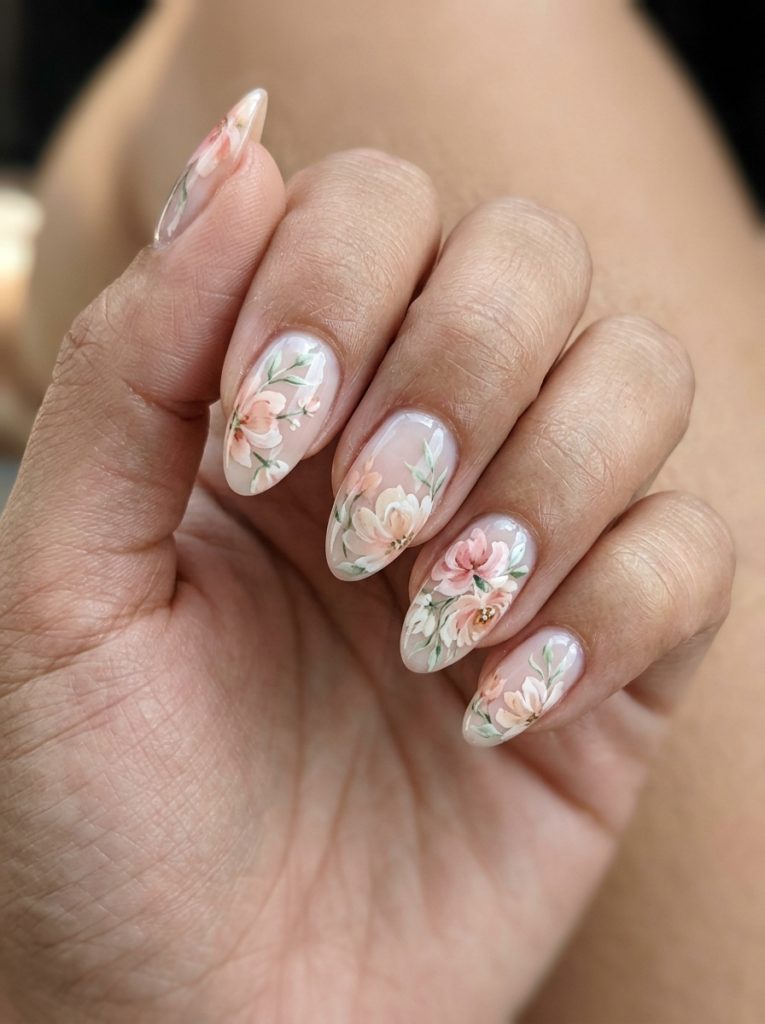
17. Watercolor Floral Press-On Nails
Nail Styling Advice
Press-ons have genuinely come a long way and August is a great time to lean into them — especially for events or travel when you don’t want to sit at a nail desk. Watercolor floral designs on press-ons are delicate and artistic, and the good quality ones look indistinguishable from a salon set in photos.
How to Create This Nail Look
Step-by-step:
On a clear or very sheer gel base (cured), dilute your floral gel colors slightly and apply loose petal shapes using a thin brush. Work quickly and let the colors bleed slightly for that watercolor effect. Add thin green strokes for leaves. Cure. Seal with glossy top coat.
Tools used: Thin detail brush, diluted gel or nail art paints in pink, peach, white and green, UV lamp, glossy top coat
Skill level: Intermediate. Loose brush control is the key skill — don’t overthink the shapes.
Occasions to Wear
Garden parties, weddings, bridal showers, spring-to-summer events, any occasion where you want something truly beautiful and a little artisan-feeling.
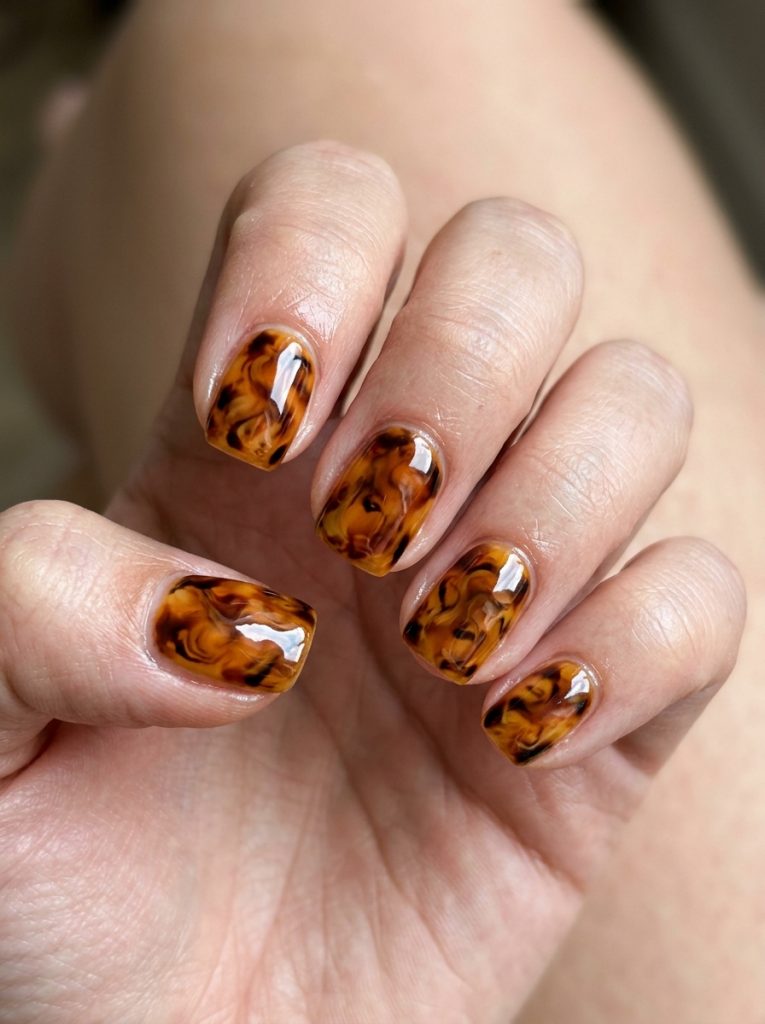
18. Tortoiseshell Nail Art on Short Nails
Nail Styling Advice
Tortoiseshell nails are one of those designs that looks incredibly complex but is actually very achievable with a bit of practice. The warm amber, brown, and black swirling pattern reads as fashion-forward and artistic — and on short nails specifically it looks almost like wearable jewelry rather than nail art.
How to Create This Nail Look
Step-by-step:
Apply a warm amber gel base and cure. Using a thin brush, apply irregular patches of honey, caramel, and dark brown gel in an organic pattern — no straight lines, everything curved. Before curing, add small touches of black at the edges of the dark patches. Use a clean brush to lightly blend the edges. Cure. Apply glossy top coat.
Tools used: Thin detail brush, amber, honey, caramel, dark brown and black gel, UV lamp, glossy top coat
Skill level: Intermediate. The blending is instinctive once you find the rhythm.
Occasions to Wear
Creative work, fashion events, dinner out, autumn-adjacent occasions. It has a very timeless quality — not trend-chasing, more like classic style.
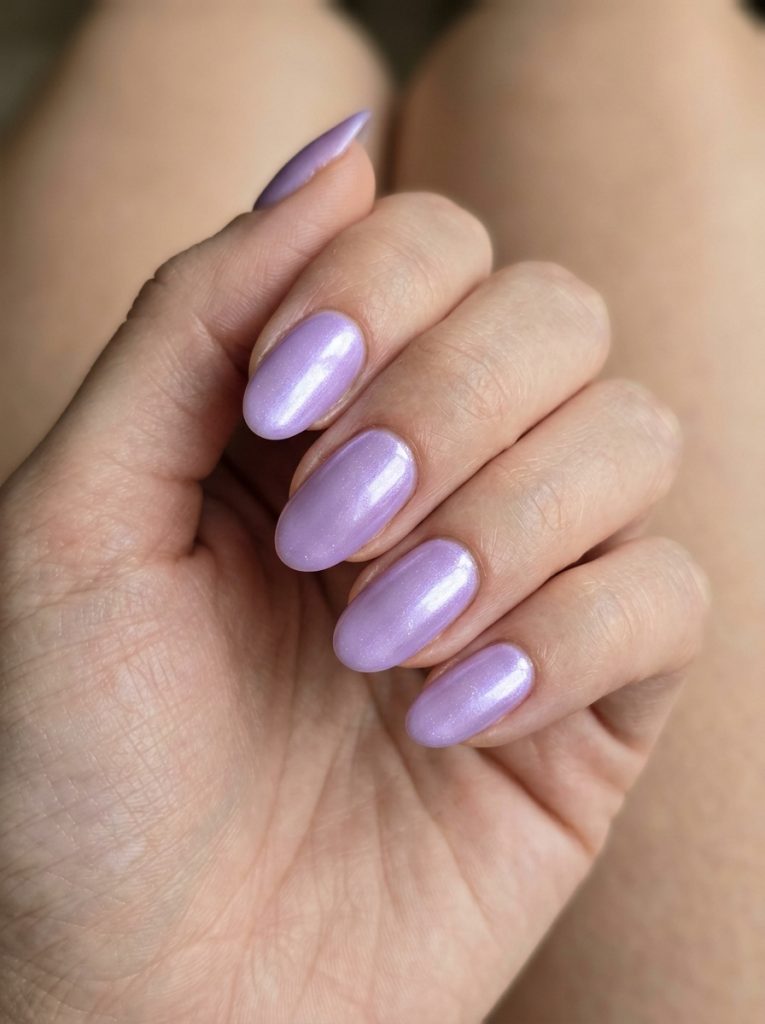
19. Lavender Oval Nails with Pearl Finish
Nail Styling Advice
Lavender with a pearl or shimmer finish is one of the most underrated August combinations. The soft purple-pink tone is dreamy and the pearlescent quality catches light beautifully in summer sun. I’ve done this set on clients headed to late-summer weddings and garden events and it always photographs like something from a Pinterest board.
How to Create This Nail Look
Step-by-step:
Shape nails into an oval. Apply base coat. Apply two coats of soft lavender gel and cure. Apply a pearl shimmer top coat over the cured color — this adds the luminous finish. Cure. Optionally layer a standard glossy top coat over the shimmer for extra depth.
Tools used: Oval file, lavender gel, pearl shimmer top coat, UV lamp
Skill level: Beginner. The pearl top coat is the only “special” element and it’s easy to apply.
Occasions to Wear
Weddings, engagement parties, spring and summer garden events, bridal showers, or just when you want to feel genuinely soft and beautiful.
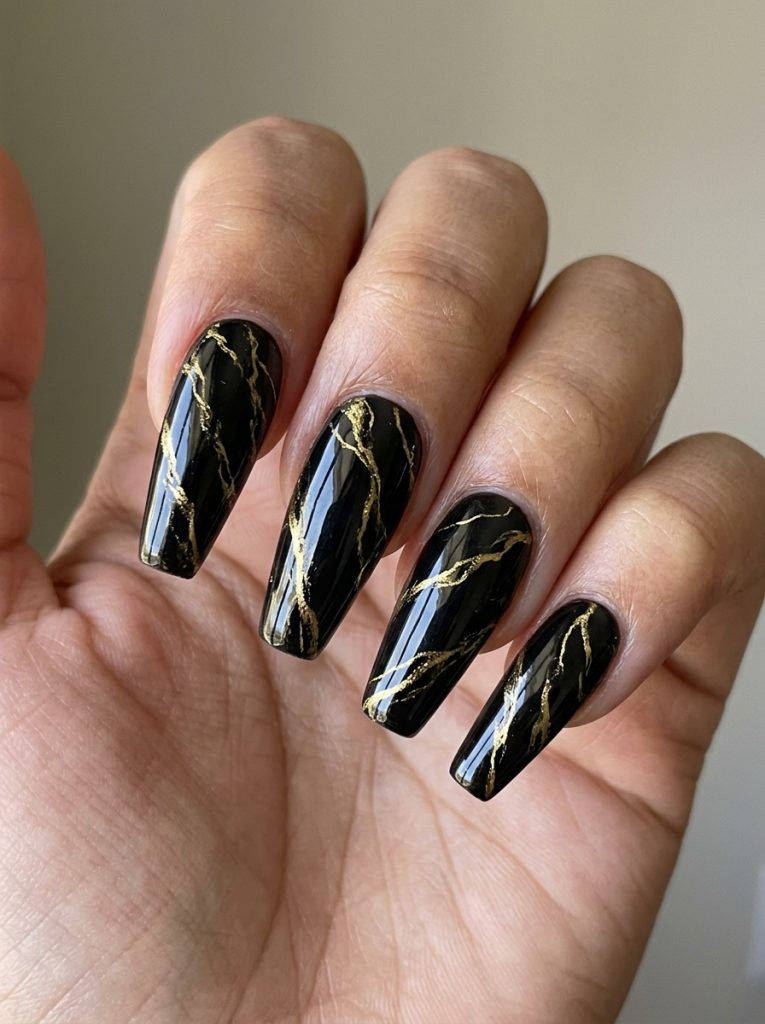
20. Black and Gold Marble Coffin Nails
Nail Styling Advice
Black marble with gold veining is dramatic in the best way. This is not a shy nail design — it makes a statement the moment someone sees your hands. The contrast between the deep black and the fine gold lines creates something that genuinely looks like wearable art. I’ve done this set on coffin nails at various lengths and it always generates a reaction.
How to Create This Nail Look
Step-by-step:
Apply a solid black gel base in two coats. Cure. Using a thin liner brush and gold gel paint, draw irregular veining lines across each nail — diagonal, branching slightly, varying in width. Cure. Apply a high-gloss top coat to make the marble depth pop.
Tools used: Thin liner brush, black gel, gold gel paint or metallic nail art paint, UV lamp, high-gloss top coat
Skill level: Intermediate to advanced. The veining technique takes practice to look natural.
Occasions to Wear
Evening events, fashion-forward occasions, gallery openings, concerts, parties, bachelorette events. Not your everyday office set — this one demands an occasion worthy of it.
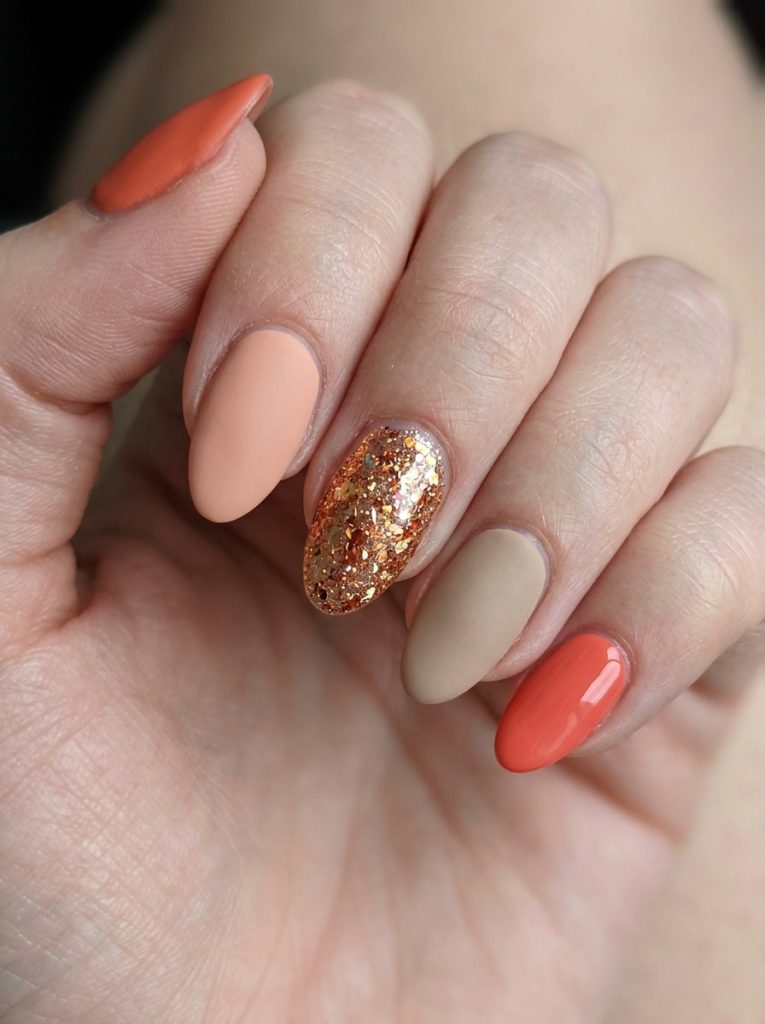
21. Coral Reef Mixed Media Nails
Nail Styling Advice
Mixed media nails are having a genuine moment and the coral reef concept is perfect for August. The idea is combining different finishes and textures across the nails — matte on some, glossy on others, maybe a glitter accent nail — all in a coordinated warm coral and sand palette. Every nail does something slightly different but they all belong together.
How to Create This Nail Look
Step-by-step:
Choose three to four coordinating shades within the coral-nude-peach family. Apply different shades to different nails — not alternating mechanically, but in a natural grouping. Apply matte top coat to some, glossy to others. On one or two accent nails, add glitter or foil. The variety is the design.
Tools used: Multiple coordinating gel shades, matte and glossy top coats, optional glitter or foil, UV lamp
Skill level: Beginner. There are no wrong choices — just stay within the warm palette.
Occasions to Wear
Beach trips, resort holidays, pool days, casual summer events, music festivals. It’s playful and creative without being chaotic.
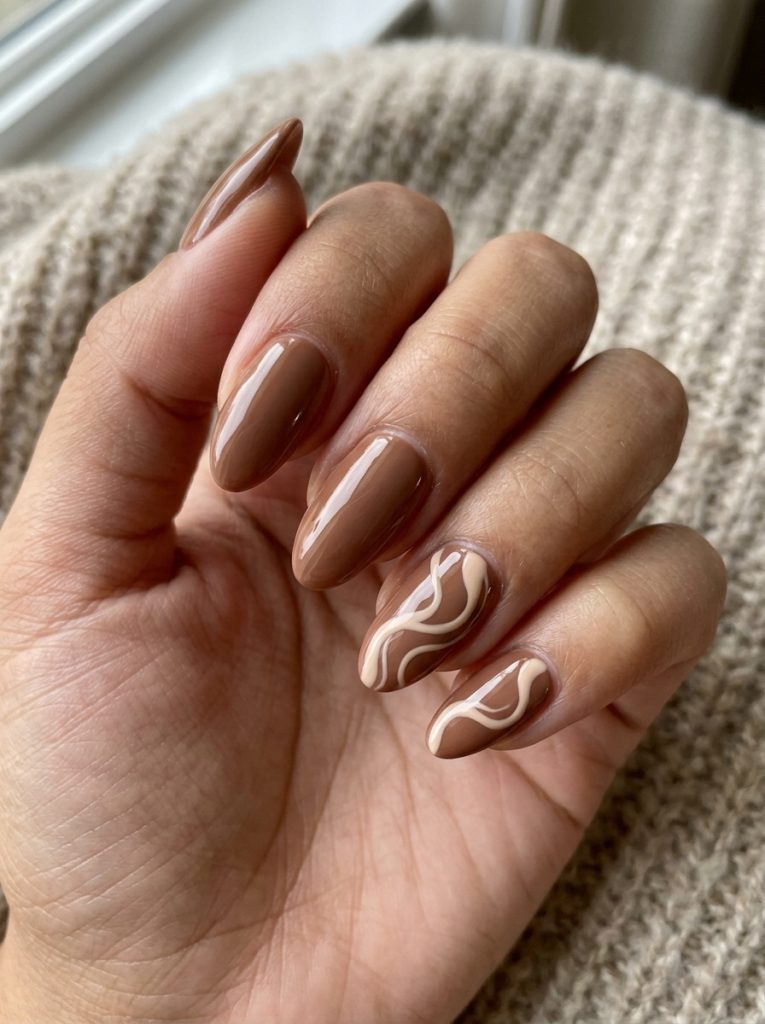
22. Mocha Latte Nails with Nude Swirl Art
Nail Styling Advice
Mocha nails are having a massive moment and for good reason — they’re warm, coffee-toned, and universally gorgeous. Pairing a mocha base with a nude or cream swirl design on one or two accent nails gives you that latte-art energy that’s all over social media right now. I honestly can’t keep up with how many clients have been requesting this.
How to Create This Nail Look
Step-by-step:
Apply mocha gel base to all nails and cure. On one or two accent nails, use a thin brush with a slightly lighter nude or cream gel to draw a loose, confident swirl — one or two overlapping curves. Don’t hesitate or it will look wobbly. Cure. Apply glossy top coat to all nails.
Tools used: Thin liner brush, mocha gel, lighter nude or cream gel for swirls, UV lamp, glossy top coat
Skill level: Beginner to intermediate. The confidence of the brush stroke matters more than perfection.
Occasions to Wear
Everyday wear, work, coffee shop outings (obviously), casual hangouts, and any setting where you want nails that look thoughtfully done without being flashy.
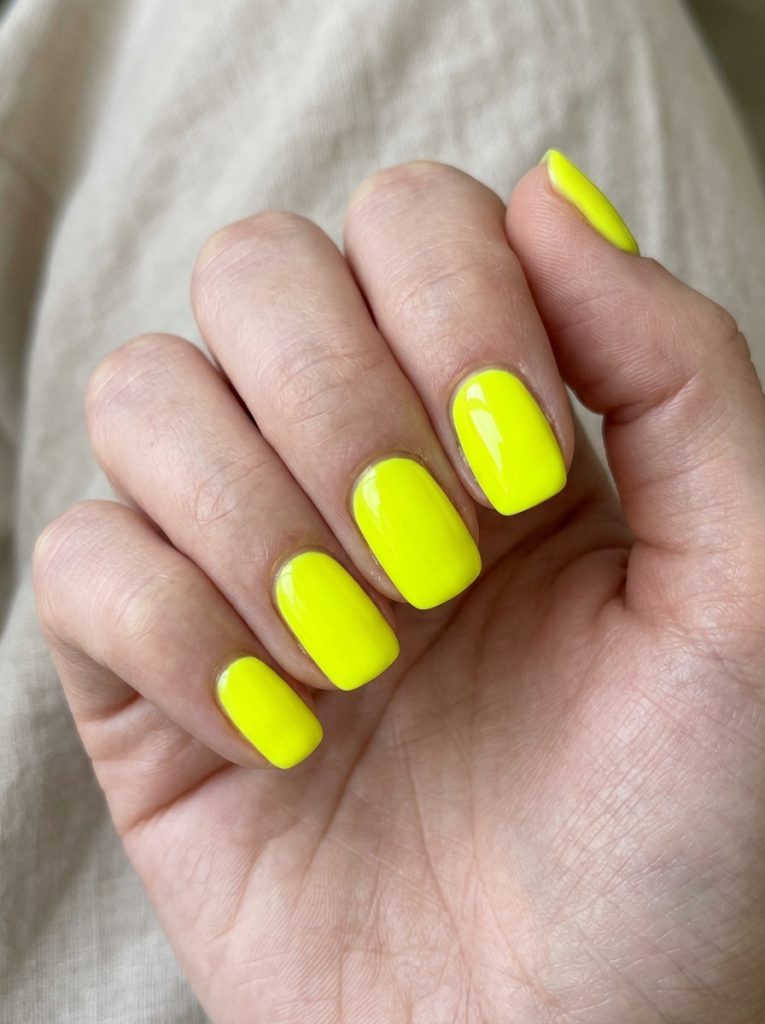
23. Neon Yellow Short Nails
Nail Styling Advice
Neon yellow is not for the faint of heart and I respect that completely. But in August — peak summer, maximum sun — it somehow makes total sense. I’ve put this shade on clients and watched their entire energy shift. It’s impossible to feel low-key wearing neon yellow nails. Short length is actually the ideal canvas for this because it keeps the energy playful rather than aggressive.
This shade is particularly stunning on medium and deep skin tones where the contrast is electric. On fair skin it reads more pop-art, which is also a vibe. Glossy finish only — matte neon yellow is genuinely one of the few shade-finish combinations I’d steer away from.
How to Create This Nail Look
Step-by-step:
Apply a white gel base coat first — this is important with neons because they need an opaque base to show their true color. Apply two coats of neon yellow gel and cure. Finish with high-gloss top coat.
Tools used: White gel base, neon yellow gel, high-gloss top coat, UV lamp
Skill level: Beginner. The white base coat step is the only extra thing to remember.
Occasions to Wear
Music festivals, beach days, summer parties, outdoor concerts, sports events, or any occasion where you want to be the most visible person in any photo.
📸 Image Prompt: Close-up of a single hand with short square or oval nails in a vivid neon yellow gel polish. Extremely bright saturated yellow with a high-gloss finish, almost luminous quality. Clear focus on the nail design mentioned in the heading, visible nail details, no text, realistic mobile camera photo, there must be not any other object nearby — the image must be nails focused, must have a single hand, and the design is cropped enough to show only nails, not nearby objects.
These 11 additional designs bring your total to a full 23+ nail ideas — more than enough to keep the post comprehensive, Pinterest-worthy, and genuinely useful for every type of reader who lands on it.
Why This Nail Trend Is Popular
August nails hit differently because they sit right between two major aesthetic camps: summer brightness and autumn warmth. That transition is genuinely exciting for nail artists. The designs that go viral this time of year tend to combine sun-warmed tones — terracotta, warm nude, gold, dusty rose — with fresh techniques like chrome tips, negative space art, and textured gel. I keep recommending August sets to clients because they’re incredibly versatile. You can make them look casual or elevated with just a finish change.
Tools & Accessories Needed
Before diving into the designs, here’s a quick rundown of what you’ll want on hand.
For tools, a quality UV/LED dual lamp is non-negotiable if you’re doing gel. You’ll also want a thin liner brush for nail art detail work, a dotting tool for florals or negative space accents, and a good glass nail file for shaping. A buffer block helps with surface prep before gel application.
For accessories, clear rhinestones, gold foil flakes, and tiny chrome powders are your best friends for August. Matte top coat and glossy top coat — both. You’ll be switching between them depending on the look. Optional but worth it: a nail stamping kit if you want detailed patterns without freehand drawing.
Closing Note
August nails are where personality really shows up — whether you go for that quiet glazed chrome moment or a full burnt orange stiletto statement. After years of doing this, I always come back to recommending something that makes the client feel like herself rather than just chasing whatever’s trending. The designs in this post cover real ground, from beginner-friendly to ambitious. Pick the one that matches your energy for the season and commit to it — half-hearted nails never look as good as fully intentional ones. And honestly? Your nails are the one accessory you never leave home without. Make them count.