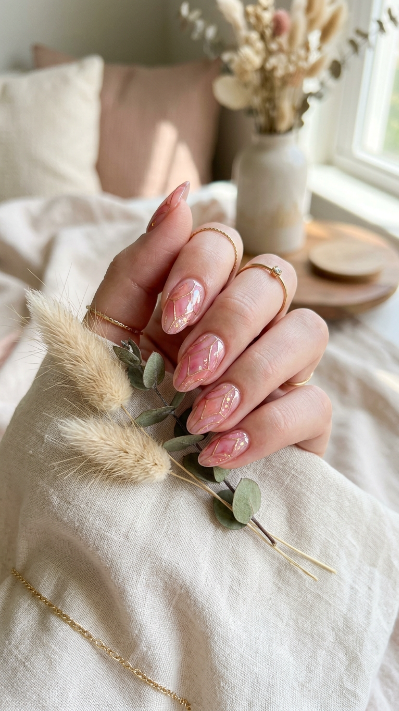
22+ April Nail Designs You’ll Actually Want to Wear (Fresh Spring Ideas)
Okay, so April is genuinely one of my favourite months to do nails. The palette opens up so beautifully — you’re not forced into the heavy berries of winter or the super bold neons of summer. You get this gorgeous in-between moment where soft lavenders, fresh greens, and barely-there pinks all make total sense. I’ve been doing nails for a while now, and every April I find myself getting genuinely excited to experiment again.
What I keep noticing is that clients come in wanting something that feels fresh but not too loud. “Something that says spring without screaming it,” one of them told me. That’s the vibe we’re going for here. Whether you’re leaning into florals, going ultra-minimal, or trying something like a milky glaze or chrome French tip — April really does have something for everyone.
I’ve put together this collection based on sets I’ve personally done, styles I’ve tested on myself, and a few that clients have brought in as references that I’ve since recreated and refined. Let’s get into it.
💡 Who this guide is for
Whether you’re doing your nails at home with gel polish or heading to a salon, you’ll find something here that works for your skill level, length, and skin tone.
Why April Nail Trends Are Genuinely Different
There’s something about transitional weather that pushes nail trends in an interesting direction. In April, it’s not quite warm enough to commit to full bright summer neons, but winter’s dark, moody palettes feel off too. What you get instead is this sweet spot — soft textures, nature-inspired motifs, and finishes that feel alive without being overwhelming.
Florals, butterflies, pastel chrome, and barely-there glazes dominate this time of year for a reason. They translate well across casual days, work settings, and events. I also think people are genuinely happier in spring and want their nails to reflect that energy. Sounds cheesy, I know — but it’s true.
Tools & Accessories You’ll Want Nearby
- Fine nail art brush
Thin liner brush for petal details and line work - UV/LED lamp
Essential if you’re working with gel polish - Nail file (180/240 grit)
Shape before you start, not after - Dotting tool
Perfect for cherry blossom stamens and dot patterns - Rhinestones & charms
Tiny florals, pearls, and 3D flowers for texture - Chrome powder
Mirror or aurora powder for color-shift effects - Matte top coat
Transforms any glossy set into something different - Nail stickers / decals
Great shortcut for complex floral or butterfly art
1. Soft Lavender Glazed Nails
Nail Styling Advice
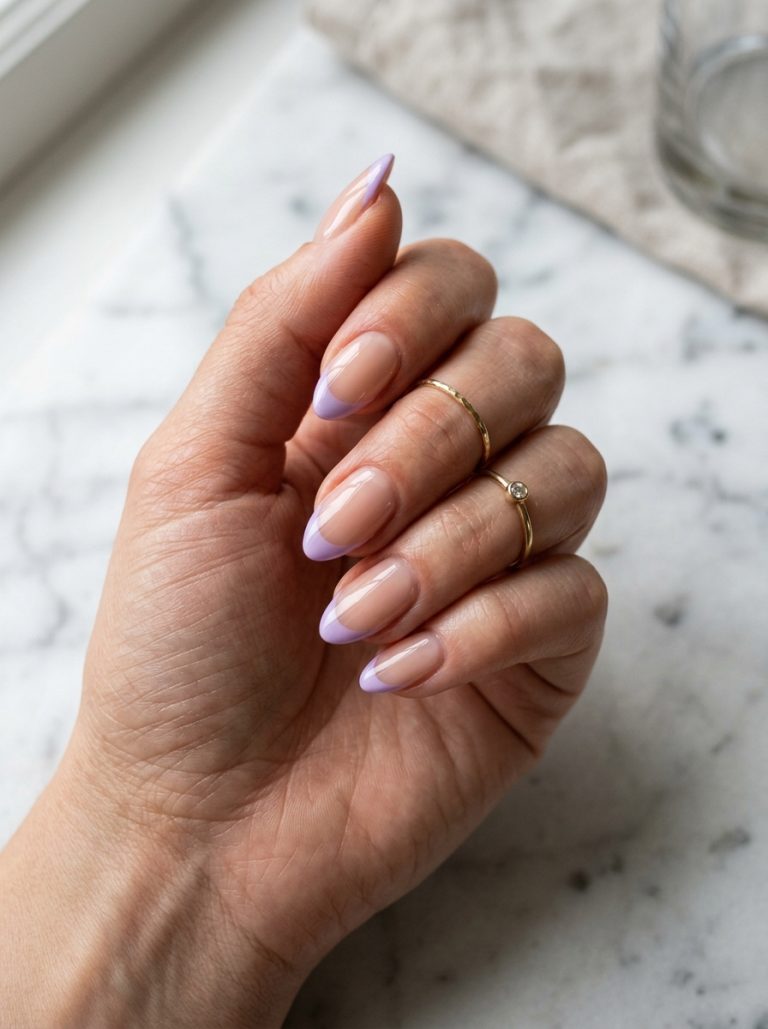
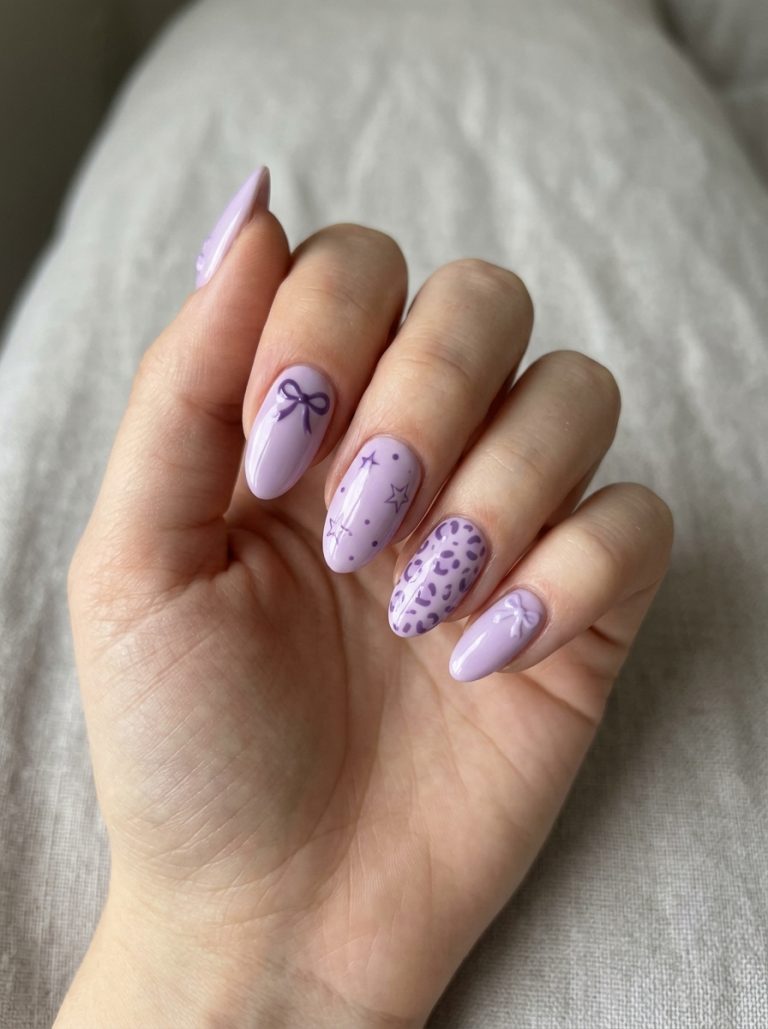
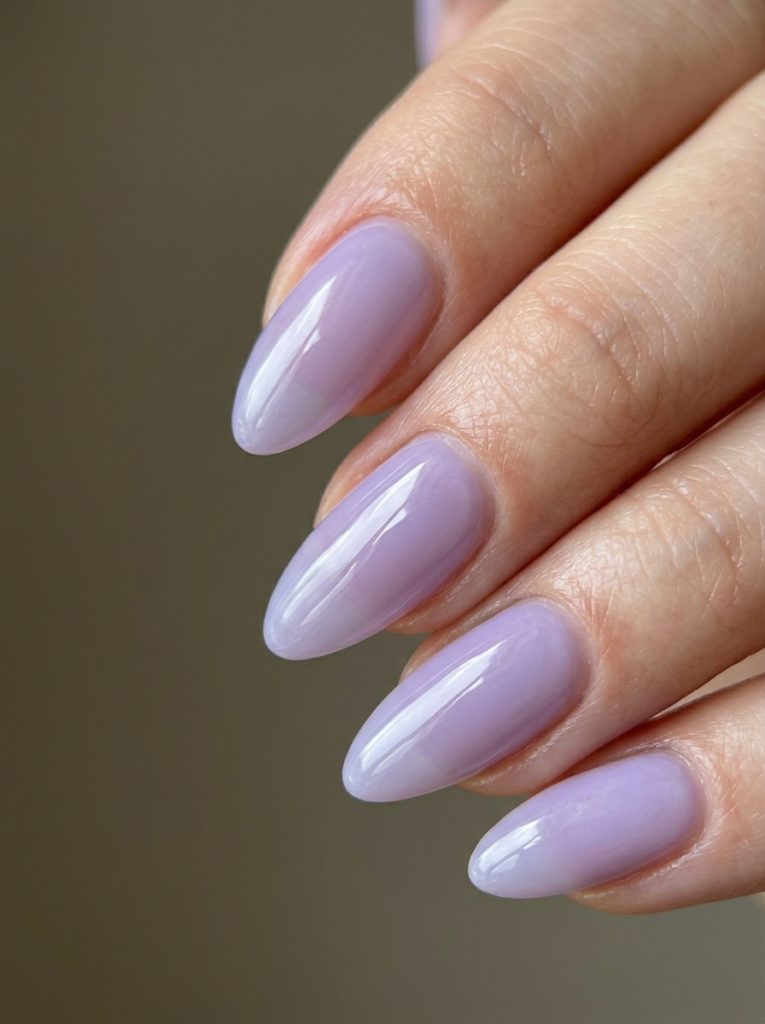
This is honestly the April look I keep coming back to. Lavender with a glaze finish — that sheer, jelly-like glow — feels so perfectly spring without trying too hard. I’ve done this on medium almond nails the most, and it flatters really well. On deeper skin tones, I’d push slightly toward a more pigmented lavender rather than sheer; the super pale version can disappear. On lighter skin, the sheer glaze looks almost luminous.
The glaze finish is the key thing here — it’s that glass-skin effect but for nails. Don’t skip the extra glossy top coat. Without it, the whole look falls flat.
How to Create This Look
Apply a clear or sheer base, then layer two thin coats of your lavender gel shade. Cure after each coat. Finish with a high-shine glossy top coat — two coats works better than one for that glass effect. Skill level: beginner-friendly. Takes about 35–45 minutes including curing time.
Occasions to Wear
Everyday wear, office-appropriate, spring brunches, garden parties. It’s genuinely one of the most versatile sets I do in April. I had a client wear this to a work presentation and then straight to a baby shower — it worked for both without question.
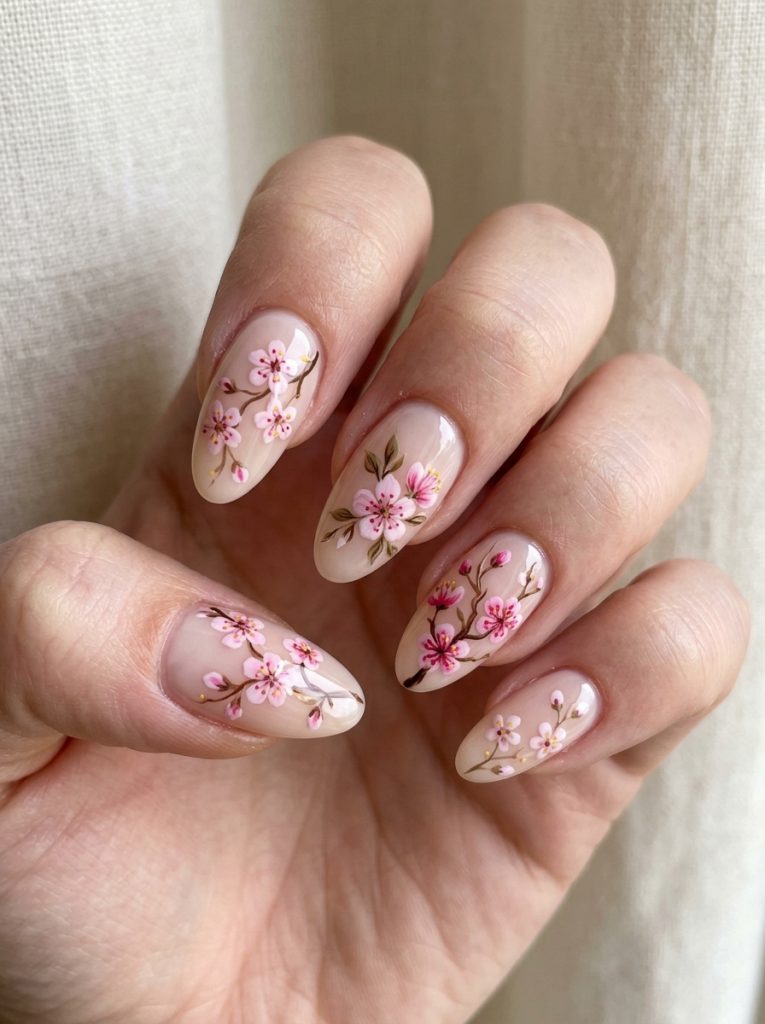
2. Cherry Blossom Nail Art
Nail Styling Advice
Cherry blossom nails are peak April. I love doing these on a white or nude base — it keeps the florals looking clean and intentional rather than busy. I typically paint the blossoms freehand on two or three accent nails and keep the rest solid. This is where it gets tricky though: the petals need to look soft and slightly imperfect, not stiff. If they’re too precise, they lose that organic quality.
Oval and almond shapes work best here. Square nails make this design feel a bit cramped, in my opinion.
How to Create This Look
Start with two coats of a sheer white or nude base. Using a fine nail art brush, paint five small pink petals per flower in a loose cluster. Add a tiny dot centre in yellow or white using a dotting tool. Thin branches can be sketched in light grey or brown with a liner brush. Seal with glossy top coat. This is intermediate level — the freehand work takes some practice.
Occasions to Wear
Cherry blossom season events, spring picnics, date nights, Japanese-inspired outfits. I did a full set of these for a client heading to a cherry blossom festival and they genuinely looked like a piece of art.
3. Mint Green French Tips
Nail Styling Advice
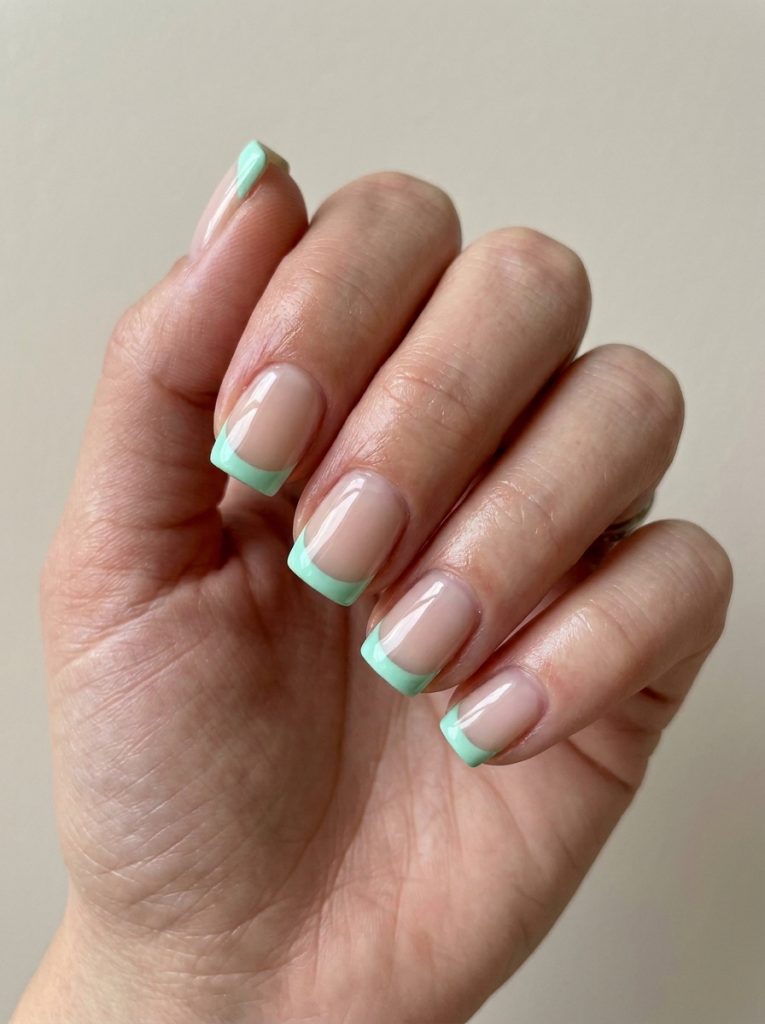
Classic French tip but make it spring. Swapping the white tip for mint green is such a small change that makes such a big difference. I’ve done this on short square nails and medium coffin — both work, but I think short square gives it a cleaner, more modern feel.
One thing I noticed: the tip thickness matters a lot. Too thin and the colour barely reads. Too thick and it looks clunky. I usually aim for about 2–3mm on the tip. For lighter skin tones, a very pale mint almost melts into the nail, so go slightly more saturated. For deeper skin, the contrast is gorgeous — that fresh green pops beautifully.
How to Create This Look
Apply a sheer or nude base coat. Use nail tape or a French tip guide to create a clean smile line. Paint mint green tips with two thin coats. Peel the tape before curing if using gel. Finish with glossy or matte top coat — I’ve tried both and honestly prefer matte for this particular colour combination. Time: about 30–40 minutes.
Occasions to Wear
Everyday casual, spring office looks, outdoor events, Easter brunch. Clean, fresh, and professional enough for most work environments.
4. Butterfly Wing Accent Nails
Nail Styling Advice
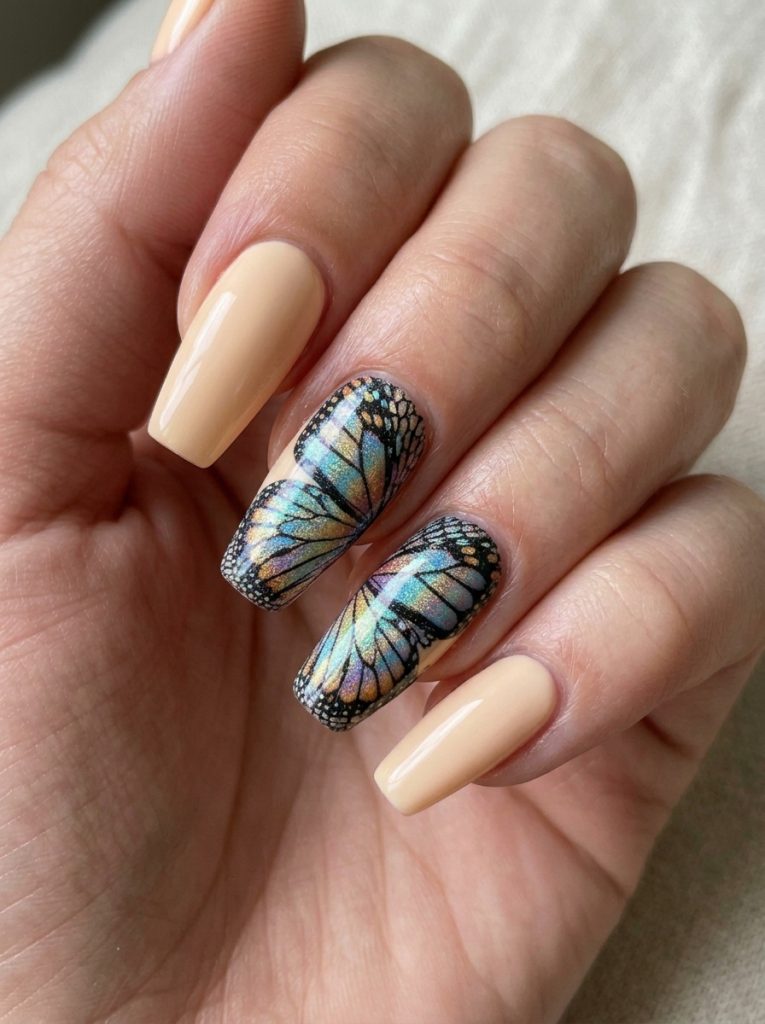
Butterflies are having their moment and honestly, I’m not tired of them yet. The version I love most for April is a subtle one — butterfly wings painted on one or two nails against a soft peach or cream base. Not the full maximalist butterfly set, just hints of it. That’s what makes it feel wearable rather than costumey.
I’ve done this mostly on medium-length coffin and almond shapes. Long coffin really lets the wing design breathe. Chrome or iridescent finishes for the wings make them look so dimensional — that’s the version I’d always recommend if someone can pull it off.
How to Create This Look
Apply a peach or cream base. On the ring finger (and optionally the index), use a thin brush to sketch two wing shapes — upper wings slightly larger than lower. Fill in with a teal, blue, or purple shade. While wet, tap chrome powder over the wings with a sponge applicator for an iridescent effect. Add thin black outlines and small white dot details. Seal with no-wipe top coat to preserve the chrome. Intermediate to advanced skill level.
Occasions to Wear
Festival season, spring weddings as a guest, birthday dinners, creative/fashion settings. Not ideal for very conservative office environments, but perfect for anything expressive.
5. Milky White Short Nails
Nail Styling Advice
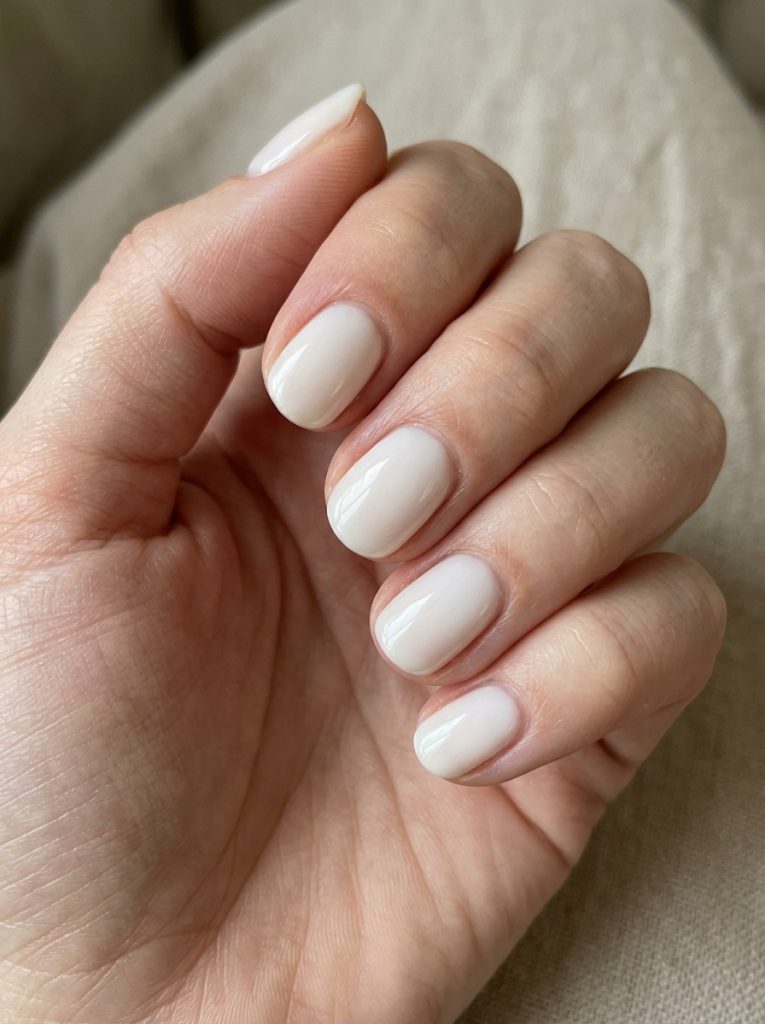
For anyone who keeps their nails short — this one’s for you, and I mean it sincerely. Milky white is one of those finishes that looks equally polished on natural short nails as it does on longer sets. The semi-opaque, creamy white shade with a glossy finish is minimal but not boring.
This part can be annoying: getting the opacity right takes a few coats. Go too sheer and it just looks like an uneven base coat. You want that cloudy, glass of milk quality. Three thin coats usually gets there. Works on every skin tone I’ve tested it on. Truly universal.
How to Create This Look
Apply three thin coats of a milky white or milk-glass gel polish, curing after each. Finish with a high-gloss top coat. That’s genuinely it. Beginner-friendly — total time around 25–30 minutes. The key is thin coats; thick ones streak.
Occasions to Wear
Work, travel, everyday wear, minimalist outfits, interviews. This is my go-to recommendation when someone says “I need something that goes with everything.” It does.
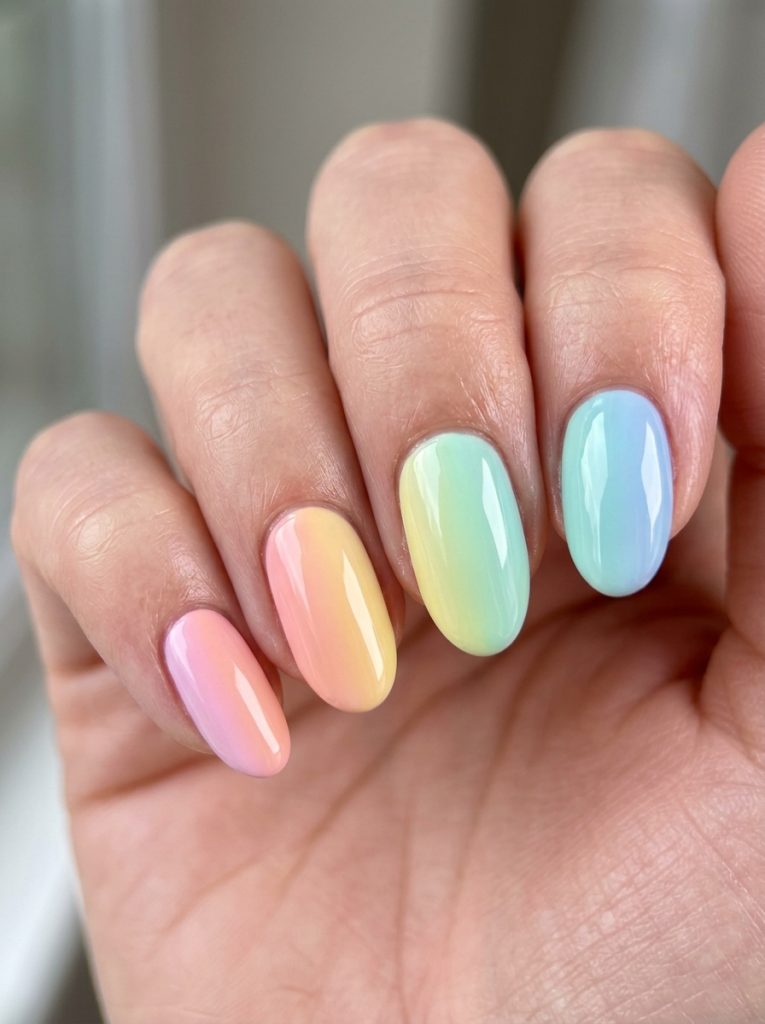
6. Pastel Rainbow Ombre Nails
Nail Styling Advice
This is the one that’s impossible not to stare at. I tried a variation of this on myself before recommending it to clients — a gradient that moves from pale yellow to soft coral to lilac across the nails. Not each nail a different solid colour (that reads a bit more retro), but an actual soft blend on each nail or a progression across all five fingers.
Medium almond or oval nails are my favourite shape for this. The curved tip softens the whole look. This one suits bold personalities — it’s not a quiet design. On deeper skin tones, push the saturation slightly on each pastel shade so the colours don’t disappear.
How to Create This Look
Apply a white base coat first — this makes pastel colours pop. Load a small makeup sponge with two or three pastel shades slightly overlapping. Dab onto the nail in a rolling motion and blend the middle section. Repeat until the gradient is smooth. Clean up edges, cure, and seal with glossy top coat. Intermediate skill level. Messy process — use liquid latex around the nail to keep cleanup easy.
Occasions to Wear
Spring birthdays, Easter, music festivals, content creation days, brunch with friends. Not office-standard but absolutely the life of any casual gathering.
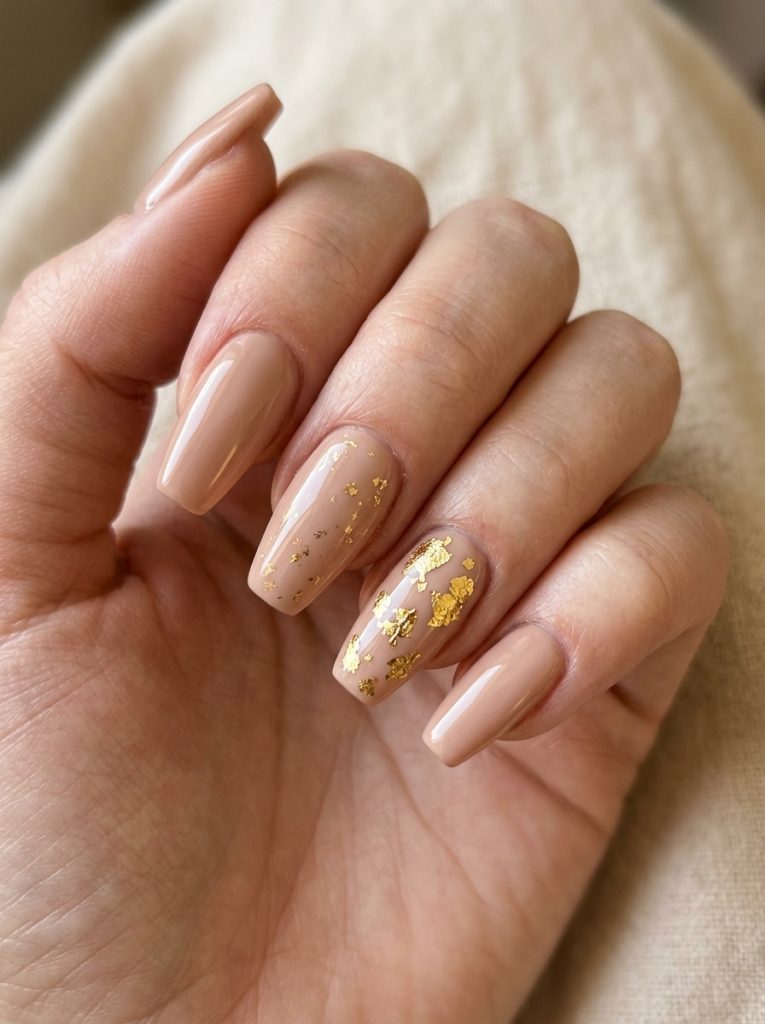
7. Nude Coffin Nails with Gold Foil
Nail Styling Advice
This is my “elevated but effortless” set. Nude coffin nails are already gorgeous on their own, but adding small pieces of gold foil to one or two accent nails takes them somewhere really special. I’ve done this on clients heading to spring weddings and it photographs beautifully.
The coffin shape is doing a lot of work here — it gives the whole thing a sophisticated edge that a round or square tip wouldn’t quite achieve. Medium to long length works best. For skin tone matching: choose a nude that’s one shade lighter than the natural skin tone for the most flattering result across different complexions.
How to Create This Look
Apply two coats of a nude gel shade matched close to the skin tone. Before curing the second coat fully, press small torn pieces of gold foil onto one or two accent nails using a silicone tool. Cure, then seal with a glossy top coat over everything. The foil sits under the top coat for a smooth, dimensional finish. Beginner-friendly if you skip the intricate foil placement.
Occasions to Wear
Spring weddings, formal events, engagement parties, work presentations. Elegant enough for any dressy occasion but understated enough for daily wear. One of my most requested April sets without question.
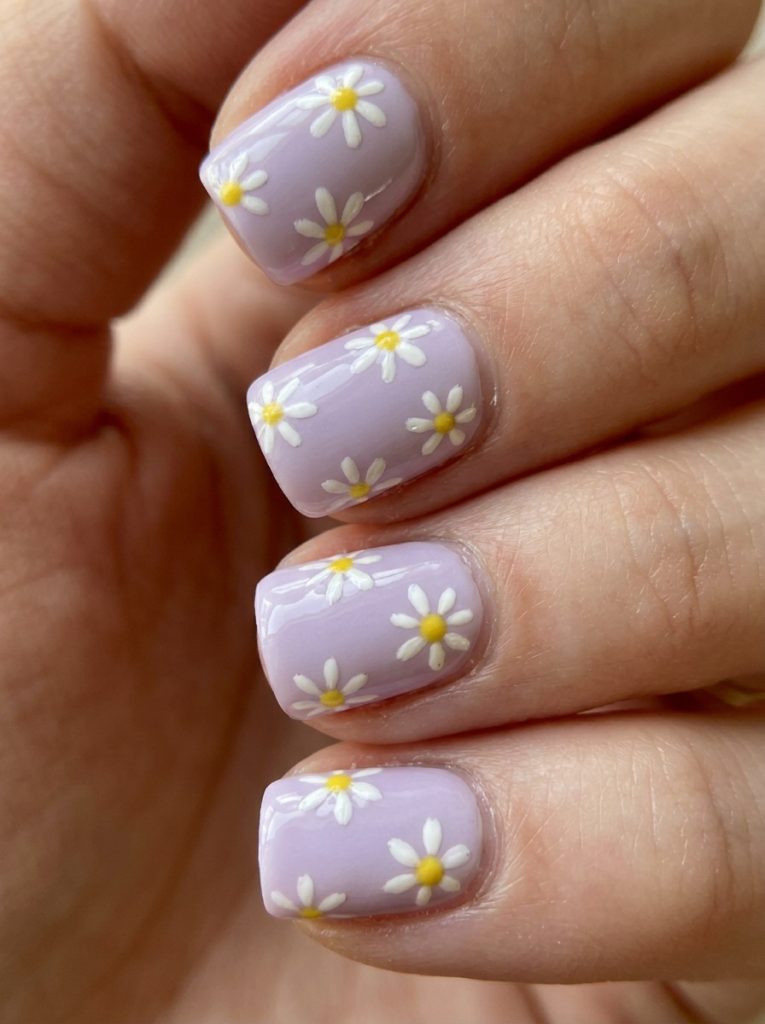
8. Daisy Nail Art on Pastel Base
Nail Styling Advice
Daisies are the most April thing I can think of and I refuse to apologise for loving them every single year. The version that works best, in my experience, is tiny daisies painted in a scattered pattern on a soft sage, baby blue, or lilac base. Not a full floral pattern — just three or four small flowers placed casually, like they landed there.
I’ve done this most on short to medium square nails. The flat nail bed gives you more surface to place the daisies clearly. Pointy or stiletto shapes make the daisies feel a bit crowded at the tip.
How to Create This Look
Apply two coats of sage green or baby blue gel base. Using a fine dotting tool, place small white petal dots in a loose circle. Add a yellow dot centre using a small dotting tool. Vary the sizes — some smaller, some slightly larger — for a natural effect. Seal with glossy top coat. Intermediate level; the dotting tool does most of the work once you get the hang of petal placement.
Occasions to Wear
Outdoor spring events, casual days off, farmers markets, picnic dates. This is a daytime design — it’s cheerful and relaxed. I wouldn’t bring it to a formal dinner, but everywhere else, yes.
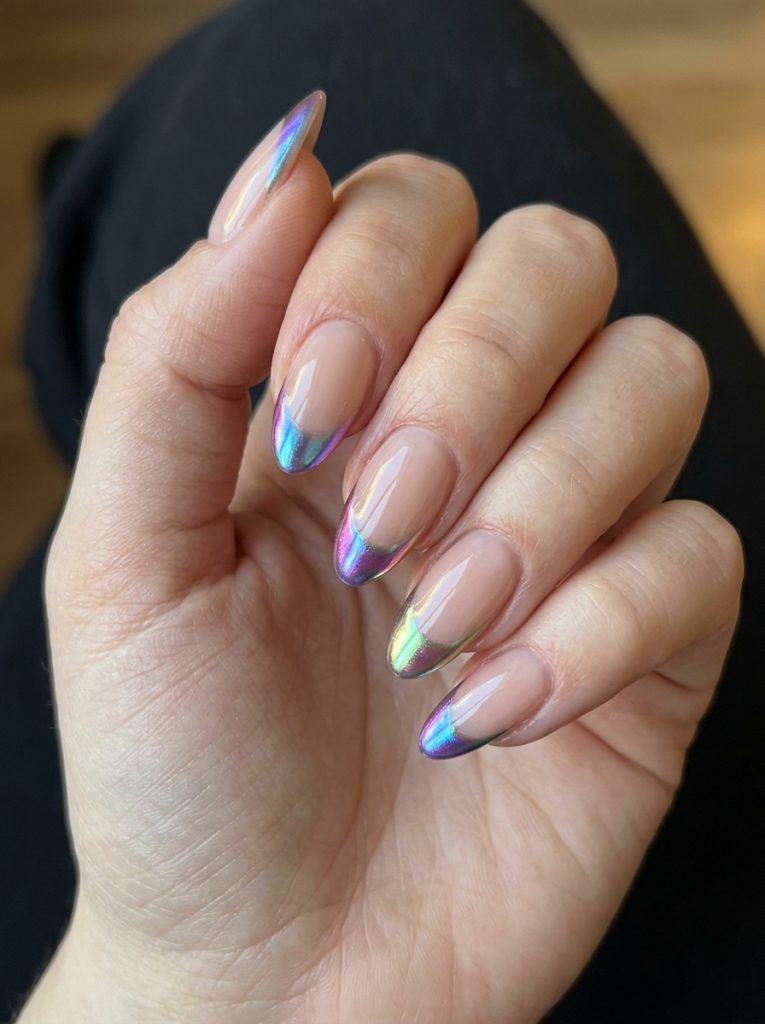
9. Chrome Aurora French Tips
Nail Styling Advice
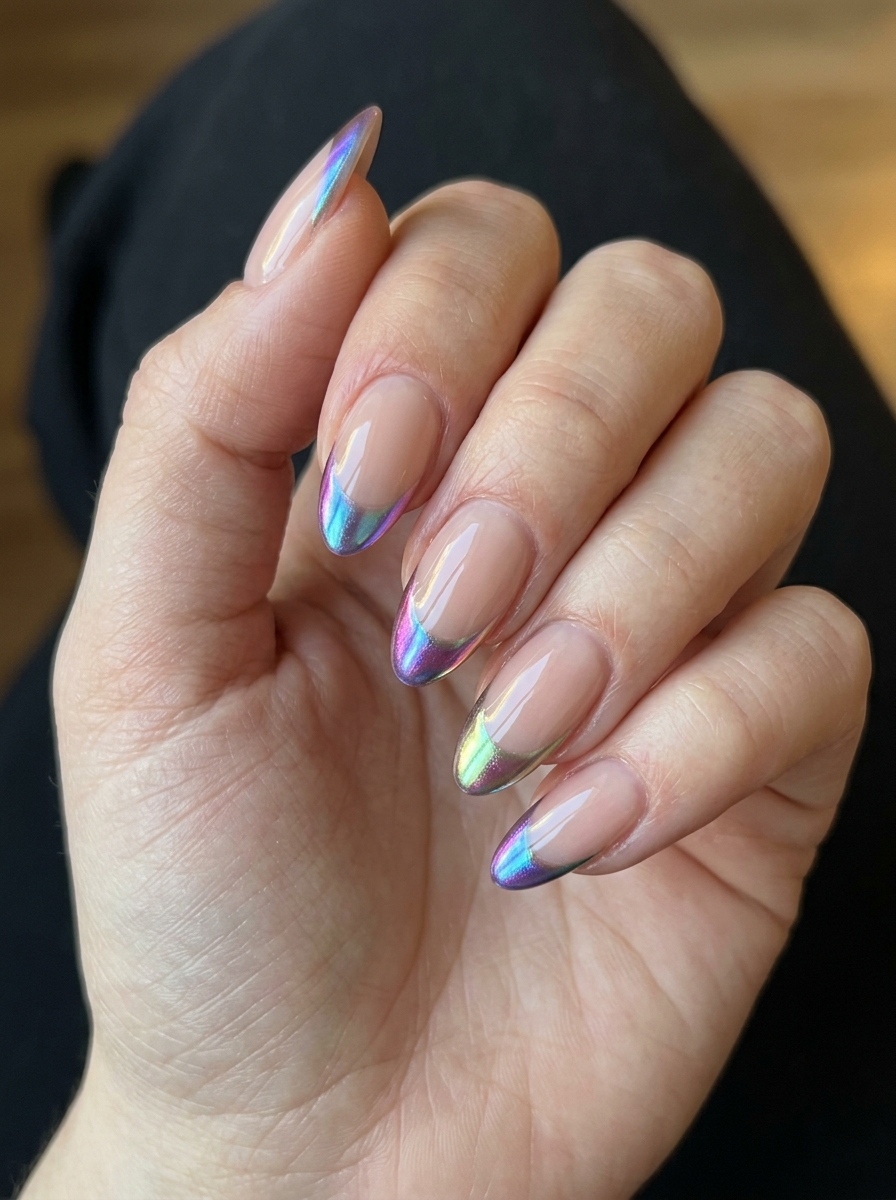
If you want the most show-stopping set in this entire list, this is it. Aurora chrome French tips — that colour-shifting powder over the smile line — are completely mesmerising in person. The way they shift between green, purple, and pink depending on the light is genuinely hard to capture in photos, which makes them even more special in real life.
I’ve done these on medium almond and long stiletto. Both are stunning, but almond feels more wearable day-to-day. This is where it gets tricky: the chrome powder needs to be applied to an uncured gel top coat for maximum payoff. Skipping that step gives you a dull finish, and that’s frustrating after putting in the work.
How to Create This Look
Apply a clear or sheer base. Paint aurora or white chrome powder only on the tip area using a French tip guide. Apply a gel top coat, but do not cure yet. Rub aurora chrome powder over the tip with a sponge applicator — the powder bonds to the uncured gel. Cure under LED. Seal with a no-wipe top coat to protect the chrome. Advanced technique — but the result is worth every step.
Occasions to Wear
Spring evenings out, weddings, upscale brunches, content shoots, any occasion where you want people to stop and ask about your nails. This is a conversation-starter set.
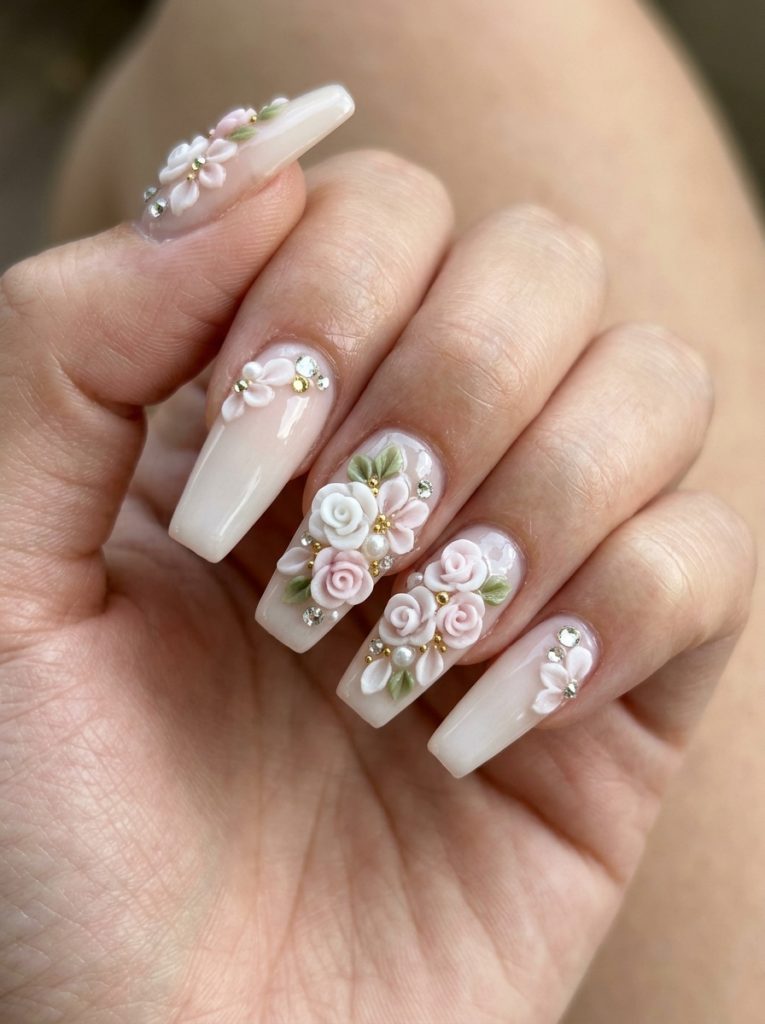
10. D Floral Press-On Nails
Nail Styling Advice
Not everyone has the time or budget for a salon set every few weeks, and that’s where high-quality press-ons with 3D floral details genuinely shine. I’ve been pleasantly surprised by how far press-ons have come. The good ones now — the ones with actual sculpted resin flowers and rhinestones — look better than plenty of salon sets I’ve seen.
The key is nail sizing. Too small and they lift at the sides. Too large and they look fake from the side profile. Take time to size properly, and use gel glue over nail tabs if you want them to last through a full week or an event.
How to Create This Look
File and buff the natural nail surface. Apply a thin layer of gel glue to the natural nail. Press the shaped nail on firmly for 30 seconds. Start at the cuticle and press toward the tip to avoid air bubbles. The 3D floral details are pre-applied — just choose a set with solid resin flower quality. Medium to long coffin or almond shapes tend to look most polished. Application time: 15–20 minutes.
Occasions to Wear
Weddings, graduation parties, vacations, or any event where you need gorgeous nails without salon time. I’ve recommended these for clients travelling for spring holidays — they go on the plane with pretty nails and don’t need to find a salon abroad.
11. Lemon Sorbet Gloss Nails
Nail Styling Advice
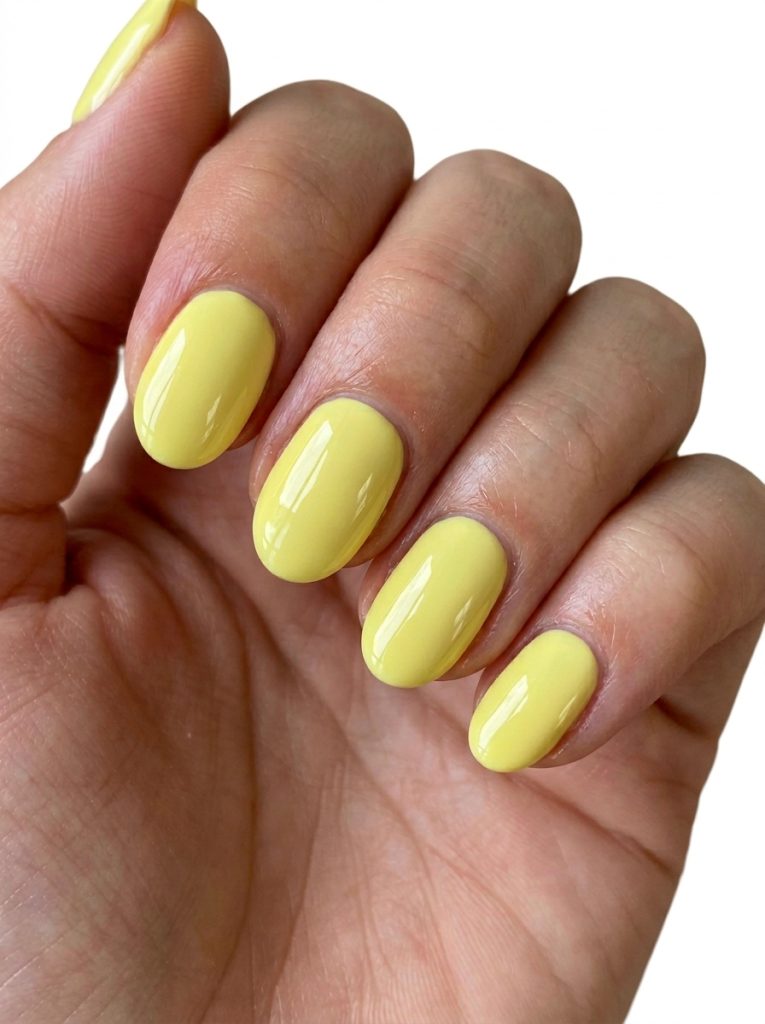
This is one of those shades that instantly lifts your whole look. Lemon sorbet yellow sits right between pastel and bright — soft enough for spring, but still noticeable. I’ve found it works especially well on short to medium oval nails because the rounded shape keeps the colour from feeling too sharp.
The finish matters here more than the colour itself. You want that ultra-glossy, almost syrupy shine. If the top coat isn’t reflective enough, the yellow can look flat instead of fresh. On deeper skin tones, this shade looks incredible — it pops in a really clean way. On lighter skin, go slightly warmer (more buttery than neon) so it doesn’t wash out.
How to Create This Look
Apply a sheer pink or nude base first to soften the yellow. Follow with two thin coats of a lemon pastel gel polish. Cure between layers. Finish with a high-gloss top coat — and don’t rush it, this is where the look comes together. Beginner-friendly and takes about 30–35 minutes.
Occasions to Wear
Spring holidays, weekend outings, casual brunch, beach days. It’s cheerful without feeling loud, which is harder to achieve than it sounds.
12. Sheer Pink Jelly Nails
Nail Styling Advice
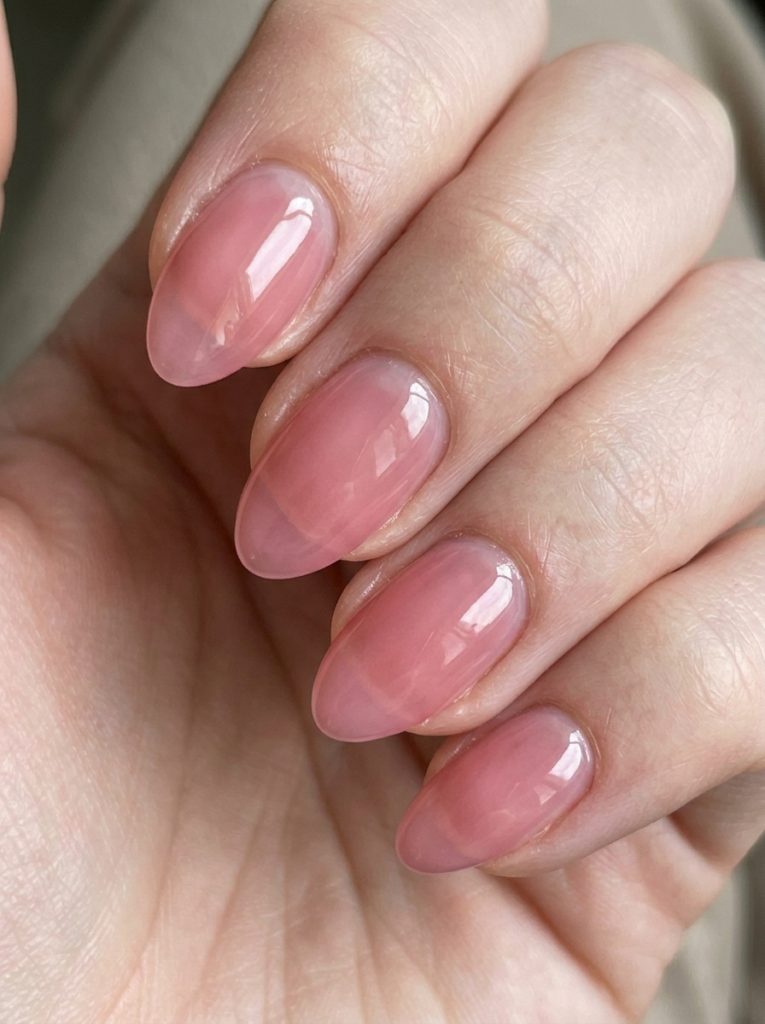
This is that “your nails but better” look that clients keep asking for in April. Sheer pink jelly nails have this translucent, hydrated finish that makes nails look healthy and polished without obvious colour.
I usually recommend this for short almond or natural rounded nails. The transparency works best when the nail shape is clean and well-filed. One thing I always mention: nail prep is everything here. Because the polish is sheer, any unevenness underneath will show through.
How to Create This Look
Apply a strengthening base coat, then layer two to three thin coats of sheer pink jelly polish. Build slowly — don’t try to get opacity in one go. Finish with a glossy top coat. Optional: add a tiny bit of cuticle oil at the end for that extra “glass” effect.
Occasions to Wear
Work, interviews, everyday wear, minimalist outfits. This is one of those sets that works literally anywhere.
13. Baby Blue Chrome Nails
Nail Styling Advice
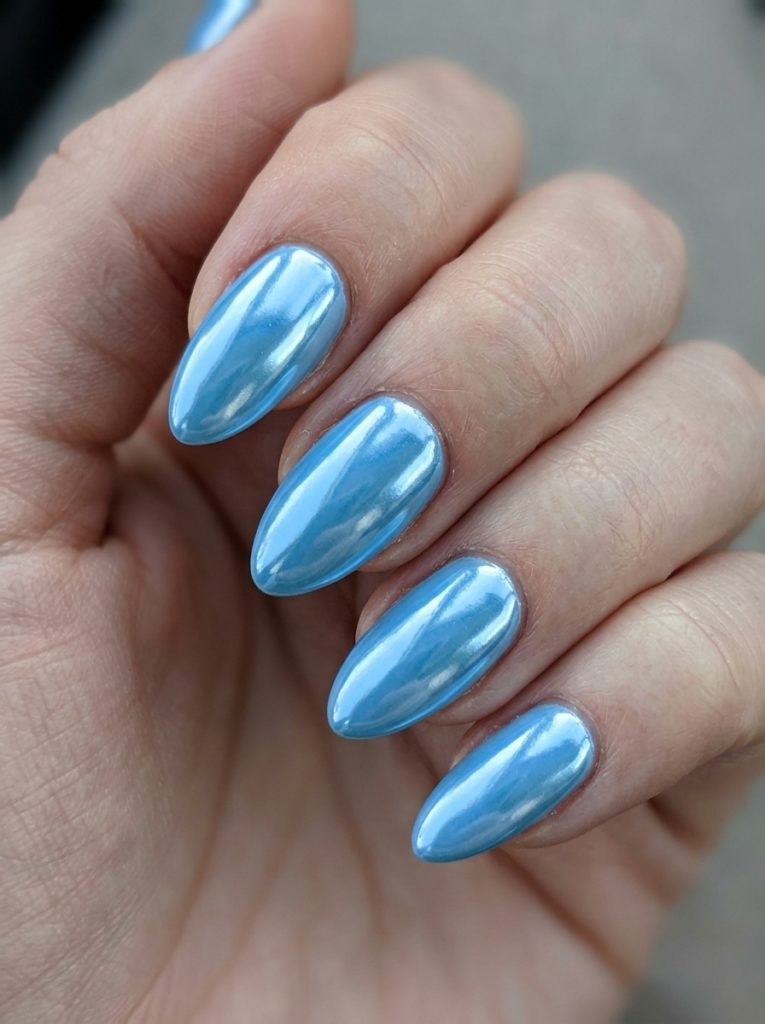
This is where soft meets futuristic. Baby blue on its own is already very April, but adding chrome gives it that reflective, almost liquid-metal effect that catches light in a completely different way.
I prefer this on medium almond or coffin shapes. Too short and you lose the impact of the chrome shift. One thing to keep in mind — chrome highlights every detail, so your base application needs to be smooth.
How to Create This Look
Apply a baby blue gel base and cure. Add a no-wipe top coat and cure again. Rub chrome powder over the nail using a sponge applicator until fully mirrored. Seal with another layer of top coat. Intermediate level — mostly because chrome can be a bit tricky the first time.
Occasions to Wear
Evening events, parties, content shoots, nights out. It leans more statement than subtle.
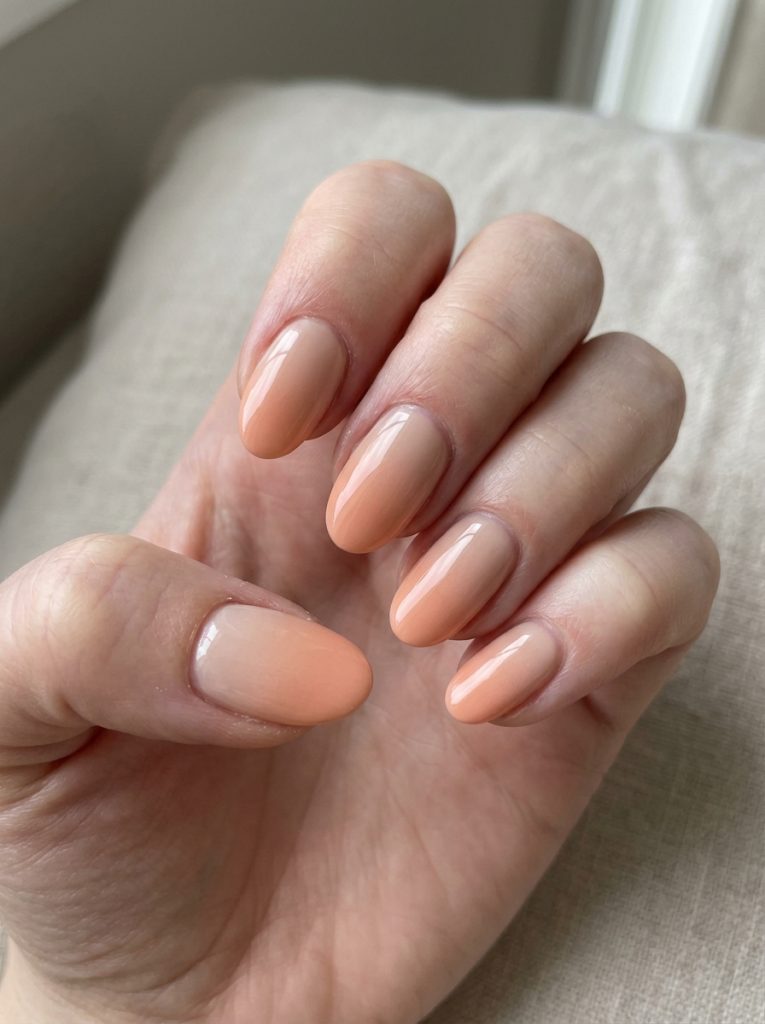
14. Soft Peach Gradient Nails
Nail Styling Advice
Peach tones are underrated for April. They sit right between pink and orange, which makes them flattering across a wide range of skin tones. A soft gradient version adds dimension without making the design feel busy.
Oval and almond shapes work best here — they help the gradient flow naturally. I’ve tried this on square nails and it just doesn’t blend as smoothly visually.
How to Create This Look
Start with a pale nude base. Use a sponge to blend peach into a slightly deeper coral shade toward the tip. Dab lightly and build in layers until smooth. Clean edges, cure, and seal with a glossy top coat.
Occasions to Wear
Day events, spring weddings, brunch, casual dates. It’s soft but still has warmth.
15. Green Tea Minimal Nails
Nail Styling Advice
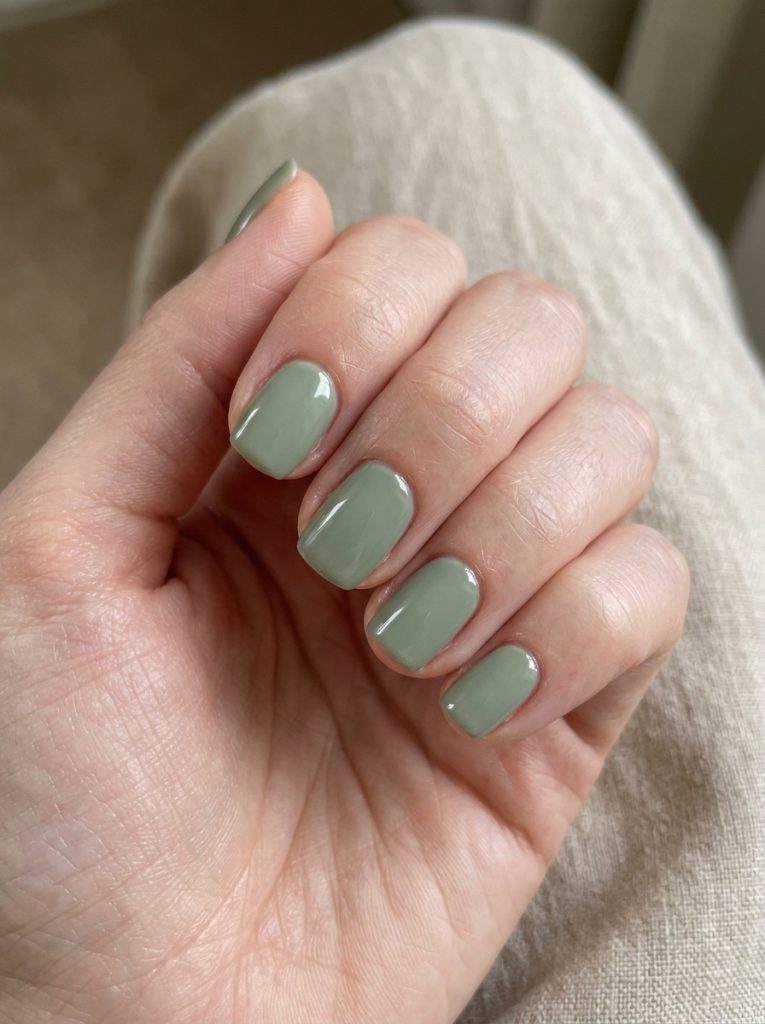
This shade is subtle in a very intentional way. Think muted sage with a slightly milky finish — calm, clean, and very wearable. I’ve noticed this becoming more popular with clients who want something different from pinks but still understated.
Short square or squoval nails suit this best. It keeps the look structured and modern.
How to Create This Look
Apply two coats of a muted green tea shade. Keep layers thin for an even finish. Seal with either a matte or glossy top coat — both work, but matte gives it a more editorial feel.
Occasions to Wear
Office, everyday wear, minimalist wardrobes, travel. Quietly stylish.
16. Pink French Tips with Micro Hearts
Nail Styling Advice
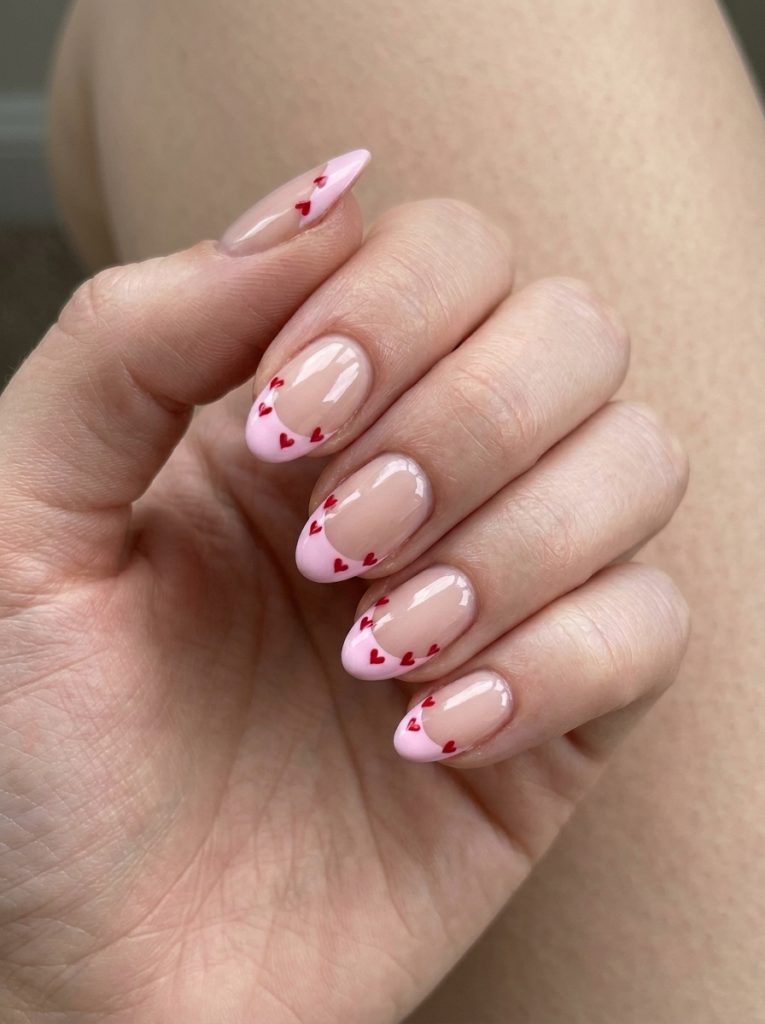
This is a softer take on playful nail art. A classic pink French tip paired with tiny heart accents — usually just one or two per nail — keeps it from feeling overdone.
I’ve done this on short almond nails and it works beautifully. The key is scale. The hearts need to be small enough to look like detail, not the main event.
How to Create This Look
Create a soft pink French tip over a nude base. Using a dotting tool or liner brush, add tiny heart shapes near the cuticle or along the tip line. Seal with glossy top coat.
Occasions to Wear
Date nights, casual outings, spring holidays. It has personality without being loud.
17. Lilac Marble Nails
Nail Styling Advice
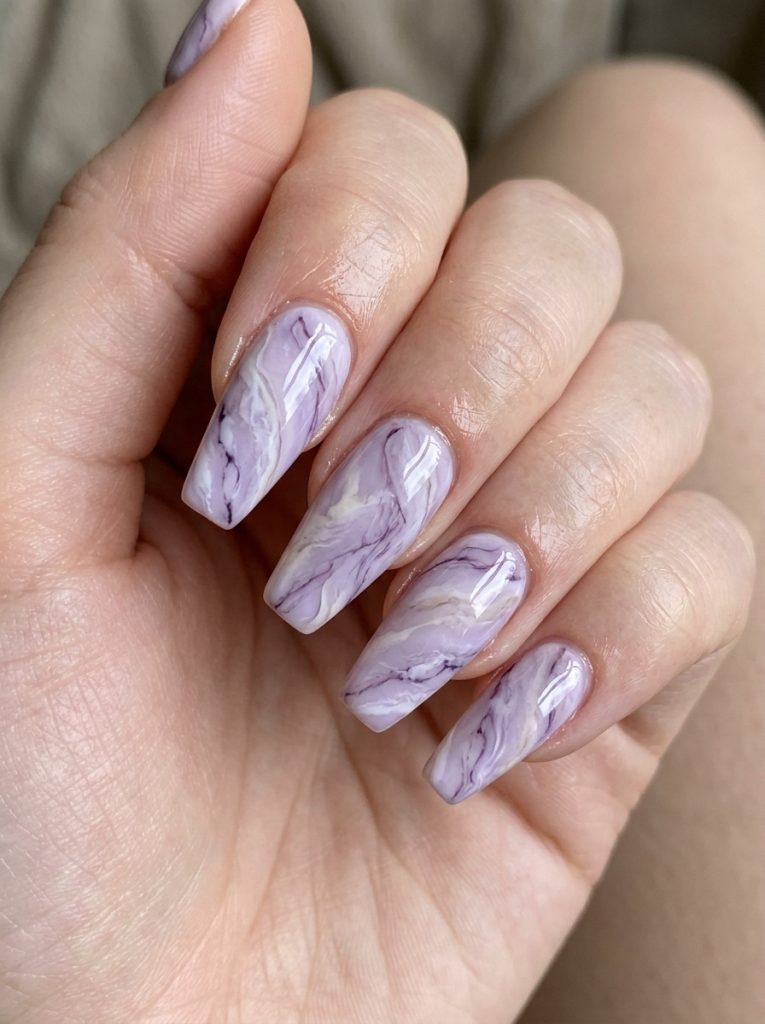
Marble nails always come back around, and lilac is perfect for April. It keeps the look soft instead of heavy. I like combining lilac with white and just a hint of grey veining.
Medium coffin or almond shapes give enough space for the marble detail to show properly.
How to Create This Look
Apply a white base. While still slightly wet, add drops of lilac and gently swirl using a fine brush or needle tool. Keep movement light — overworking it turns muddy. Cure and seal with glossy top coat.
Occasions to Wear
Events, dinners, slightly dressy settings. It sits between subtle and statement.
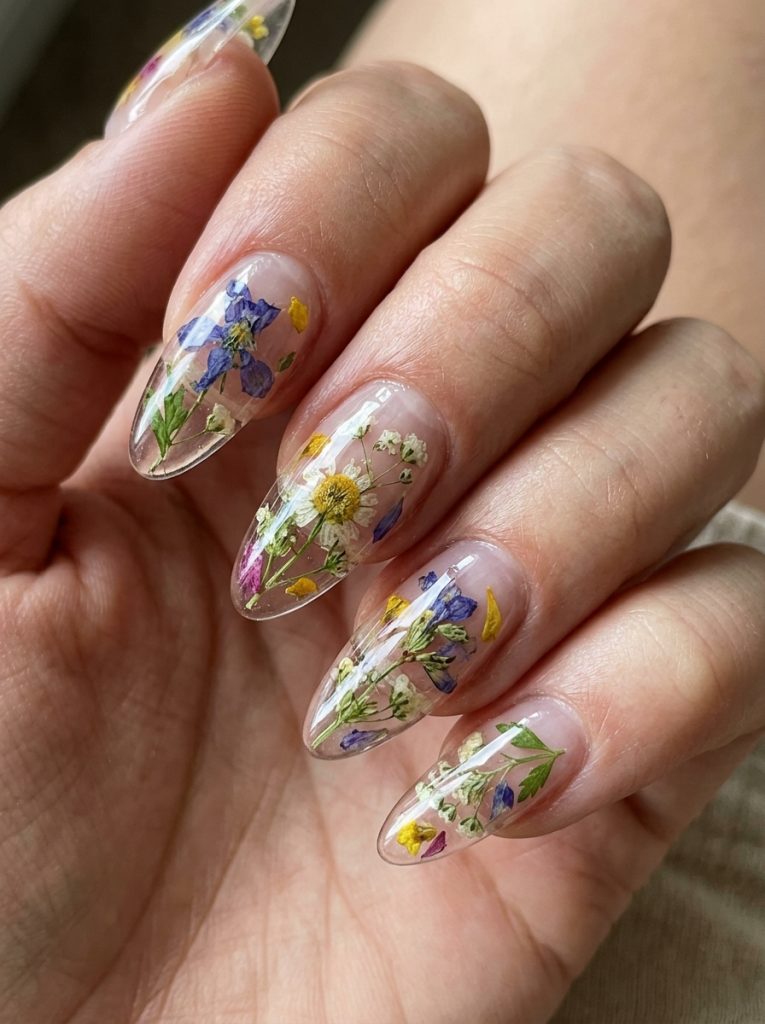
18. Clear Nails with Embedded Flowers
Nail Styling Advice
This is one of the most “spring” designs you can do. Real or dried mini flowers embedded in clear gel create a floating effect that looks delicate and detailed at the same time.
Longer nails work best here — almond or coffin shapes give space for the placement.
How to Create This Look
Apply a clear builder gel layer, place dried flowers using tweezers, then encapsulate with another layer of clear gel. File smooth and finish with a glossy top coat.
Occasions to Wear
Weddings, vacations, spring photoshoots. It feels special without needing bright colours.
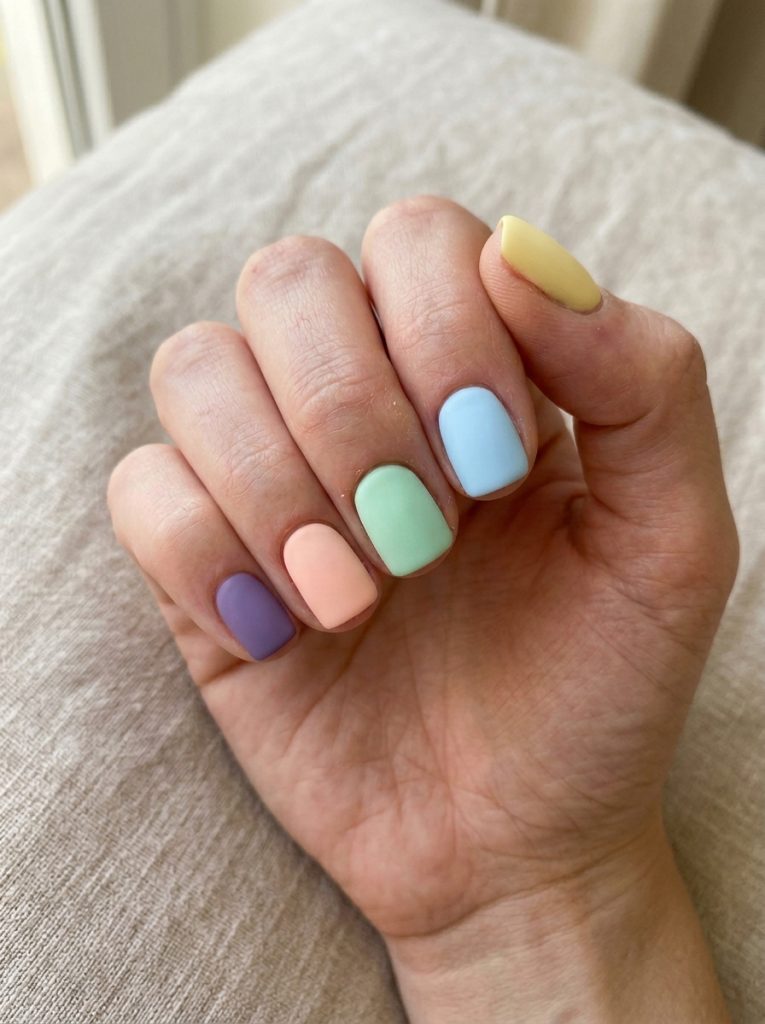
19. Matte Pastel Mix Nails
Nail Styling Advice
Instead of a gradient, each nail gets its own pastel shade — lilac, mint, peach, baby blue — all tied together with a matte finish. The matte top coat is what keeps it from looking too playful.
Short to medium square nails give the cleanest result.
How to Create This Look
Apply different pastel shades on each nail. Cure, then finish with a matte top coat. That’s it — simple but effective.
Occasions to Wear
Casual days, travel, social outings. It’s relaxed and fun without being overdesigned.
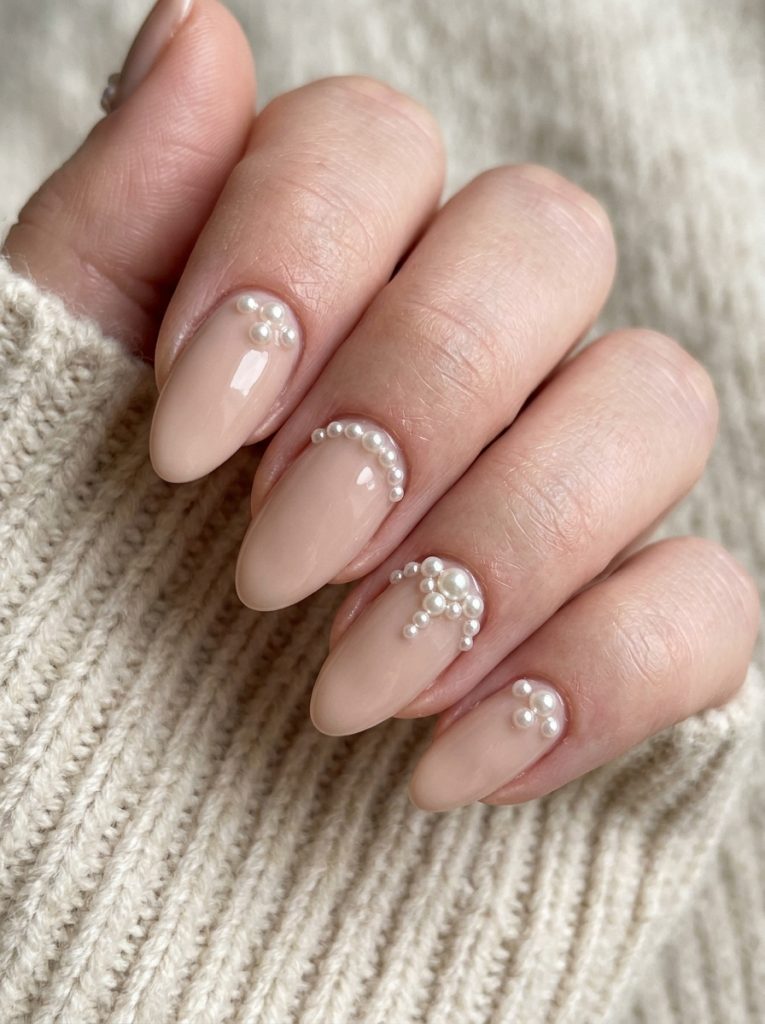
20. Pearl Accent Nude Nails
Nail Styling Advice
This one leans elegant. A soft nude base with tiny pearl accents placed near the cuticle or along one side of the nail. It’s minimal, but the texture adds interest.
Almond and oval shapes work best here.
How to Create This Look
Apply nude polish, cure, then use nail glue or gel to place small pearl embellishments. Seal carefully around (not over) the pearls with top coat.
Occasions to Wear
Weddings, formal events, dinners. Understated but polished.
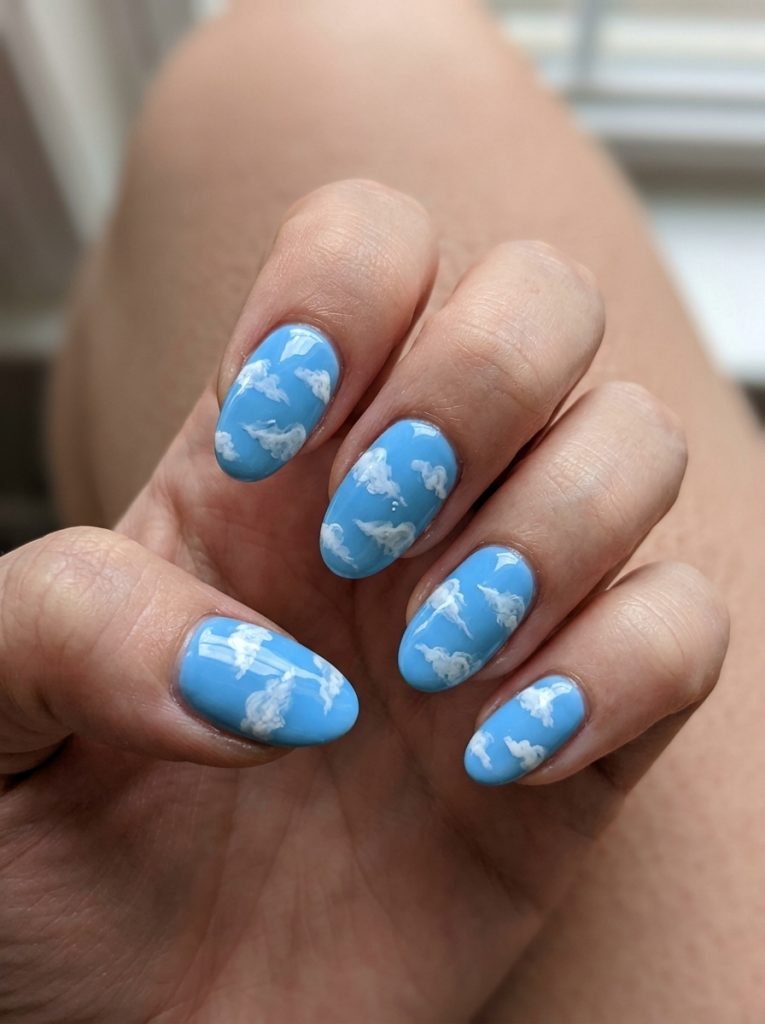
21. Sky Blue Cloud Nails
Nail Styling Advice
This one is playful in a very light way. A sky blue base with soft white cloud details — not too cartoonish, just soft and slightly blurred edges.
Medium oval nails give enough space for the cloud shapes.
How to Create This Look
Apply sky blue base. Use a sponge or small brush to dab white polish into soft cloud shapes. Blend edges lightly. Seal with glossy top coat.
Occasions to Wear
Daytime outings, holidays, relaxed weekends. It has that carefree spring feel.
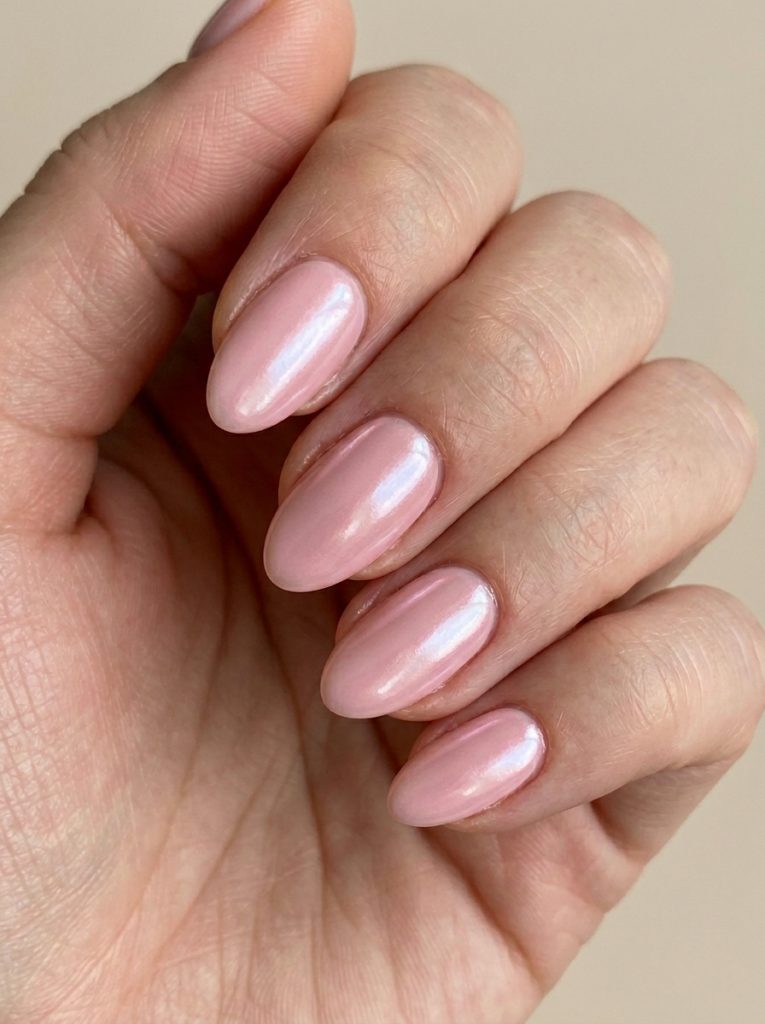
22. Blush Pink Chrome Glaze Nails
Nail Styling Advice
This is the pink version of the glazed trend — soft blush with a pearly chrome overlay. It catches light in a really subtle way, which is why it’s so popular right now.
Short almond or oval nails work beautifully for this.
How to Create This Look
Apply blush pink base. Add a no-wipe top coat and cure. Rub a fine chrome powder lightly over the surface for a glazed effect. Seal with another top coat.
Occasions to Wear
Everything. Work, events, everyday wear — this is one of the most versatile designs in the entire list.
A Few Quick Tips to Make These Last
Regardless of which look you choose, cap the free edge with your top coat — swipe it across the very tip of the nail, not just the surface. This single habit extends the wear time noticeably. Avoid using your nails as tools (I know, easier said than done). And reapply a thin top coat layer every few days if you want maximum longevity without a full redo.
For gel sets, cure times actually matter. Undercured gel chips faster and stays slightly tacky. If your lamp is older, add an extra 10 seconds per layer.
April nails don’t need to be complicated to be beautiful. Some of my most-requested sets this month are the simplest ones — the milky whites, the barely-there glazes, the clean mint tips. But if you want to go all in with the aurora chrome or the 3D florals, spring is absolutely the time to do it.
Personally, I keep coming back to cherry blossom and the lavender glaze every April. They just feel right for the season. Whatever you choose — enjoy the process. Good nails really do change how you carry yourself through the day.