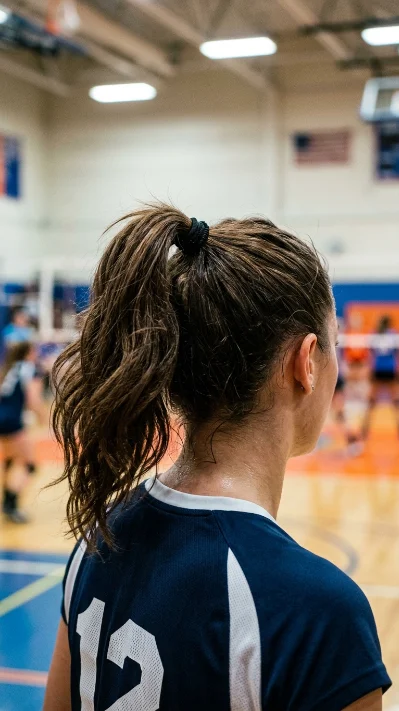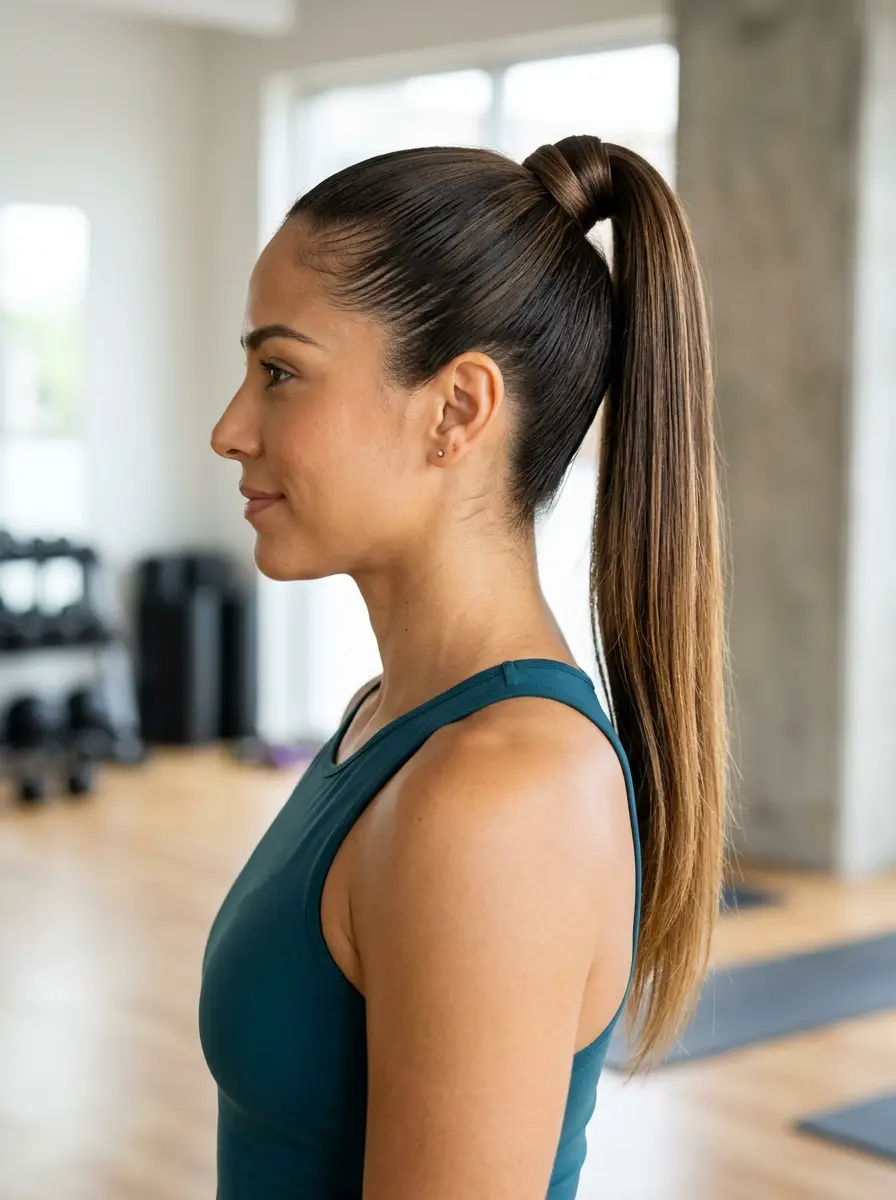
12 Best Low Maintenance Hairstyles for Working Women in Their 30s
You wake up at 6:45. You have a meeting at 9. Your hair is doing that thing again where one side flips out and the other side just gives up.
Sound familiar?
Most working women in their 30s don’t have an hour to spend on their hair. We’re juggling careers, maybe kids, maybe a social life, maybe just trying to get eight hours of sleep. The last thing you need is a haircut that demands a 20 minute blowout every morning.
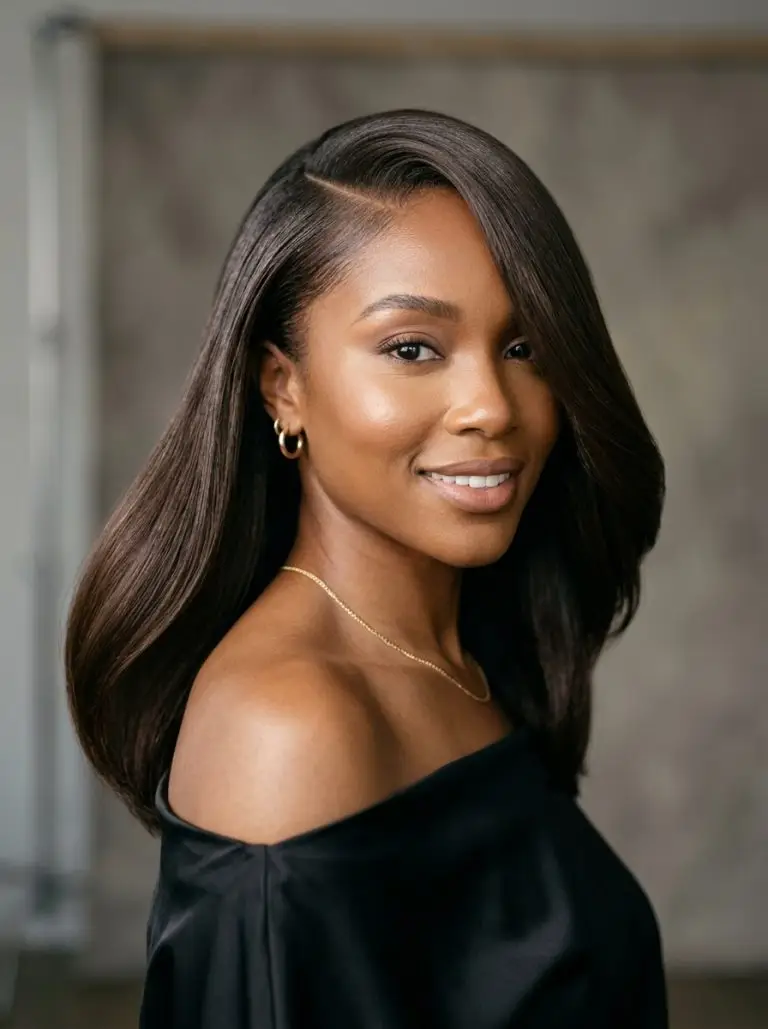
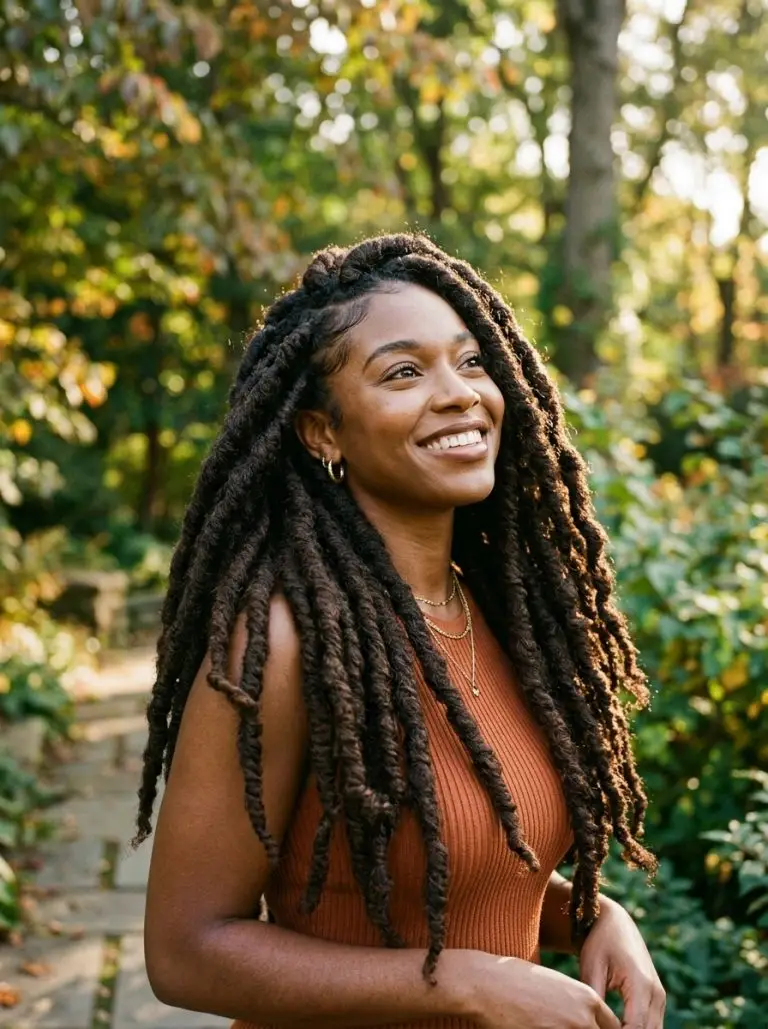
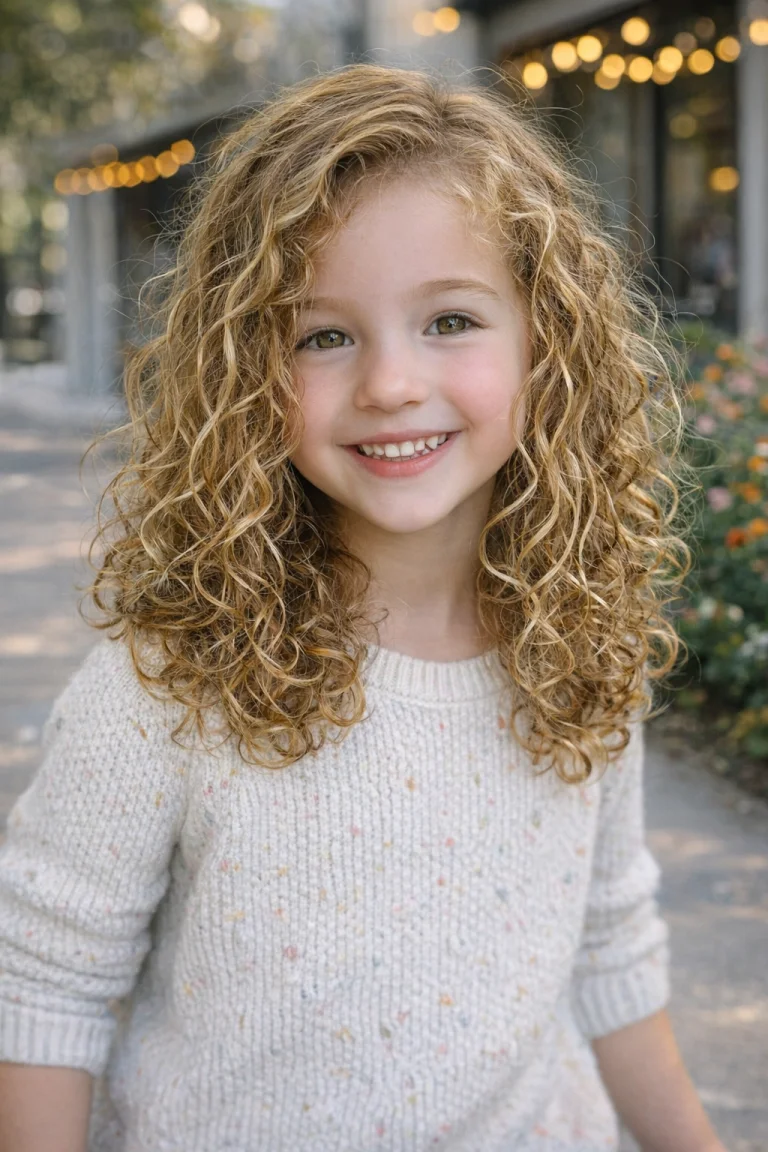
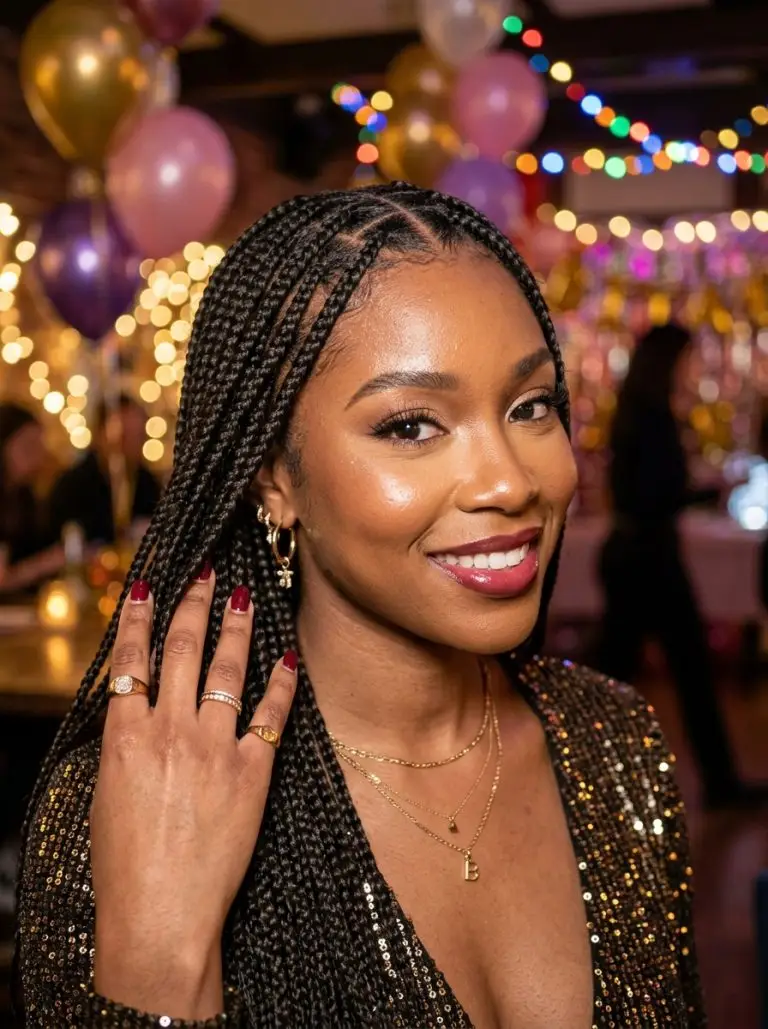
That’s where a smart cut comes in.
A truly low maintenance style isn’t about being lazy. It’s about working with what your hair already wants to do. It’s about a cut that looks better on day two. It’s about walking into a meeting and not worrying if your hair still looks like it did at 8 AM.
I’ve spent years behind the chair. I’ve seen what happens when a client leaves with a style that needs 45 minutes of heat and three products. She calls me two weeks later, frustrated.
So this list is built for your real life. These 12 cuts and styles are the ones my busy clients actually keep, not the ones they abandon after one wash.
Let’s get into it.
1. Soft and Polished, Shoulder Length Lob with Face Framing Layers

Why This Cut Saves You 15 Minutes Every Morning
The lob is the little black dress of haircuts. It never goes out of style and it always looks intentional.
This version sits right at your shoulders or just above. That length is long enough to pull back on gym days but short enough that air drying doesn’t take an hour. The real secret weapon here is the face framing layers. They start around your chin and do all the work of softening your features without you having to curl or wave anything.
You wake up, you brush it, you walk out. Maybe you tuck one side behind an ear. That’s the whole routine.
How to Get This Cut Right at the Salon
Ask your stylist for a blunt perimeter with soft internal layers only around the face. The back stays mostly one length. That keeps the ends looking thick and healthy while the front has just enough movement to not feel heavy.
Length is key here. If it hits right at your collarbone, it will flip out when it touches your shoulders. Ask for it to sit either a full inch above the collarbone or a full inch below. No in between.
For color, keep your natural base and add a few fine highlights just around your hairline. That brightens your face without forcing you into root touch ups every four weeks. This color can grow for three months before anyone notices.
Who Should Try This Cut
This works on almost everyone, which is rare to say honestly.
If you have a round or heart shaped face, the face framing pieces slim and elongate. If you have fine hair, the blunt perimeter makes it look twice as thick. Medium and thick hair textures love this cut because the weight is removed only where you need movement.
Straight and wavy textures get the best results with air drying. Curly girls can absolutely wear this but you’ll want to ask for the layers to be cut dry so your curl pattern is respected.
How to Switch It Up on Day Three
When your blowout fades, spray the front pieces with a little water and twist them away from your face while they dry. That gives you a soft bend without any hot tools.
Or flip your part to the other side. Instant volume at the roots and a totally different shape. No products needed.
2. Quiet Confidence, Blunt Bob with a Deep Side Part
The Power of a Single Length Cut
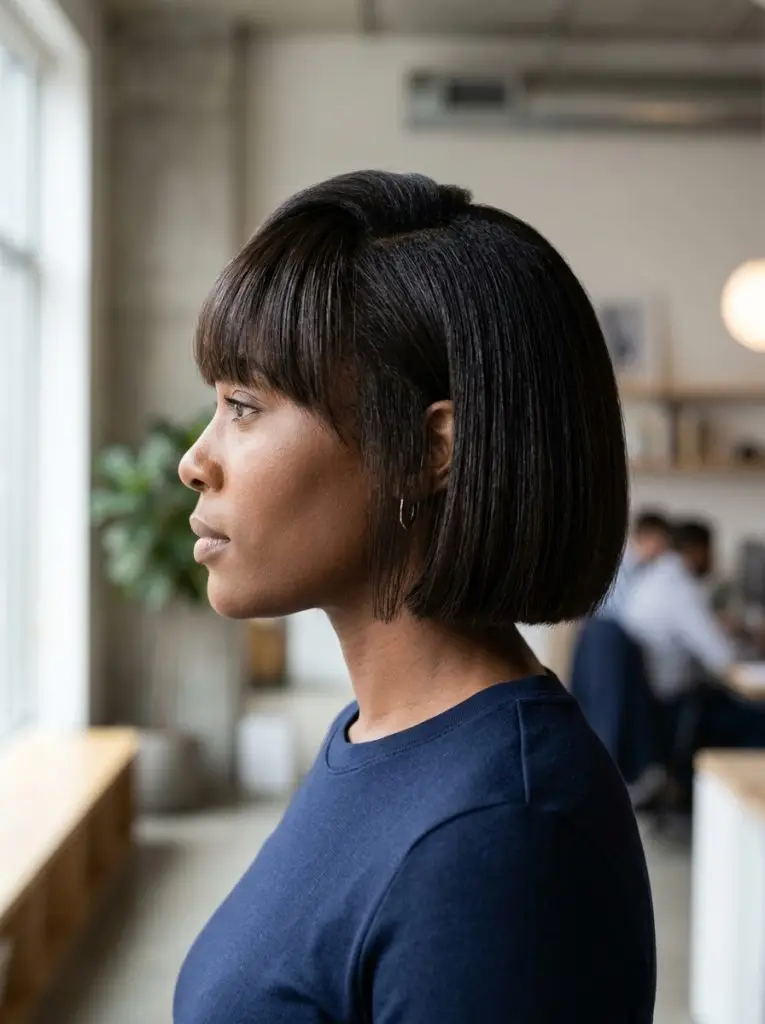
There is something incredibly chic about a blunt bob. It says you know exactly who you are and you don’t need to try hard to prove it.
A one length cut removes the need for layering, which removes the need for styling those layers. Every hair on your head falls to the same point. When it’s straight, it looks razor sharp. When it air dries with a little texture, it looks cool and undone. Either way, you win.
The deep side part is what keeps it from looking like a helmet. It creates natural volume at the crown and gives the whole look some movement without a single layer being cut.
How to Style It When You Have Five Minutes
Start with damp hair. Apply a heat protectant and a tiny dab of smoothing cream. Blow dry using a paddle brush, pulling the hair down and slightly forward toward your face on each side.
The deep part goes where your natural part tries to go, just pushed over by about an inch. Don’t force it somewhere your hair doesn’t want to be. That’s a battle you’ll lose by lunchtime.
After it’s dry, run a flat iron through the mid lengths and ends only. Leave the roots alone so they keep some natural lift. Finish with one pump of shine serum rubbed between your palms and smoothed over the surface.
Who This Flatters Most
This cut was made for oval and square face shapes. The blunt line at the chin balances a strong jaw beautifully.
It works best on fine to medium hair that’s naturally straight or wavy. If your hair is very thick or curly and you want this precise look, you’ll need to commit to silk pressing it. But on the days you don’t, a blunt cut on curly hair looks like a gorgeous rounded shape. Still intentional, just different.
How to Keep It Looking Fresh
This is the one cut on this list that does need regular trims. Every five to six weeks you’ll want the ends cleaned up so that sharp line stays sharp.
The good news? Growing it out is easy. It just becomes a longer blunt cut. No awkward grow out phase like you get with heavy layers or asymmetrical shapes.
3. Effortless Texture, Curly Shag with Curtain Bangs

Stop Fighting Your Curls Every Morning
If you have naturally curly or wavy hair and you’ve been straightening it into submission since 2010, this cut is your permission slip to stop.
The shag is built for curls. All those layers remove weight so your curls can spring up instead of being pulled down by length. The curtain bangs open up your face and give you softness around the eyes without the commitment of a full fringe. When you wake up, you refresh with a little water and some curl cream, scrunch, and go.
This is the definition of working with what you have. No more hour long battles with a flat iron.
What to Ask Your Stylist For
Ask for a mid length shag that hits between your chin and shoulders. The layers should be short at the crown and get progressively longer toward the bottom. You want choppy, not blended. Choppy layers create more texture and movement in curly hair.
The curtain bangs should be the shortest piece, hitting around your cheekbones when dry. Ask your stylist to cut your hair dry if possible. Curls shrink when they dry and you don’t want to be surprised by how short things end up.
For color, a single process in a warm tone keeps things simple. Copper, auburn, or caramel over a brown base all glow on curly texture without needing frequent touch ups.
Who Rocks This Style Best
Curly and wavy textures from fine to thick all work here. The shag was originally designed for curls and waves so it’s one of the few cuts that truly works across the curl spectrum.
Oblong and oval face shapes benefit most from the curtain bangs because they break up the vertical length. But round faces can wear this beautifully too if the bangs are a little longer and sweep outward at the cheekbones.
Straight hair can do a shag but it requires more daily styling to create the texture this cut is meant to show off. So if your hair is pin straight, skip to another style on this list.
Making It Last Between Washes
Curls don’t need daily washing. On day two or three, mist your hair with a water and leave in conditioner mix. Scrunch upward with your hands. Let it air dry for 10 minutes while you do the rest of your morning routine.
At night, pile it loosely on top of your head in a satin scrunchie. That preserves the volume at the roots and keeps the curls from getting flattened while you sleep.
4. Understated and Sharp, Sleek Long Hair with a Middle Part
Why Less Really Is More Here
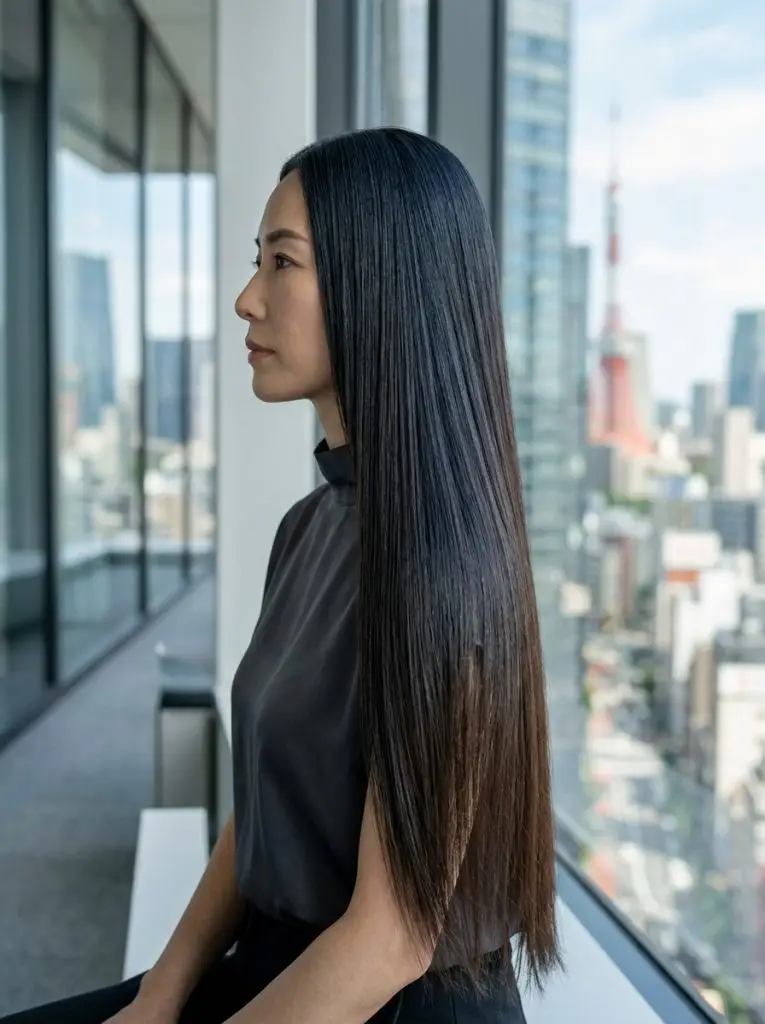
Long, one length hair gets a bad rap for being boring. But boring is subjective. What I see is a woman who knows her time is valuable and refuses to spend it on complicated styling.
This cut is zero layers, zero bangs, zero tricks. Just healthy, shiny hair falling straight down. It looks expensive and intentional every time. The middle part gives it a modern, symmetrical feel that reads as put together even when you literally just brushed it and walked out the door.
You don’t need to do anything to this hair for it to look good. That’s the whole point.
How to Keep Long Hair Looking Healthy
The number one mistake with long hair is holding onto damaged ends. Split ends travel up the hair shaft and make the whole length look frizzy and thin. Get a trim every eight to ten weeks. You’re not losing length. You’re keeping the length you have looking expensive.
Wash it less than you think. Twice a week is plenty for most hair types. Dry shampoo at the roots on day three and four absorbs oil and adds a little lift. Brush it through with a boar bristle brush to distribute natural oils from your scalp down to your ends.
Once a week, apply a hair oil from mid lengths to ends an hour before you wash. That keeps the cuticle sealed and the shine high.
Who This Works For
Straight and slightly wavy hair textures thrive with this cut. Medium to thick density gives you that heavy, glossy look that makes the one length style so striking.
Oval and oblong face shapes balance beautifully with a center part. Square faces can absolutely wear this too. The long, uninterrupted length softens a strong jawline better than any layers could.
If your hair is fine, this style can still work but keep the length around chest level instead of waist level. Anything longer on fine hair starts to look stringy at the ends.
The 30 Second Refresh
When your roots start to fall flat, flip your head upside down and blast the roots with dry shampoo. Massage it in with your fingertips. Flip back up and smooth the surface with a tiny drop of serum on your palms.
That’s it. You look like you just walked out of a blowout even on day four hair.
5. Busy Morning Savior, Low Twisted Bun
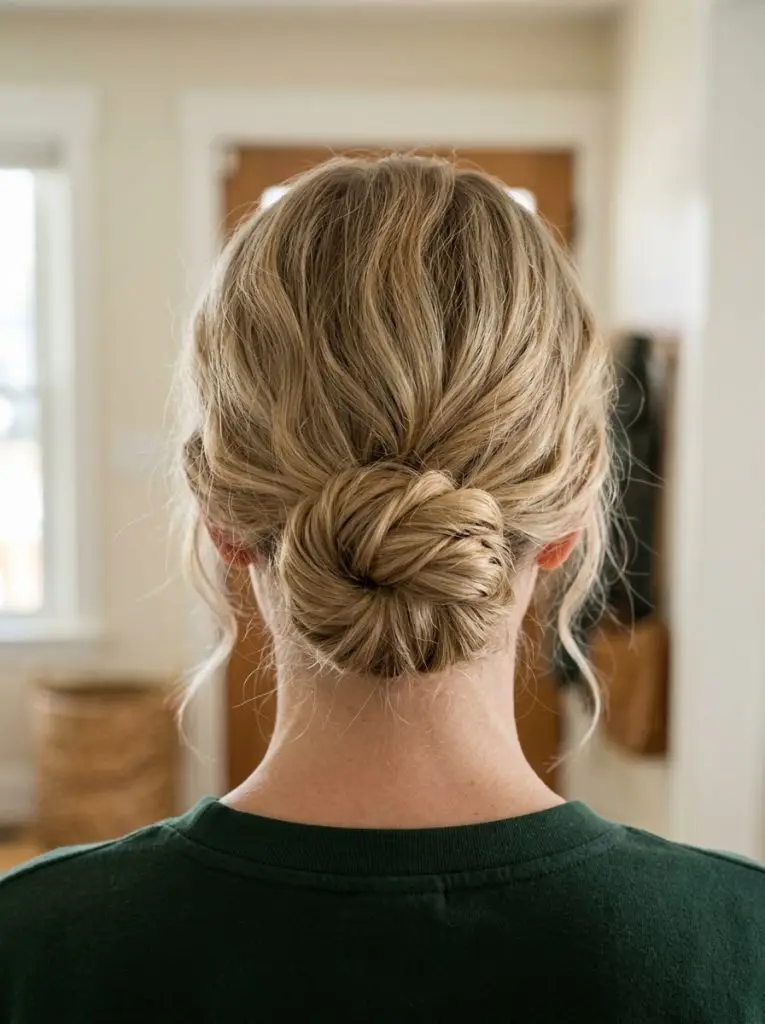
Your Go To When You Hit Snooze Three Times
Some mornings, there is no time. Your hair is a little greasy, you have eight minutes to get out the door, and you need to look like you tried.
Enter the low twisted bun. It takes less than two minutes. It works on dirty hair. It looks elegant enough for a boardroom. This is not the tight, slicked back ballet bun that gives you a headache by 10 AM. This one sits low and soft at the nape of your neck and actually looks better when it’s a little undone.
How to Twist It in 90 Seconds
Gather your hair at the nape of your neck like you’re making a low ponytail. Don’t use a brush. Use your fingers. The texture from not brushing it smooth is what makes this look modern instead of severe.
Twist the length loosely from the base all the way to the ends. Keep the twist relaxed. If you twist too tight it looks like a cinnamon roll and loses the softness. Wrap the twisted hair around itself into a coil and tuck the ends under.
Secure it with two or three bobby pins slid in from the bottom upward. That hides the pins and gives better hold than pushing them straight in. Pull out a few wisps around your ears and at the nape of your neck. Those pieces make it look effortless.
When to Wear This Style
This bun works for every occasion where you need to look polished fast. Morning meetings, school drop off, video calls where only your top half shows. It’s also great for hot days when you can’t stand hair on your neck.
All hair textures can do this. Fine hair gets a little extra grip from a spritz of texturizing spray before you twist. Thick hair might need a few extra pins. Curly hair looks especially beautiful in this style because the twists show off all that natural texture.
Two Ways to Change It Up
Add a small gold or tortoise hair clip right above the bun. That dresses it up without adding any time to your routine.
Or twist the hair to the side instead of straight back. Gather it over one shoulder and twist the bun sitting just behind your ear. Same technique, totally different look.
6. Fresh and Lived In, Mid Length Curly Cut with Rounded Shape
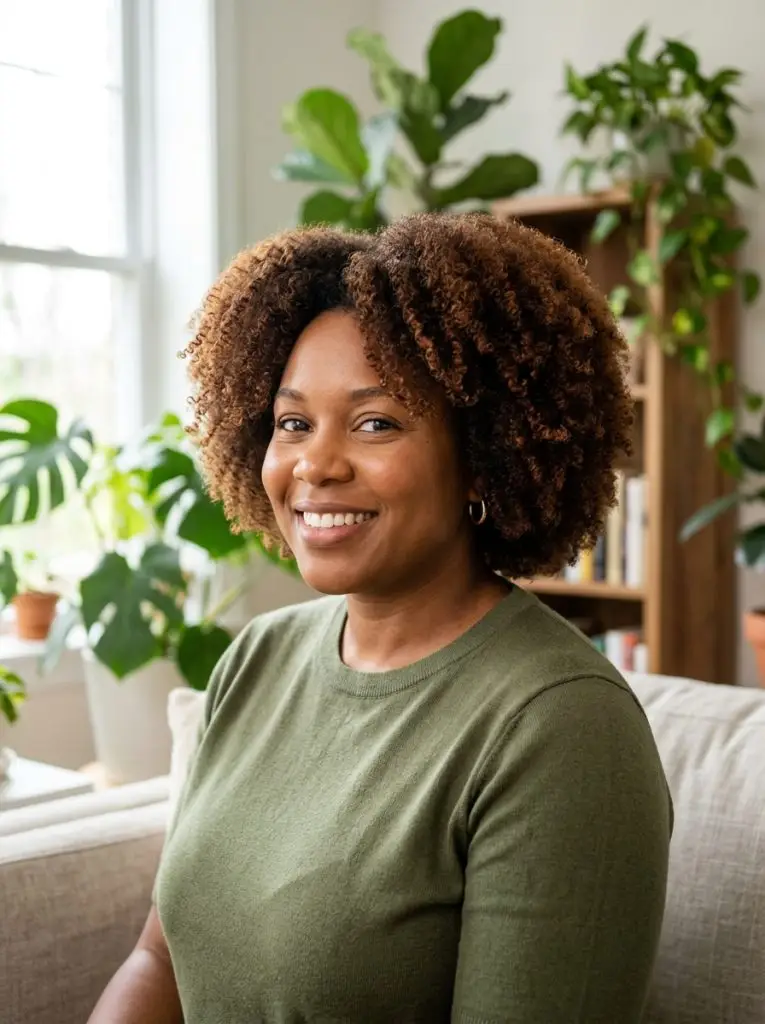
A Shape That Does the Work for You
The rounded curly cut is a masterclass in letting your hair be itself. The shape is cut into a perfect circle when your hair is dry and in its natural state. Every curl falls exactly where it needs to so the overall silhouette is balanced and full.
You don’t have to manipulate individual curls into place. The cut does that for you. On wash day, you cleanse, condition, apply your products, and either diffuse or air dry. The shape comes together on its own because the foundation is already there.
This is the ultimate wash and go style. What you get is a halo of curls that looks intentional and joyful without any daily fussing.
What Makes This Cut Different
Most haircuts are cut on wet hair pulled straight. A rounded curly cut is cut dry, curl by curl. Your stylist shapes it the way your hair actually lives, not the way it looks when it’s soaking wet and stretched out.
The length should fall somewhere between your chin and your shoulders. Any shorter and you lose the round silhouette. Any longer and the weight pulls the shape down into more of a triangle. The layers are even throughout, not stacked heavy at the crown. That creates the circle.
Color stays simple. A single process in a shade that makes your natural hair glow is all you need. Warm browns, rich coppers, deep burgundies. No highlights necessary.
Who Should Bring This Photo to Their Stylist
This cut is specifically for curly and coily textures. The tighter your curl pattern, the more dramatic and beautiful the round shape looks.
Round and heart shaped faces benefit most because the volume at the sides balances the narrower chin. Oval faces can wear any shape, including this one.
Fine curly hair gets great volume from the shorter length and even layers. Thick curly hair finally gets a shape that removes weight without removing personality.
Keeping It Fresh All Week
Sleep on a satin pillowcase or wrap your hair in a satin scarf at night. In the morning, shake your hair out at the roots with your fingertips. Mist lightly with water and scrunch to reactivate your curl product.
If a few curls look flat, twirl them around your finger with a tiny bit of gel and let them air dry while you finish getting ready. Five minutes, tops.
7. Grown Up and Easy, Long Layers with Curtain Bangs
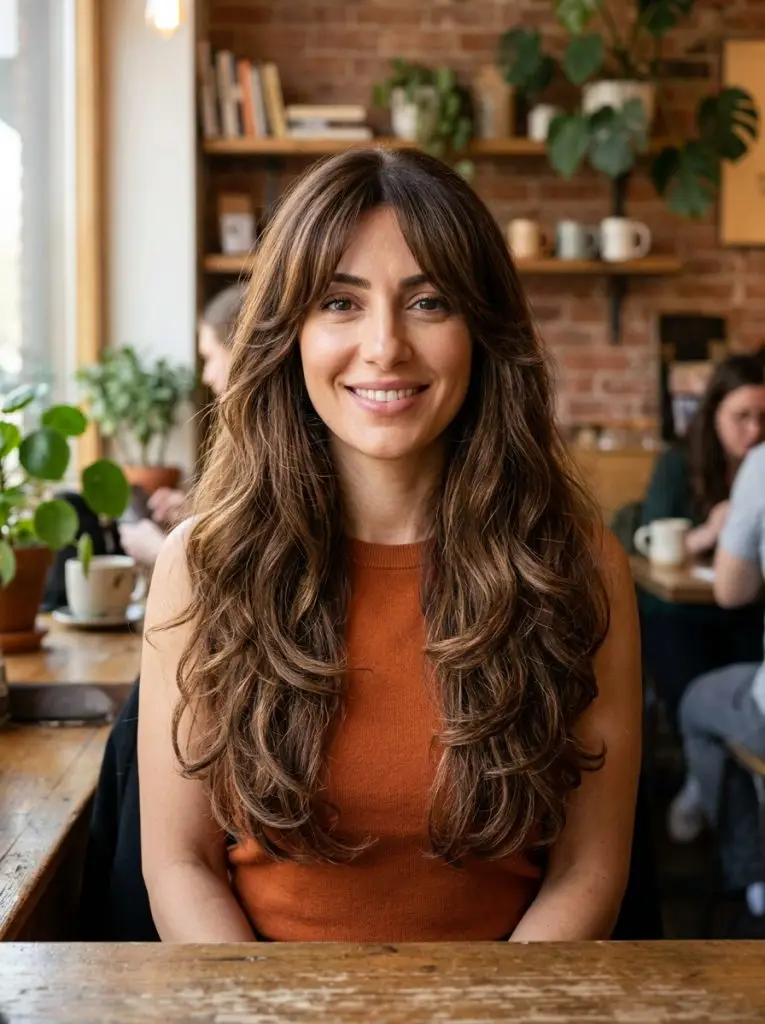
Long Hair That Doesn’t Just Hang There
Long hair without layers can look heavy. It pulls your features down. It feels like a blanket on your back in summer. But you don’t want to lose the length either. You’ve spent years growing it.
Long layers solve that. They remove weight from the inside of the cut without taking away any visible length. The hair moves. It bounces. It doesn’t just sit there like a curtain. Add curtain bangs and suddenly you have a style that frames your face and feels light while still being long enough to pull into a ponytail.
The Cut Breakdown
Ask for long layers that start around your chin in the front and angle down toward the back. The shortest piece in the front should be the curtain bang, hitting right at your cheekbone. From there, the layers gradually lengthen until they blend into your overall length.
The back stays long with minimal layering. You want the movement focused around your face, not through the back where it can make your ends look thin. The curtain bangs should be cut to split naturally where your hair parts. Don’t fight your cowlick. Work with it.
For color, a soft balayage that brightens the ends and leaves your roots natural means you can go four to six months between appointments. The grow out looks like part of the design.
Who Gets the Most Out of This Style
Wavy and straight textures from medium to thick density love long layers. The weight of the hair keeps the layers from flipping out in weird directions.
Oval and oblong face shapes are ideal for curtain bangs. The bangs shorten the appearance of a longer face. Heart shaped faces benefit too because the bangs soften a wider forehead.
Fine hair can do this but keep the layers minimal. Too many layers on fine hair eat up the density at the ends and leave you with a wispy look.
The Five Minute Blowout
Flip your damp hair upside down and rough dry until it’s about 80 percent dry. Flip back up. Take a large round brush and just hit the front sections, pulling them away from your face. Don’t worry about the back. Let the back air dry.
The curtain bangs are the only part that really need attention. Everything else can do its own thing. A little texture spray at the roots gives you volume without having to tease or backcomb.
8. Quick and Put Together, Half Up with a Clip

The Style That Tricks Everyone
The half up clip is my favorite trick to teach busy clients. It looks like you did something. It took you 30 seconds. It keeps hair out of your face during the day. And it works on hair that hasn’t been washed in three days.
You don’t need a fresh blowout for this to look good. In fact, a little second day texture helps the clip grip better and gives the style that effortless feel. This is the look you wear when you want to seem like you have your life together, even if you absolutely do not.
How to Clip It Without Looking Like a 90s Throwback
Start with dry hair. Take a section from above each ear, going straight up to the crown of your head. This should be roughly the top third of your hair. Gather it at the back of your crown, not at the very top of your head. Too high reads junior year prom. Too low reads sad office ponytail.
Hold the section with one hand and twist it once, just enough to give the clip something to bite into. Open your claw clip and secure the twist against your head. Let the ends of the twisted section poke out over the top of the clip for a casual look.
Pull out a couple pieces at your temples. Those soften the whole thing and stop it from looking too severe. If your hair is very fine, tease the crown section once with a comb before you twist it. That gives the clip something to hold onto.
When This Style Shines
This is your Monday morning meeting, your Friday date night, your Saturday brunch style. It’s the most versatile thing on this list. It works on shoulder length hair and longer. Bob length hair might struggle to reach the clip but you can do a mini version with a smaller clip.
All textures can wear this. Straight hair looks sleek and minimal. Wavy and curly hair looks romantic and textured. Fine hair gets a volume boost from the lift at the crown. Thick hair finally gets the front pieces off the face without committing to a full updo.
Two Ways to Switch It Up
Use a metal or pearl clip instead of tortoise shell. Instant evening vibes.
Or pull the half up section into a small messy bun instead of using a clip. Wrap the twisted section around itself and pin it. That reads more boho and works beautifully on curly hair.
9. No Heat Required, Air Dried Wavy Bob

The Cut for Women Who Refuse to Blow Dry
I have clients who tell me straight up, “I will never use a blow dryer. Don’t give me a cut that needs one.” I respect that honesty.
This bob is for them. The cut itself creates the shape so your natural wave does the rest. You wash it, you scrunch in a little product, you let the air do all the work. The result is a messy, textured, beachy bob that looks like you just got back from vacation. Even if you just got back from a conference call.
What Makes This Cut Different from a Regular Bob
A regular blunt bob cut on wet hair assumes you’ll style it smooth. An air dried bob is cut with the expectation that it will shrink up and get wavy as it dries.
Your stylist should cut this dry if possible, or at least factor in your wave pattern when cutting it wet. The perimeter stays blunt so the ends look full. But a little internal texturizing with point cutting or a razor keeps it from looking too heavy or bell shaped when it dries natural.
The length should hit right around your chin or an inch below. Any shorter and the wave might bounce it up to ear level, which is cute but a different vibe.
For color, let the sun do some of the work. A few natural looking lighter pieces painted around the face and through the ends make the texture pop without obvious highlights.
Who Benefits from This Approach
Wavy hair is this cut’s soulmate. If you have that in between texture that isn’t straight and isn’t curly, this bob is your new best friend. It gives your waves a purpose instead of treating them like a problem to be straightened out.
Round and square face shapes benefit from the chin length creating a vertical line through the face. Medium density hair is the sweet spot. Fine hair might need a little volumizing mousse at the roots. Thick hair might need more internal texture to prevent poufiness.
Straight hair won’t get the same effect without product and scrunching. If your hair is curly, you’ll get a different but equally beautiful version of this with more defined ringlets.
The 10 Minute Wash Day Routine
Wash and condition. While hair is still soaking wet, rake a quarter size of curl cream or mousse through from mid lengths to ends. Flip your head over and scrunch upward with your hands. The squelching sound means it’s working.
Plop your hair in a microfiber towel or cotton t shirt for 10 minutes while you do other things. Take it down. Let it air dry completely without touching it. Touching creates frizz. Once it’s dry, scrunch out any crunchiness with a drop of oil on your hands.
10. Clean and Classic, French Twist for Work
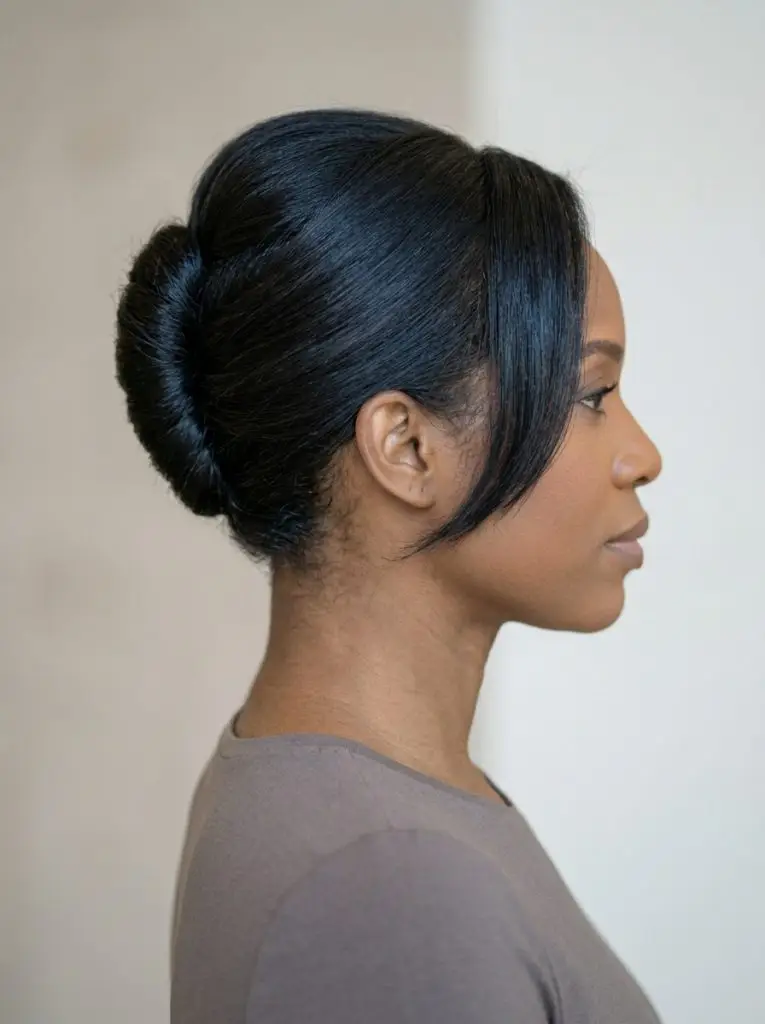
The Style That Makes You Look Instantly Taller
The French twist has a reputation for being fussy. It’s not. Once you learn the motion, it’s faster than a ponytail and ten times more polished.
This is the style for days when you need to project authority. Presentations, client meetings, interviews. Something about a French twist makes you stand up straighter. It elongates your neck and pulls your whole posture into alignment. You walk differently when your hair is swept up like this.
How to Twist It Without the Fuss
Start with day old hair if possible. Freshly washed hair is too slippery and won’t hold. If you must do it on clean hair, add some texturizing spray first.
Gather all your hair at the nape like a low ponytail. Smooth the sides with a brush but don’t tighten it. Hold the gathered hair in one hand and twist it upward, keeping the twist vertical against the back of your head. As you twist, tuck the ends into the pocket created between the twist and your scalp.
Slide in bobby pins vertically along the seam of the twist. Start at the bottom and work your way up. The pins should go through the outer layer, into the twist, and down toward your scalp. That anchors everything. Finish with a light mist of hairspray.
Pull out a few pieces at the front. This is not optional. Those pieces are what keep the style from looking dated.
When and Where This Works
This is your power meeting style. It also works for evening events when you want to feel dressed up without actually doing much. It takes about three minutes once you’ve practiced it a few times.
Shoulder length and longer hair works best. Bob length hair can do a mini version that’s more of a tucked roll than a full twist. All textures can wear this if you adjust the grip. Fine hair needs texturizing spray. Thick hair might need a few extra pins.
The Messy Version for Casual Days
Don’t brush the sides smooth. Use your fingers to gather the hair instead. The twist itself can be looser, with pieces falling out intentionally. This version reads as cool French girl instead of corporate executive. Same technique, completely different energy.
11. Fresh and Rooted, Buzz Cut with Soft Fade
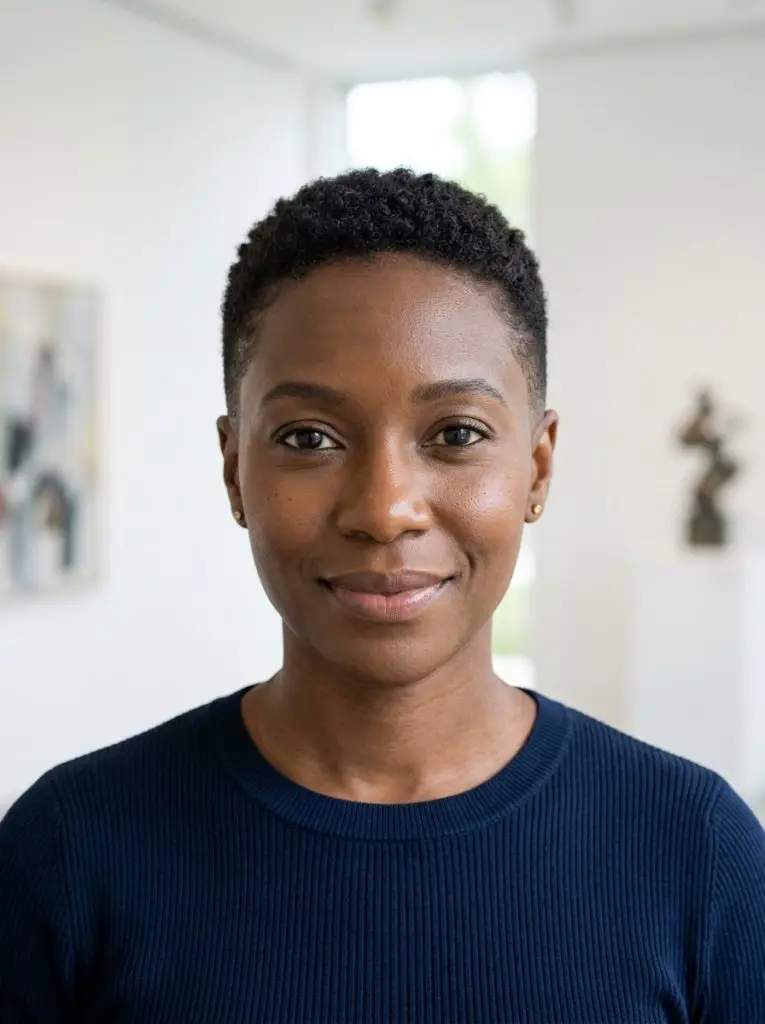
The Ultimate Low Maintenance Statement
Zero minutes of styling. Let that sink in. A buzz cut is the most radical and also the most practical choice on this list.
You wake up. Your hair is done. You shower and your hair dries in 90 seconds. You never buy dry shampoo again. You never book another blowout. For working women who are done spending mental energy on their hair, this is liberation in the form of clippers.
It’s also a bold aesthetic choice. A buzz cut puts your face front and center. Your bone structure, your eyes, your smile. Everything you might have been hiding behind layers and bangs is suddenly the main event.
What to Ask For at the Barber Shop
Go to a barber, not a salon. Barbers cut short hair every day and they understand fades better than most stylists. Ask for a number 3 or 4 guard on top. That leaves about half an inch of length. Ask for a soft fade on the sides and back so it tapers cleanly at the temples and nape.
You can go shorter or longer depending on your preference. A number 2 guard leaves a quarter inch and shows more scalp. A number 5 leaves about three quarters of an inch and gives a softer look. Start longer. You can always go shorter.
No color needed. Your natural shade is the whole point.
Who Can Pull This Off
Every face shape can wear a buzz cut. The key is confidence, not bone structure. If you want to do this, you can do this.
All hair textures work. Coily and curly textures look especially beautiful buzzed because the curl pattern creates natural texture even at short lengths. Straight hair looks sleek and modern. Fine hair shows more scalp and can look intentionally edgy.
The one consideration is head shape. Most people have a pretty normal head shape but if you have any bumps or indentations you’re self conscious about, a slightly longer guard on top can help.
Maintenance That Actually Matters
You’ll need a trim every three to four weeks to keep the shape crisp. That’s more frequent than any other cut on this list. But each trim takes 15 minutes and costs less than a full haircut.
At home, invest in a good pair of clippers. Between barber visits you can clean up the neckline yourself. Sunscreen on your scalp is non negotiable. The scalp burns fast and peeling skin on your head is not a good look.
12. Keep It Moving, High Ponytail with Wrapped Base
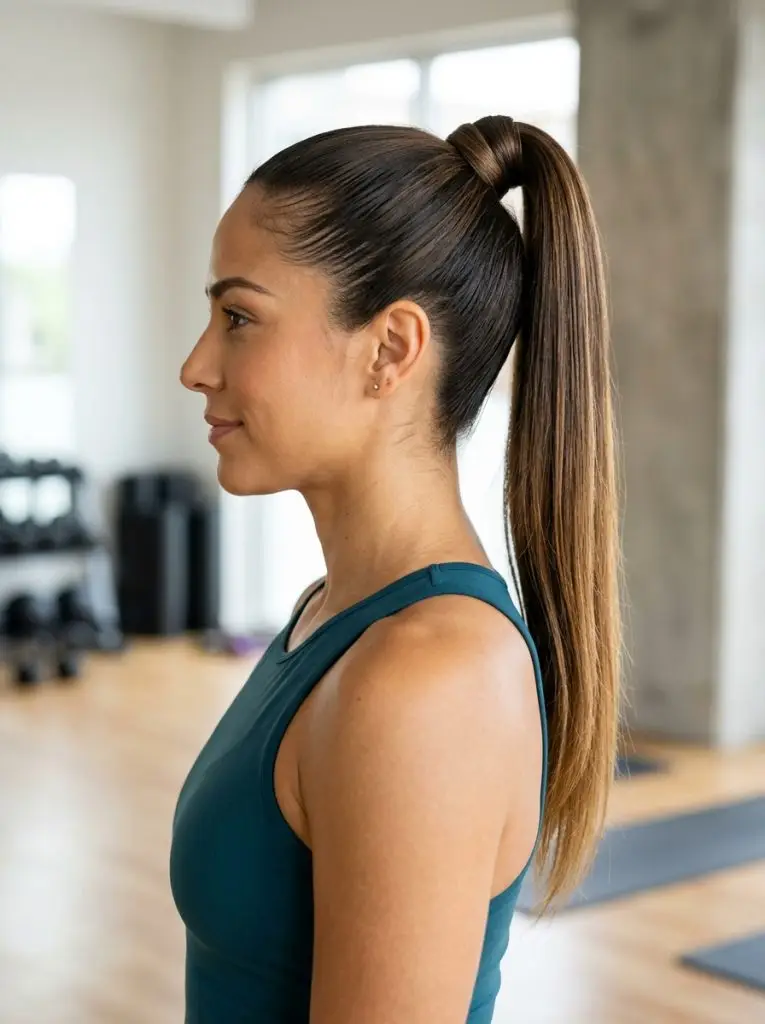
The Ponytail That Means Business
Not all ponytails are created equal. A low ponytail at the nape can look tired. A mid height ponytail can read as gym hair. But a high ponytail at the crown with a wrapped base? That’s a power move.
This style lifts your whole face. It pulls your cheekbones up and opens your eyes. It swings when you walk. It stays out of your way during long work days and it transitions seamlessly to evening. You can wear it to a workout and then straight to a Zoom call with a quick touch up.
How to Get the Height Right
Flip your head upside down and brush all your hair toward the ceiling. Gather it at the highest point of your crown, right where your head starts to curve toward the front. If you draw an imaginary line from your chin to the top of your head, the ponytail should sit right at the end of that line.
Secure it with a strong elastic that won’t slide down. Take a small section of hair from underneath the ponytail and wrap it around the base to cover the elastic. Pin the end of the wrapped section underneath with a bobby pin.
Smooth the hairline with a little edge control or a soft bristle brush and some hairspray. Not too much product. You don’t want the slicked back helmet look. Just enough to tame flyaways.
Who Wears This Best
This style needs hair that’s at least shoulder length. Longer hair gives you that dramatic swing at the back. Medium to thick density creates the fullest looking ponytail.
Oval and oblong faces are ideal for this style because the height at the crown balances a longer face shape. Round faces benefit from the lift elongating the overall silhouette.
All textures can wear a high ponytail. Straight hair looks sleek and sharp. Wavy and curly hair can be smoothed back or worn with natural texture for a fuller, more voluminous ponytail.
The Wrap Trick for Dirty Hair
When your hair isn’t fresh enough to wear down but too clean to justify washing yet, this style saves the day. The smoothing process at the roots hides any oil. The length of the ponytail still looks shiny and healthy.
Add a little dry shampoo at the roots before you brush it back. That absorbs oil and adds grip so the ponytail doesn’t slip as the day goes on.
Pick the One That Fits Your Life Right Now
You don’t need to try all 12 of these. You don’t need to change your whole look tomorrow. The point is to find one or two styles that actually match your real mornings, your real hair texture, and your real patience level for styling.
If you’re a wash and go person, start with the air dried wavy bob or the rounded curly cut. If you love a pulled back look, master the low twisted bun or the high ponytail. If you’re ready for a big change, the buzz cut is waiting for you whenever you want it.
Take a screenshot of the one that feels most like you. Show it to your stylist. Have an honest conversation about how much time you actually want to spend on your hair each morning. A good stylist will work with that reality, not against it.
The best haircut isn’t the one that looks perfect on Instagram. It’s the one that makes you feel like yourself when you walk out the door at 7:45 AM. That’s it. That’s the whole goal.