
20+ Short Shaggy Haircuts for Thick Wavy Hair That Actually Work
Introduction
I’ve been styling thick, wavy hair for years, and I’ll be honest — it can be one of the most rewarding hair types to work with, but also the most misunderstood. So many of my clients come in with a reference photo of a shaggy cut on someone with fine, straight hair, and we have a little heart-to-heart about why their hair has its own personality. The short shaggy haircut, though? This is where thick wavy hair truly shines. It’s one of the few styles that actually benefits from that volume and texture instead of fighting it.
What I love most about this trend is that it feels effortless — even when it isn’t. I’ve watched clients walk out of the chair looking like they just rolled out of a vintage French film, and that’s the magic of a well-cut shag on waves. It’s messy on purpose. It’s layered strategically. And honestly, it suits more face shapes than people give it credit for.
1. The Classic Shaggy Bob for Thick Wavy Hair

Styling Advice
This is the cut I recommend most to first-timers. It sits right at the jaw or just below, with choppy layers cut throughout to remove weight. The shaggy bob on thick wavy hair creates this beautiful natural volume that looks intentional rather than uncontrollable. I’ve styled this on clients with coarse, dense hair who spent years fighting their texture — and this cut turns that density into the whole point.
How to Style This Hairstyle
Wash and condition, then apply a small amount of curl cream while hair is still dripping wet. Scrunch upward from the ends. Diffuse on low heat, lifting the roots as you go. Once about 80% dry, let it air dry the rest of the way. Finish with a light spritz of sea salt spray and scrunch once more. Total time? Maybe 20 minutes.
Occasions to Wear
This works for daily wear, casual outings, coffee dates, and creative workplaces. With a little smoothing serum and a flat iron on the top layers only, it transitions to dinner or work presentations without a full restyle.
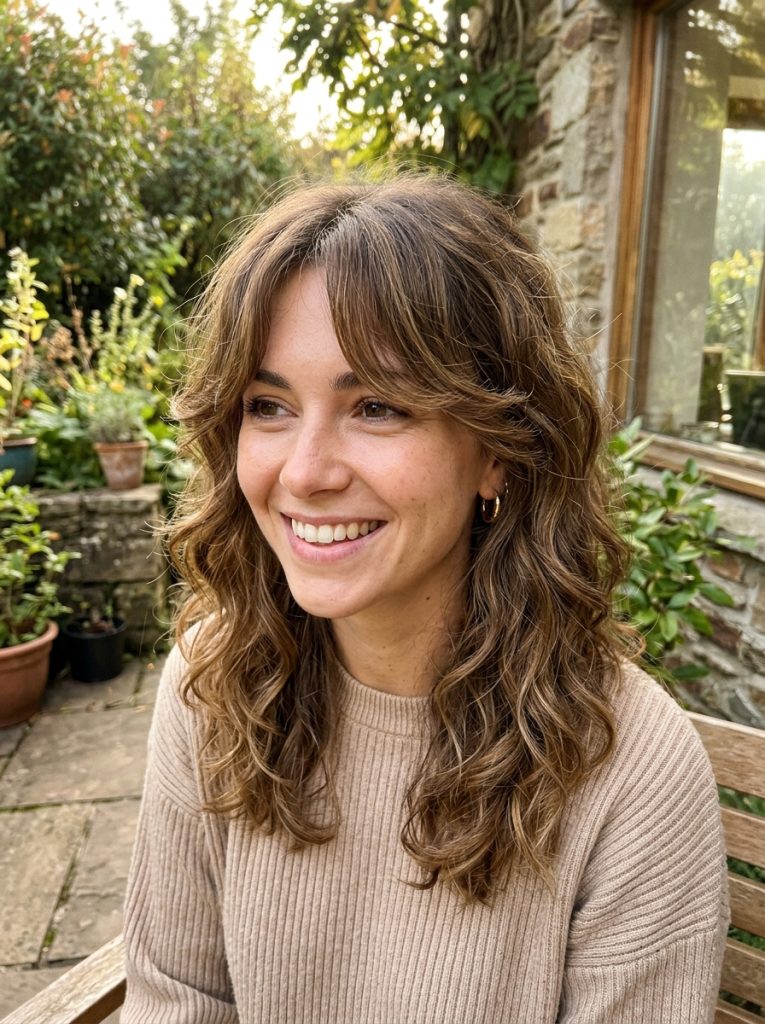
2. Curtain Bang Shag on Thick Waves
Styling Advice
If I had to pick one shaggy style that’s had the most consistent moment, it’s this one. The curtain bangs — those soft, face-framing pieces that part down the middle — completely change how the face reads. I’ve tried this on clients with round faces, square faces, and heart-shaped faces, and every single time it adds this soft, almost romantic quality.
How to Style This Hairstyle
After washing, separate the bang section and apply a tiny bit of smoothing cream just to those pieces. Use a round brush or your fingers to pull them to either side while blow drying on medium heat. Don’t over-dry — a slight bend at the ends looks intentional. Let the rest of your hair diffuse naturally. The contrast between the slightly smoother bangs and the wavy body is exactly the look you want.
Occasions to Wear
Honestly, every day. I have clients who wear this to the gym and to board meetings with equal confidence. For formal events, add a pearl pin or small clip to one side of the curtain bang — it elevates immediately.
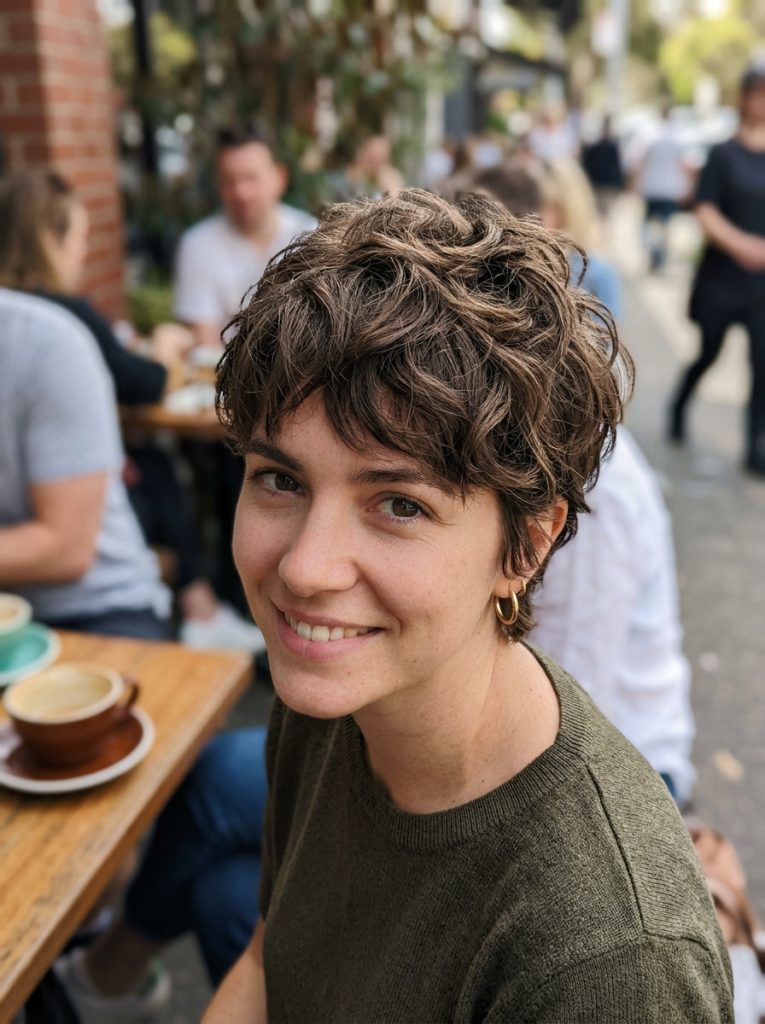
3. Textured Pixie Shag for Super Thick Hair
Styling Advice
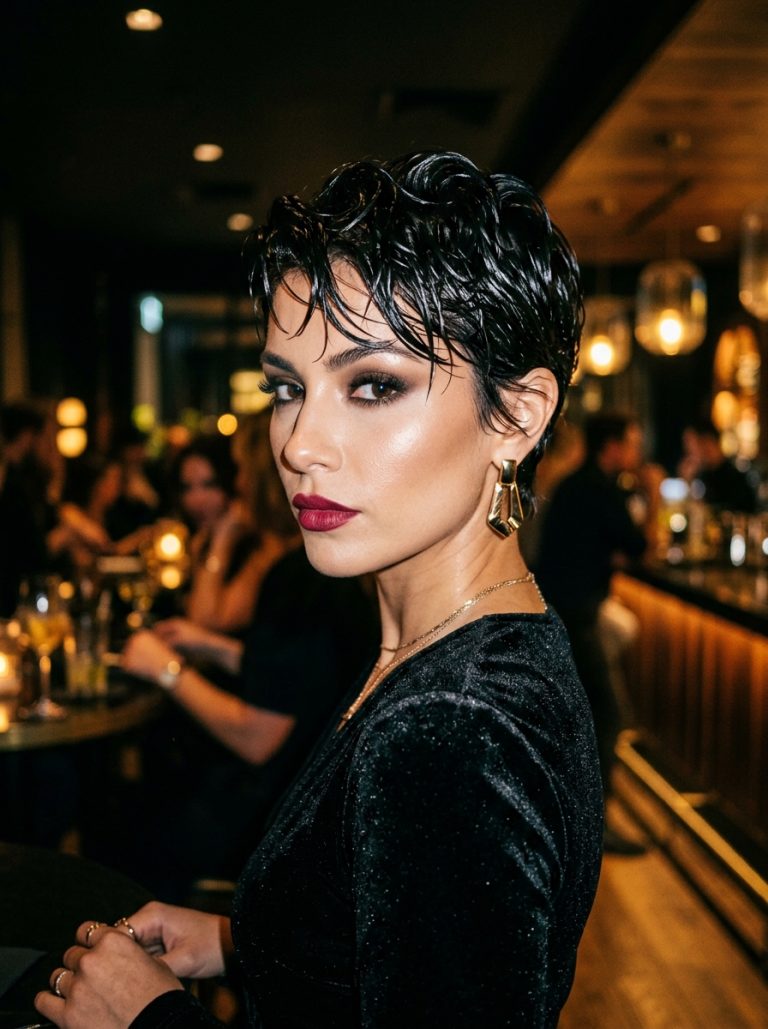
This is where it gets tricky. The pixie shag on thick hair is bold, and not everyone is ready for it — but when it works, it really works. I’m talking maximum texture, visible layers going in all directions, and a confidence that just radiates. It’s shorter on the back and sides but keeps length at the top and around the face.
How to Style This Hairstyle
This style needs a bit more product than others. After washing, work a small amount of texturizing paste through damp hair, then diffuse. Use your fingers to direct pieces forward and to the side. Don’t comb — ever. Finger-styling is everything here. Once dry, go in with a tiny bit of pomade just on the top pieces to define them.
Occasions to Wear
This is more of an edgy, fashion-forward look. It suits creative fields, events, parties, and casual daily wear. For something more polished, smooth the top section with a flat iron and it becomes quite refined.
4. Shoulder-Grazing Shag with Face-Framing Layers

Styling Advice
Just because it’s called a short shag doesn’t mean it has to be chin-length. This version grazes the shoulders and is one of my favorites for clients who are nervous about going too short. It gives all the shaggy layer benefits without the commitment of something very close to the face.
How to Style This Hairstyle
Diffuse from roots to ends, scrunching gently. Once dry, take a 1-inch wand and loosely wrap just the face-framing pieces for about 8 seconds each — don’t curl the whole head, just those forward layers. This adds intentional shape right where it matters most. Shake everything out and finish with a light-hold spray.
Occasions to Wear
This is genuinely the most versatile length in the shag family. Wedding guest? Yes. Office? Absolutely. Festival or vacation? Pull the top half back with a claw clip and let the rest wave freely.
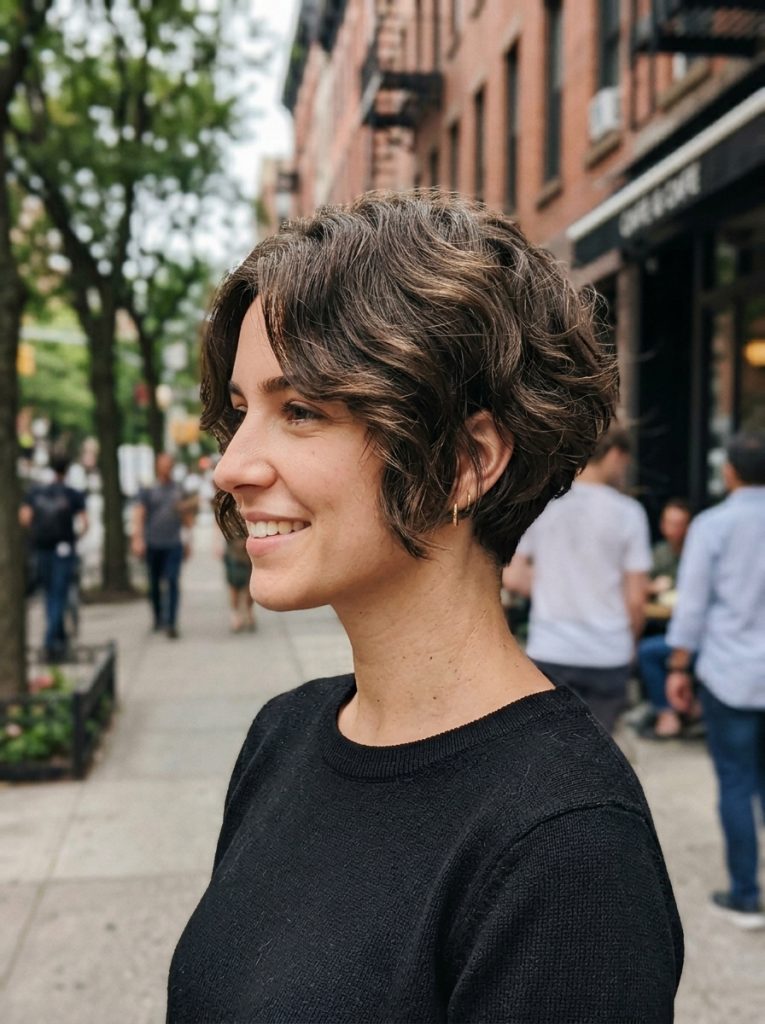
5. The Bixie Shag (Between Bob and Pixie)
Styling Advice
The bixie is having its moment, and I am fully here for it. It sits between a bob and a pixie — longer in the front, shorter and tapered in the back, with shaggy layers throughout. For thick wavy hair, this cut is genuinely life-changing. The back is kept tight and clean while the front pieces have room to wave and curl forward.
How to Style This Hairstyle
After washing, apply mousse through mid-lengths and ends. Diffuse while flipping your head upside down for root volume. Once dry, flip right-side up and use your fingers to arrange the front pieces forward and to the sides. A little texturizing spray on top adds that piece-y definition. The whole process takes under 15 minutes once you get the hang of it.
Occasions to Wear
The bixie shag is surprisingly office-appropriate. It’s polished enough for professional settings yet casual enough for weekends. Add a thin headband for a pulled-together look at events.
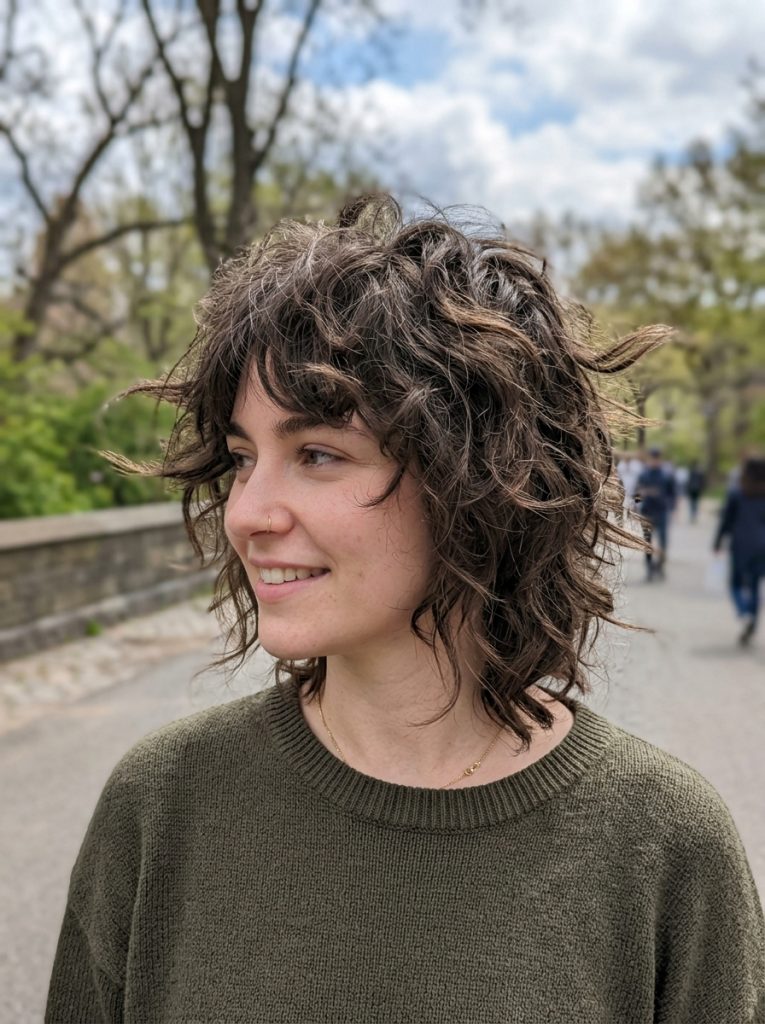
6. Messy Shag with Wispy Ends
Styling Advice
This one is all about intentional imperfection. The wispy ends — those feathery, almost undone tips — are achieved through point-cutting and razor work. On thick wavy hair, they flutter and move in a way that looks effortlessly undone. I love this on clients who find most hairstyles “too stiff” or overly done. It has a very natural, grown-out quality.
How to Style This Hairstyle
Skip the round brush entirely for this one. After washing, scrunch in a curl-defining cream, then air dry if you have time. If you don’t, diffuse on the lowest heat setting. The goal is zero tension during drying — tension kills the wispy effect. Once dry, shake at the roots and go. That’s really it.
Occasions to Wear
Beach days, brunch, creative workplaces, casual dates. This isn’t a formal style, and I wouldn’t try to force it to be. It lives best in relaxed settings where looking effortlessly cool is the whole point.
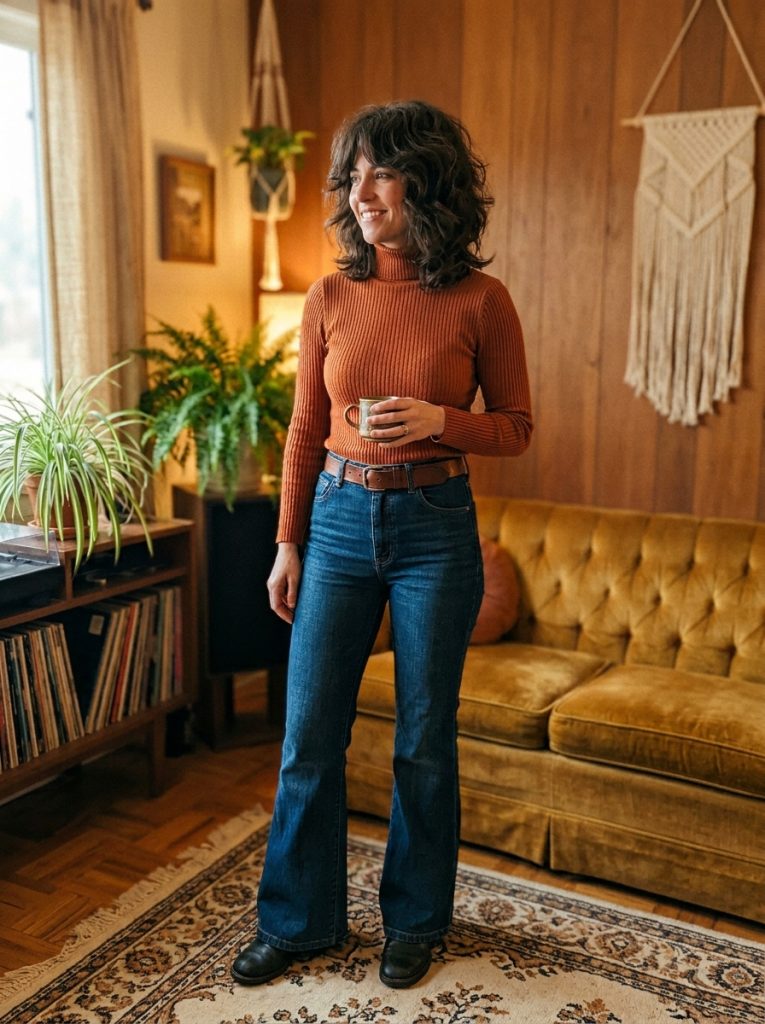
7. 70s-Inspired Shag with Heavy Layers
Styling Advice
This is my personal favorite to style. There is something about the 70s shag that just never gets old — the heavy, dramatic layers, the slight flick at the ends, the curtain bangs or side-swept fringe. On thick wavy hair it looks like a vintage album cover in the best way possible.
How to Style This Hairstyle
This style benefits from a little blowout energy. After washing, rough-dry with a blow dryer and a paddle brush until about 70% dry. Then go in section by section with a round brush, flicking the ends out slightly. For the curtain bangs, use the round brush to pull outward. Finish with a medium-hold mousse and a light-hold spray. The flicked ends are the whole personality of this look, so take your time on those.
Occasions to Wear
This is a statement look. Concerts, art events, dinner outings, themed parties, and any occasion where you want your hair to start the conversation. It’s also surprisingly great for first dates.
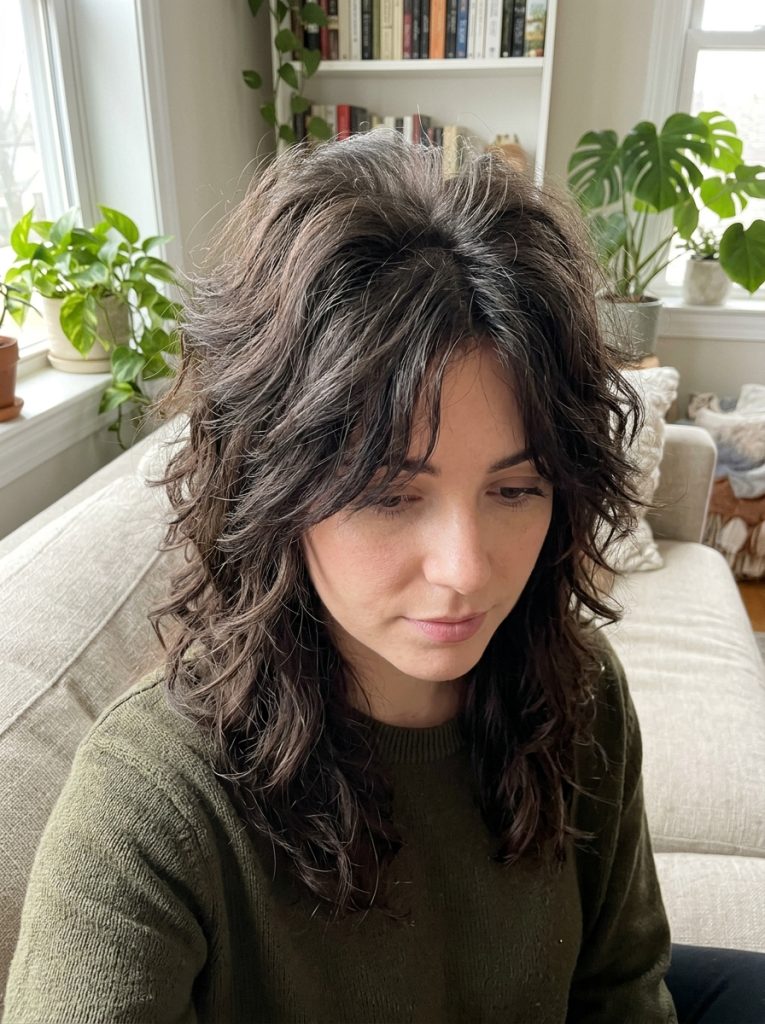
8. Shaggy Wolf Cut on Thick Wavy Hair
Styling Advice
The wolf cut is the shag’s cooler younger sibling, and on thick wavy hair it is absolutely stunning. It combines the shag’s layers with a slightly more dramatic crown volume and very long, wispy front pieces that frame the face. I’ve styled this on clients ranging from 19 to 52, and the age range doesn’t matter — it’s universally flattering.
How to Style This Hairstyle
This is one style where a diffuser is truly essential. Apply a curl mousse from roots to ends on soaking wet hair. Flip upside down and diffuse the crown first — this builds that signature volume at the top. Then diffuse the lengths while scrunching. Once dry, flip back up, shake the roots, and separate any clumped waves with your fingers. Light-hold spray to finish.
Occasions to Wear
Daily wear, weekend hangouts, casual work environments, events. The wolf cut has this remarkable quality of looking intentional at all times, even if you did nothing beyond washing and diffusing.
9. Short Shag with Side-Swept Bangs

Styling Advice
Not everyone wants curtain bangs or full fringe, and side-swept bangs on a short shag are an underrated choice. They soften the face asymmetrically and add a touch of old-Hollywood glamour without being overdone. On thick wavy hair, I like to keep side-swept bangs just above the eye — any longer and the wave in the hair starts to push them into your face, which gets annoying quickly.
How to Style This Hairstyle
The bang section needs to be blown dry first, before the rest of the hair. Use a small round brush and pull the bangs to the side on medium heat. Once set, clip them to the side while you diffuse the rest of your hair normally. Remove the clip and use a tiny bit of pomade just through the bang section to keep them in place. Takes about 5 extra minutes but makes a big difference.
Occasions to Wear
This version of the shag is one of the most office-friendly. The side-swept bang reads as polished and intentional. Also great for weddings, formal events, and anywhere you want to look done without looking like you tried too hard.
10. Undone Shag with Grown-Out Color

Styling Advice
This isn’t technically about color, but I’d be leaving out something real if I didn’t mention how amazing the short shag looks with grown-out color — balayage, highlights, or even just natural root regrowth. The layers and texture of the shag catch the color variation in a way that solid-color hair just doesn’t. I’ve had clients come in embarrassed about their grown-out highlights and left with a freshly cut shag that made the grown-out look intentional and expensive.
How to Style This Hairstyle
Style exactly as you would a standard shag — diffuse, scrunch, texturize. The color does the visual work for you. The only thing I’d add is a shine-enhancing spray at the end. Just a light mist from about 30cm away. It catches the light and makes the tonal variation really pop.
Occasions to Wear
This lived-in, dimensional look is incredibly versatile. Casual daily wear, creative industries, travel, any setting where authenticity over perfection is the vibe.
11. Choppy Layered Shag with Blunt Micro Fringe

Styling Advice
This one is not for the faint-hearted, and I mean that in the best possible way. The micro fringe — that short, almost eyebrow-grazing bang — paired with choppy all-over layers creates this incredibly striking silhouette on thick wavy hair. I tried this on a client last spring who had been wanting something dramatic but was terrified of going too short overall. The micro fringe gave her the bold moment she wanted without sacrificing length everywhere else.
How to Style This Hairstyle
Blow dry the fringe section first using a small paddle brush, pulling straight down with medium heat. This is the one section you want relatively smooth — the contrast between a flatter fringe and wavy lengths is part of the charm. Diffuse the rest normally, scrunching upward. Once dry, use a tiny flat iron pass just on the fringe if needed. Texturizing spray through the lengths and you’re done.
Occasions to Wear
This is a statement look that leans editorial. It works brilliantly at events, creative workplaces, gallery openings, and nights out. With a bit of smoothing through the lengths, it can read surprisingly polished for more formal settings too.
12. Asymmetrical Shag Cut for Thick Waves

Styling Advice
One side longer than the other — and somehow it works on almost everyone. The asymmetrical shag is one of those cuts that looks incredibly intentional and modern, and on thick wavy hair the longer side creates this gorgeous sweep of layered waves while the shorter side shows off the texture up close. I’ve styled this on clients who wanted something edgy but still wearable for their day jobs, and the asymmetry does exactly that — it’s interesting without being overwhelming.
How to Style This Hairstyle
Diffuse as normal, but spend a little extra time on the shorter side to encourage curl formation there. Once dry, use a 1-inch wand on just the longer side pieces — loose waves, nothing tight. Run your fingers through to separate. The key is keeping the shorter side more textured and the longer side more flowing. A light-hold spray to lock it in and you’re set in about 20 minutes.
Occasions to Wear
Daily wear for creative types, casual outings, concerts, and fashion-forward events. If you need to dress it up, pin the longer side back with a decorative clip — it shifts the whole mood elegantly.
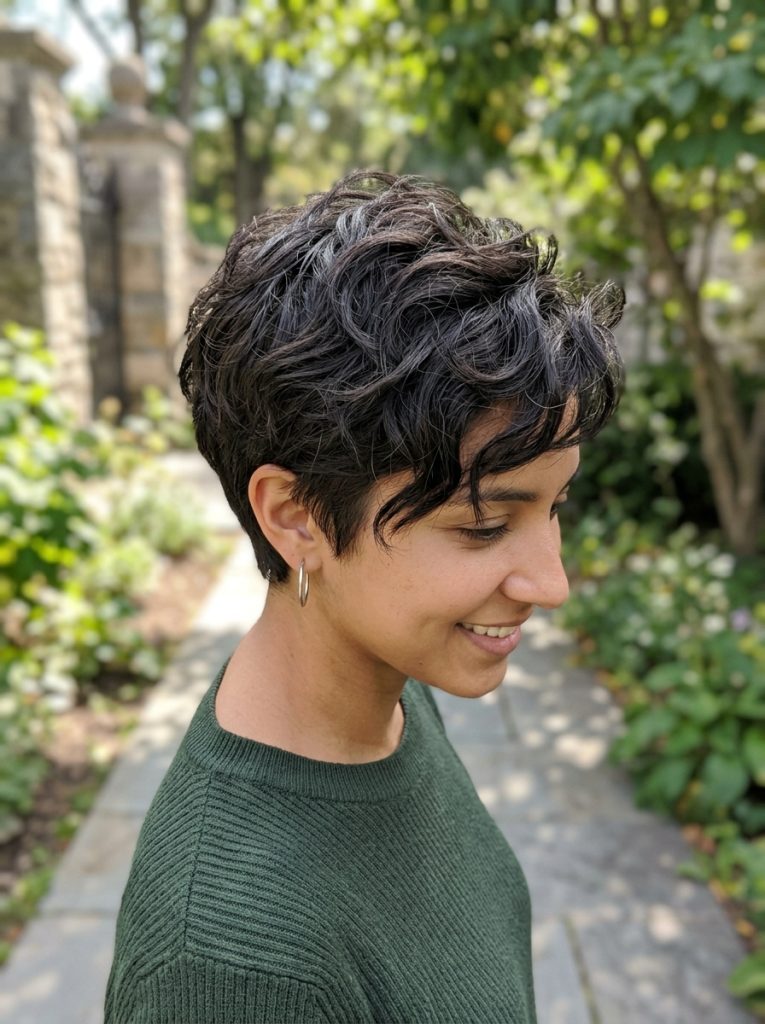
13. Shaggy Pixie with Elongated Crown Layers
Styling Advice
Different from the standard textured pixie I mentioned earlier, this version keeps the sides and back quite short but allows the crown layers to grow out longer — sometimes 3 to 4 inches — so they can actually wave and move. The result is this beautiful contrast of close-cropped sides and a soft, wavy crown that has real personality. I honestly think this is the most underrated short shag option for thick wavy hair.
How to Style This Hairstyle
After washing, apply a small amount of curl mousse only to the crown section. Diffuse upside down, focusing heat on the crown. For the sides, use a blow dryer with no attachment on low heat, smoothing close to the head. The contrast between smooth sides and wavy crown is the whole point. Finish the crown with a light texturizing spray and lift with fingers for height.
Occasions to Wear
This cut transitions really well. Keep the crown smooth for work or formal events by using a flat iron briefly on those top pieces. Let it wave naturally for weekends and casual settings. It’s genuinely a two-mood hairstyle.
14. Beachy Shag with Piece-y Ends

Styling Advice
If there is one shag style that basically sells itself, it’s this one. The beachy shag looks like you just came back from a week by the ocean — salt in the hair, ends slightly separated and clumped into little pieces, layers catching the light. On thick wavy hair, the piece-y ends happen almost naturally with the right product, which I love because it means less work for more payoff.
How to Style This Hairstyle
This is a sea salt spray situation, full stop. After washing and lightly conditioning, squeeze out excess water and apply sea salt spray generously through mid-lengths and ends. Scrunch hard and repeatedly — really work it in. Diffuse on low heat or air dry completely if time allows. Once dry, separate any over-clumped sections with your fingers and add one more light spritz of sea salt spray. Don’t touch it again.
Occasions to Wear
Beach, obviously. But also festivals, summer weddings as a guest, casual brunches, holidays, any outdoor daytime event. This style has a very specific energy — laid-back, warm, effortless — and it fits anywhere that energy is welcome.
15. Voluminous Shag with Razored Layers

Styling Advice
The razor is the secret weapon most people don’t know about, and it completely transforms what a shag can do on thick hair. Instead of scissors cutting blunt or point-cut ends, a razor feathers and thins the hair as it cuts — creating ends that are almost translucent in their lightness. On thick wavy hair, razored layers mean the ends move freely rather than sitting heavy, and the overall silhouette looks dramatically lighter and more airy.
How to Style This Hairstyle
Razored layers are very responsive to product, so apply your curl cream while hair is soaking wet — not damp, actually wet. The razored ends will absorb product beautifully and define the wave without any crunchiness. Diffuse slowly on medium heat. Once dry, the layers will almost style themselves. A finishing oil just on the ends adds shine and prevents any dryness that sometimes comes with razor cutting.
Occasions to Wear
This elevated version of the shag works across the board — daily wear, professional settings, events, evenings out. The lightness and movement give it a polished quality that some of the messier shag versions don’t quite achieve.
Styling Tips Worth Knowing
Thick wavy hair and heat can be a difficult combination. I always tell my clients — low heat, slow drying, no tension. The more you rush the drying process on thick waves, the more frizz and the less definition you get.
Also, please don’t brush your hair once it’s dry. I see this constantly. A dry brush through wavy hair destroys the wave pattern and creates frizz that takes 20 minutes to fix. Finger-separate only.
One more thing — don’t skip the trim. Shaggy cuts grow out fast, and after about 8 weeks you’ll lose the shape. Every 6–8 weeks for a quick reshape keeps everything looking intentional rather than simply overgrown.
Why This Hairstyle Is Popular
The shaggy cut made a massive comeback and honestly, it never fully left. I think what’s driving people back to it is this collective exhaustion with overly polished, high-maintenance styles. Nobody wants to spend 45 minutes on their hair every morning. The shag gives you that “I tried but not too hard” energy, which is incredibly on-trend right now.
For thick wavy hair specifically, the layers do most of the heavy lifting. They remove bulk, create movement, and let the natural wave pattern breathe. I’ve noticed that clients who used to hate their hair — said it felt like a “bush” — completely change their perspective once we put in the right shag layers.
Who This Style Suits
Short shaggy cuts work beautifully on oval, round, heart, and square face shapes. The curtain bangs and face-framing layers soften strong jawlines and add width where needed. I tend to avoid very heavy blunt shags on very long or narrow face shapes — the layers need some adjustment to add width, not length.
Hair texture matters too. Fine wavy hair can pull this off with the right product. But thick, wavy, or coarse hair? It’s basically made for this cut. The natural texture fills out the layers in a way that fine hair simply can’t replicate.
Where It Can Be Worn
This isn’t just a weekend look. I’ve styled short shaggy cuts on brides (yes, really), job interviews with a sleeker finish, beach days, gallery openings — everywhere. Depending on how you finish it, it can swing from very casual to surprisingly polished.
Accessories & Tools Needed
Before we get into the individual styles, here’s what I typically reach for when working with short shaggy cuts on thick wavy hair:
A diffuser attachment is non-negotiable for most of these styles — it encourages the wave pattern without frizz. A 1-inch barrel curling wand helps when the natural wave needs a little nudging. Fine-tooth tail combs are useful for parting and sectioning, and a good texturizing spray or sea salt spray will be your best friend for that lived-in finish. Wide-tooth combs for detangling when wet. Bobby pins and mini claw clips for pinning back pieces while styling.
I keep lightweight styling cream on hand too — just a tiny amount to smooth frizz without weighing down the waves.
Hair Mistakes to Avoid
The biggest mistake I see is going too short too fast. If you have thick wavy hair and you’ve never had a shag before, start at the jaw or shoulder. Going pixie-short right away can be a shock, and wave patterns behave differently when the weight is gone.
Second mistake — using too much product. Thick hair already has substance. Heavy creams or oils will flatten the layers and make the whole style look limp. Less is genuinely more here.
Third — skipping the diffuser and just letting wet hair air dry flat. You’ll lose all the lift and volume. The diffuser shapes the wave as it dries.
Closing Note
After years of working with thick wavy hair, the short shaggy cut is still the style I recommend more than almost anything else. It works with the hair instead of against it, and that shift in perspective — from fighting your texture to embracing it — changes everything. I still get messages from clients months after their shag cut just to say their hair routine went from 45 minutes to 10. That’s the real win.
If you’re on the fence, start with the classic shaggy bob or the shoulder-grazing version. Get comfortable with the layers. Then, if you want, go shorter. Your hair will thank you.